PickBazar Update - Virutal Private Server
If you follow this Virtual Private Server docs to host your site, then follow this documentation to update PickBazar to a new version.
To build the frontend you've to update the API first. But before that this time, we'll use git and GitHub to make upload and download relatively easy.
Step 1: Setup Git - Server
This step is only for first update. From second update start from Step 2
At first, we've to install git on our server and config it.
Install git
sudo apt install git
Config for first time
git config --global user.email "you@example.com"git config --global user.name "Your Name"
Make sure you change you@example.com and Your Name with your email and name.
Prepare Git Repository
At first, go to your pickbazar directory on your server,
cd /var/www/pickbazar
- Then initialize a git on that folder,
git init
- Create a new
.gitignorefile
nano .gitignore
and paste this code to that .gitignore,
# See https://help.github.com/articles/ignoring-files/ for more about ignoring files.# dependenciesnode_modules/.pnp.pnp.js# testing/coverage# *~*.swptmp/# misc.DS_Store# If Packages have their independent repo# /packages# ignore log filesnpm-debug.log*yarn-debug.log*yarn-error.log*.idea/.vscode/node_modules/.DS_Store*.tgzmy-app*lerna-debug.lognpm-debug.log*yarn-debug.log*yarn-error.log*/.changelog.npm/packages/server/node_modulespackages/server/error.logpackages/server/debug.logpackages/web/.envpackages/reusecorepackages/cloud.docz.now.vercel
After that, save that file and use this command for the initial commit,
git init
git add .
git commit -m "Initial commit"
Create a separate branch to maintain the updated code.
git branch pickbazar
Git & Github
- At first, go to https://github.com/ and create an account first. If you already have an account then
Sign Inon that account. - Then create a new repository,
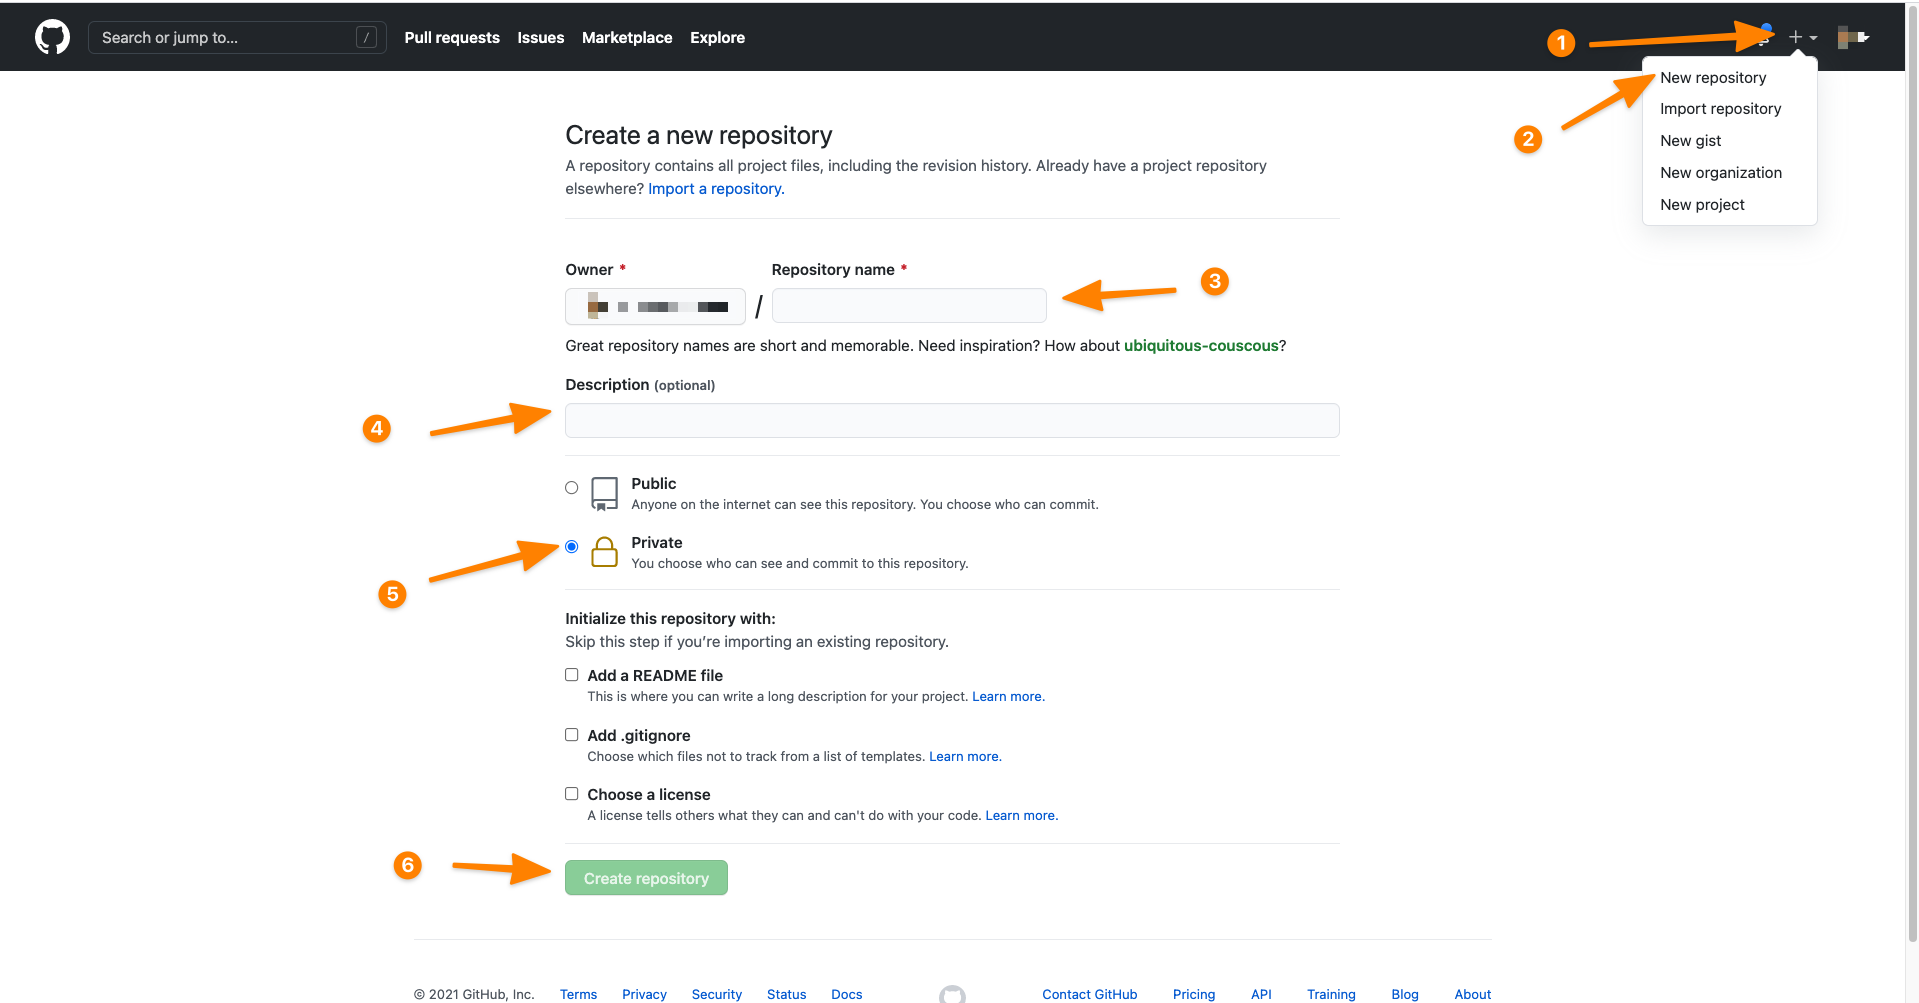
- After creating the repository you'll get a page like this and from this page copy the
second command blockand go to yourserverusingSSH & terminal,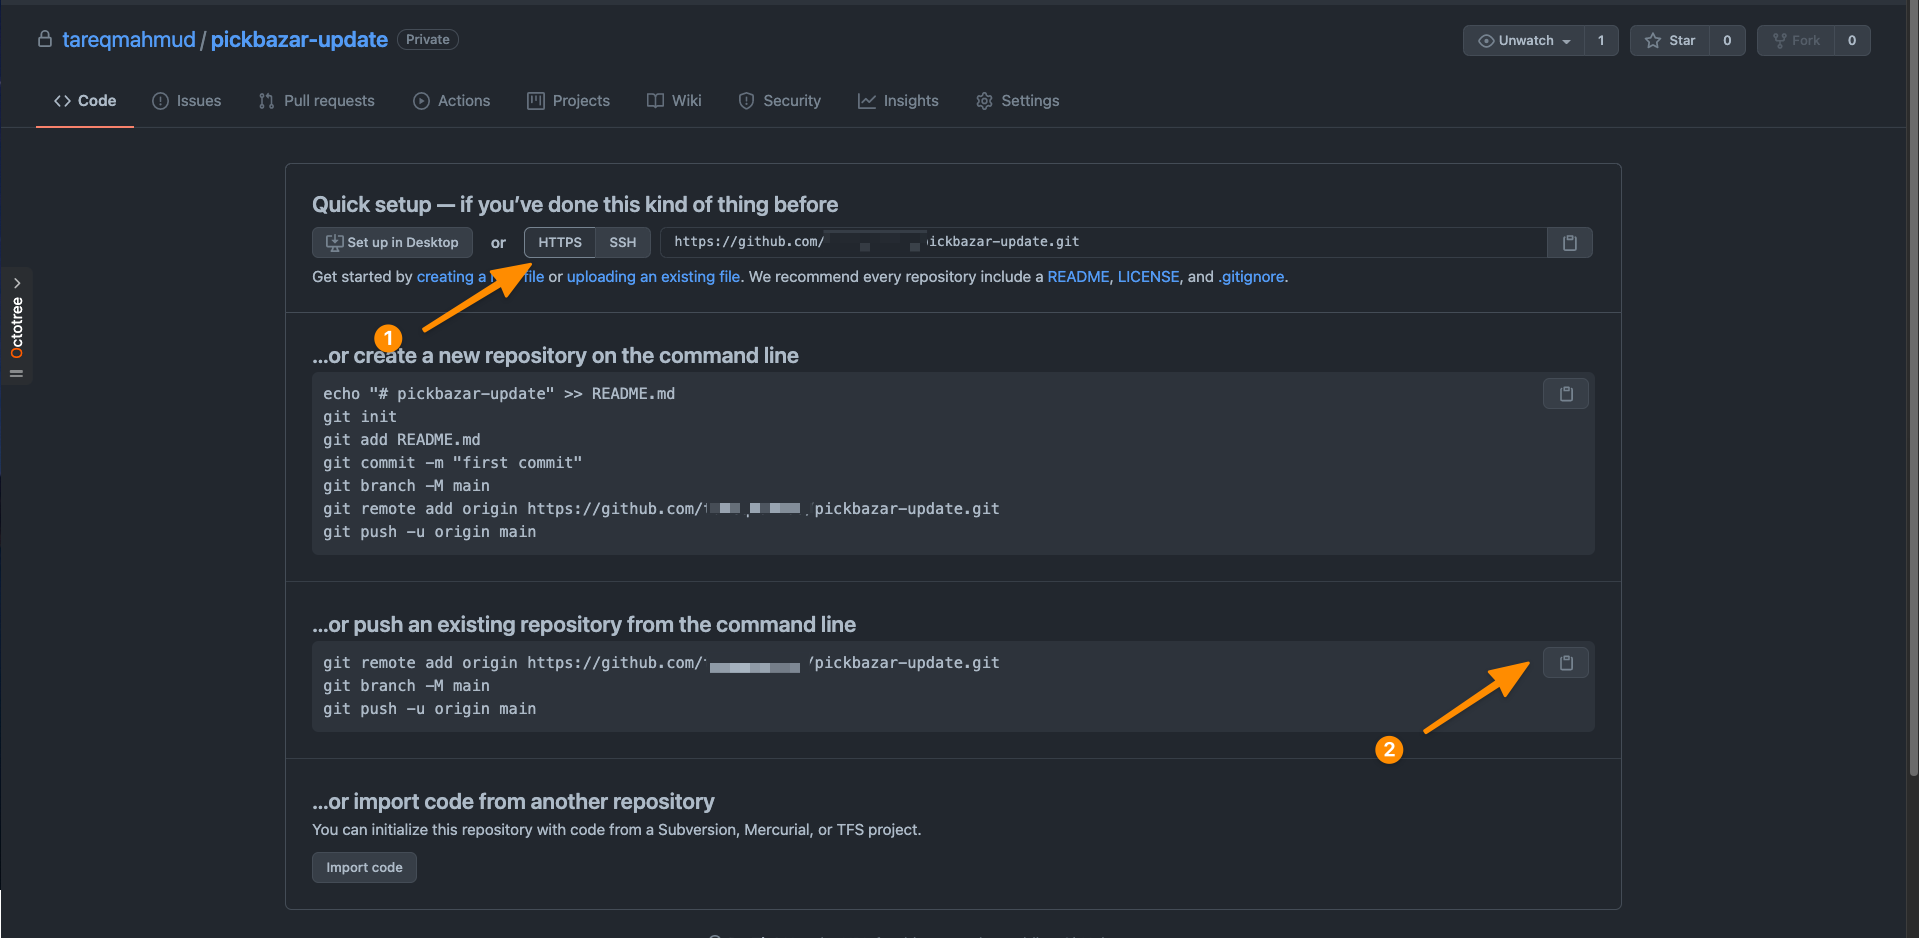
And paste that copied command to pickabazar folder and press enter
It'll ask your GitHub username and password, provide your GitHub username and password
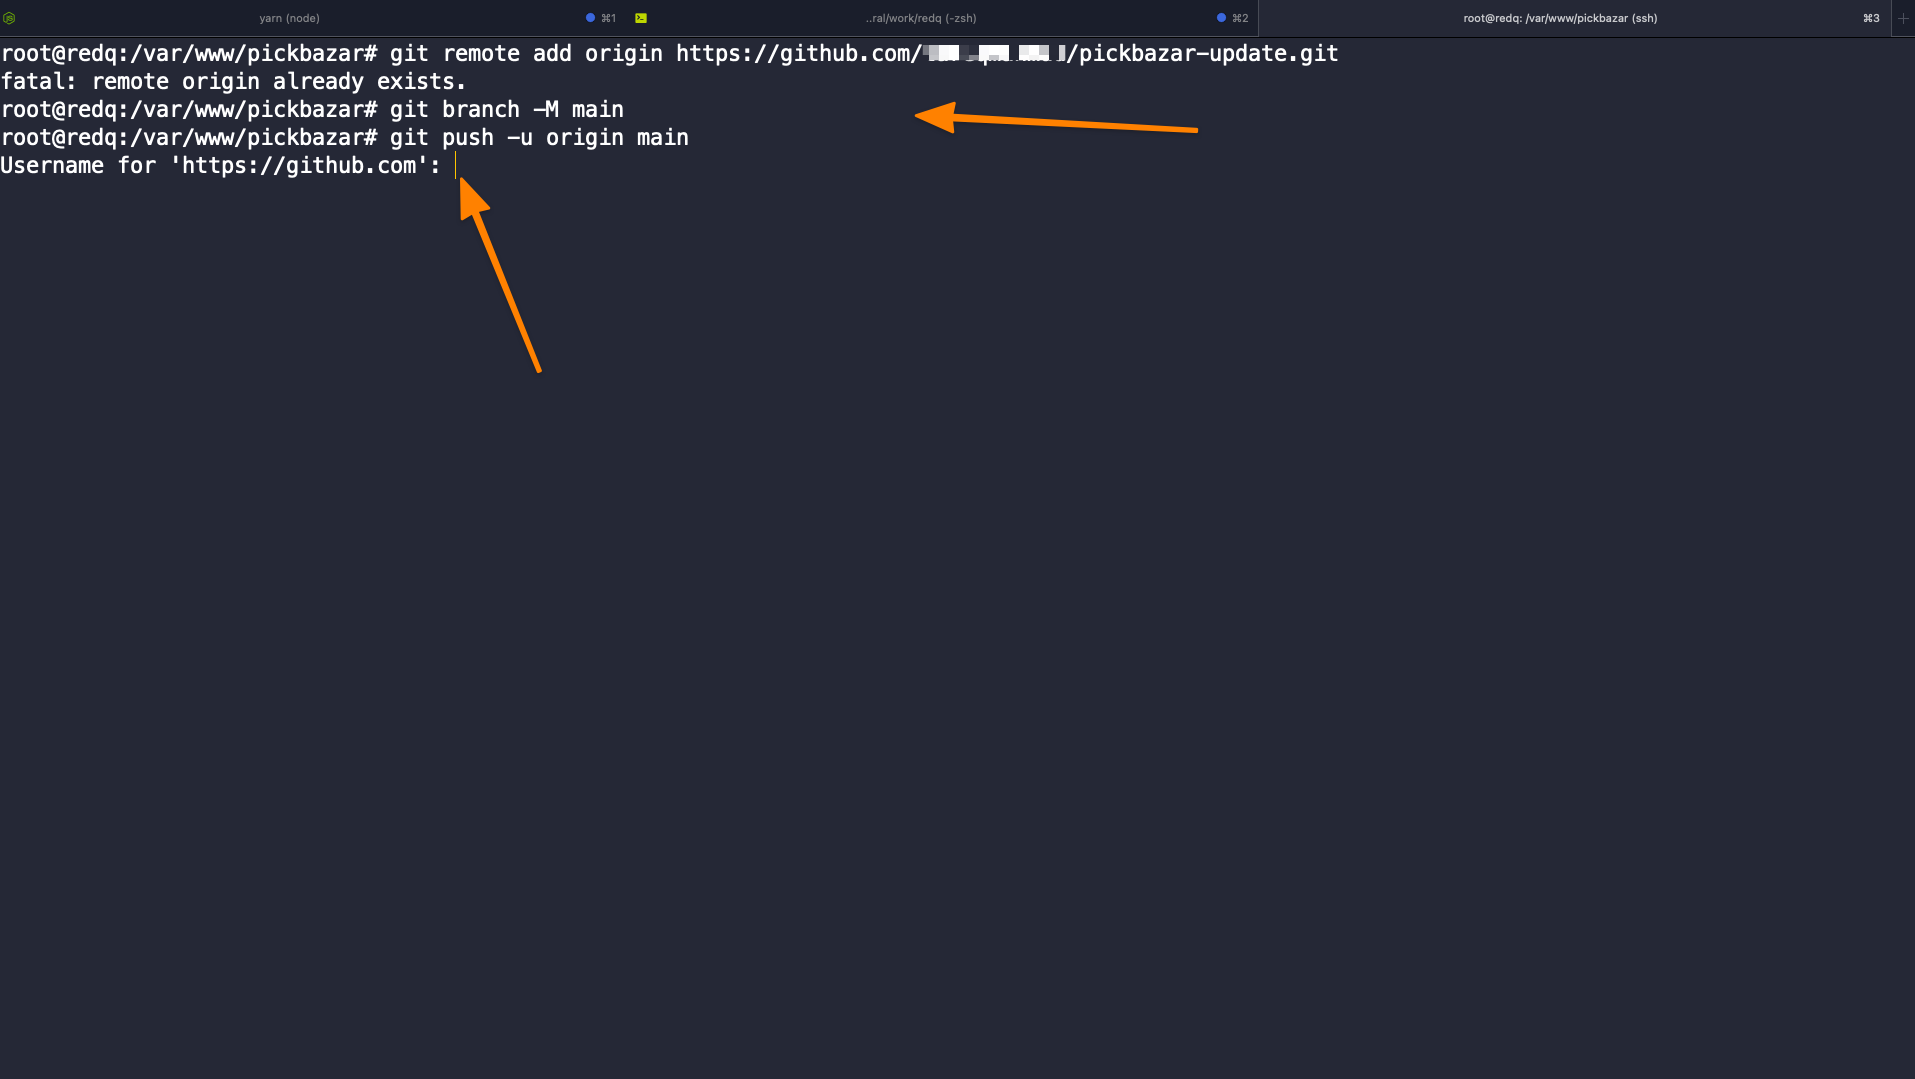
Your existing repository is successfully connected with GitHub.
Step 2: Shut Down Current Process
At first use this command to shut down all the applications for update,
pm2 stop 'all'
Step 3: Local Repository & Updated Code
In this step,
- Clone that
GitHub repositoryto yourlocal computer - Download
update packagefromCodeCanyon - Open your terminal and clone that repository to your computer
- Checkout to
pickbazarbranch
git checkout -b pickbazar
- replace
repositoryfile with downloadedpickbazar-laravelfolder content. - Then use this command to add all files to git
git add .
git commit -m "Update PickBazar API"
- Merge new code with
mainbranch
git checkout -b main
git merge pickbazar
In this step, you'll face a merge conflict issue. Make sure you resolve all the conflicts to maintain your customization with the updated code. You can check this video about resolve merge conflict.
After resolve and commit, push the code to GitHub.
git push origin main
Step 4: Update API
In this step, go to your server terminal and go to /var/www/pickbazar directory and pull all updated code,
git pull origin main
After pull go to api folder,
cd api
and install composer package and optimize compiled file,
composer install
php artisan optimize:clear
With that updated API will be installed. To check go to your YOUR_API_DOMAIN/products
Step 5: FrontEnd Project Build
Typescript requires a huge chunk of memory to build the project, so if your server has at least 8gb+ of memory, then you can build the project on your server directly. If not, then build the project on your server, then move the folder to the server then serve the project. We'll do the second method in this tutorial.
We'll suggest you build the frontend part on your computer and then move the build file to the server using git and github.
Go to your local git repository using terminal.
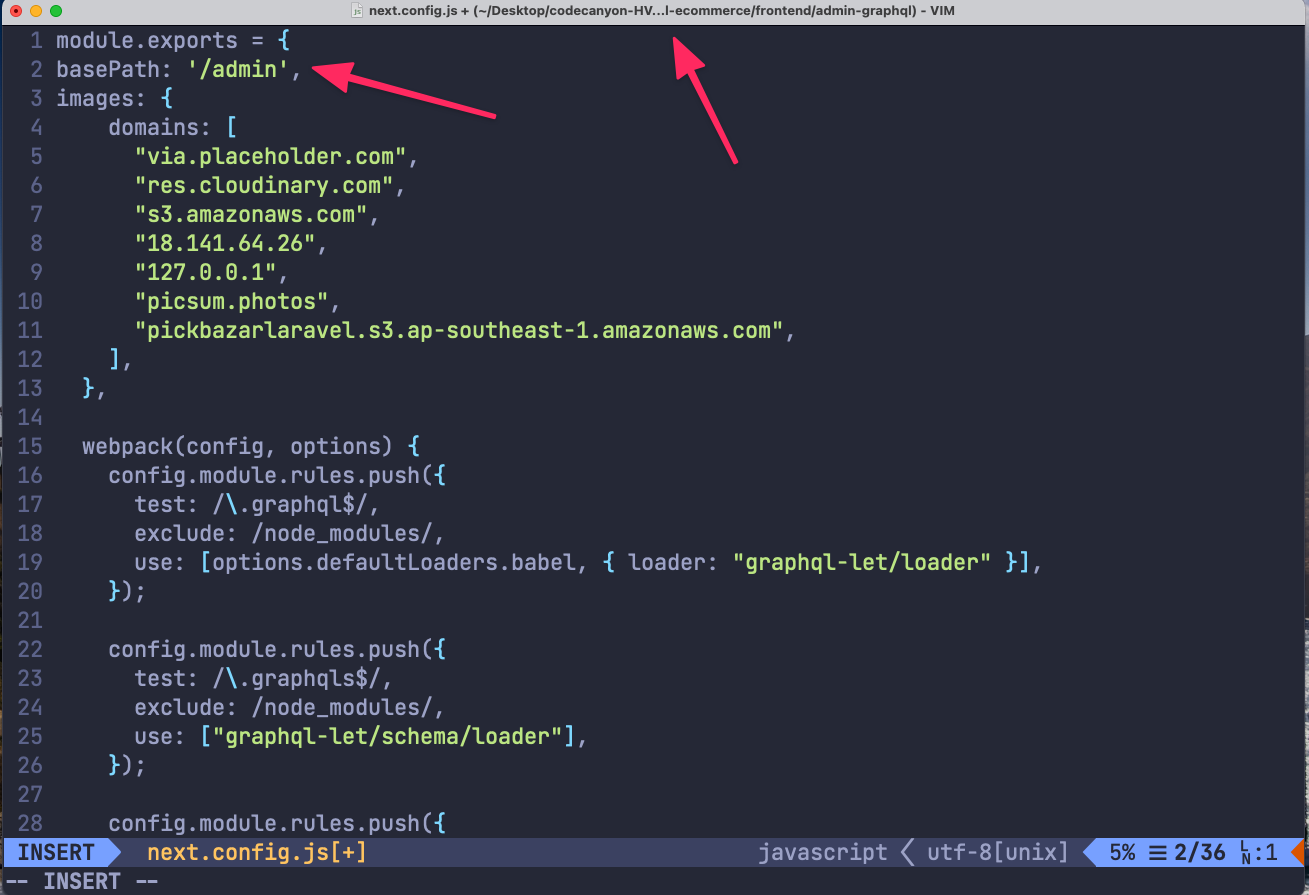
Config Next Admin App For /admin Sub Directory
Edit admin/rest/next.config.js,
add basePath for '/admin'

Again,
Edit admin/graphql/next.config.js,
add basePath for '/admin'
Install & Build
go to your root folder again
Clean previous build file,
yarn clean
To install all the npm packages run this command,
yarn
Build the project
For REST api
yarn build:shop-restyarn build:admin-rest
And for GraphQL,
yarn build:shop-gqlyarn build:admin-gql
Upload to GitHub
Use this command to add all files to git,
git add .
git commit -m "Build frontend"
git push origin main
Step 6: Upload Frontend & Run
At first go to your server pickbazar or git folder and use this command to pull all the build file,
git pull origin main
Then install all the node packages,
yarn
Run frontend app
Use this command to run frontend app as PM2 again.
pm2 start 'all'
Now go to Now, go to your YOUR_DOMAIN to access the shop page and YOUR_DOMAIN/admin for the access admin section.