Email Configuration
A range of mail transport drivers are supported by Laravel and may be utilised for sending emails. We'll take you step-by-step through the setting of three (3) different email service types today. Here, we'll talk about setting up Mailgun, Gmail SMTP, and Mailtrap SMTP.
Mailgun Configuration
Sandbox domains are restricted to authorized recipients only. If you want to receive your email in sandbox account. Please authorize your email. Up to 5 Authorized Recipients can be added.
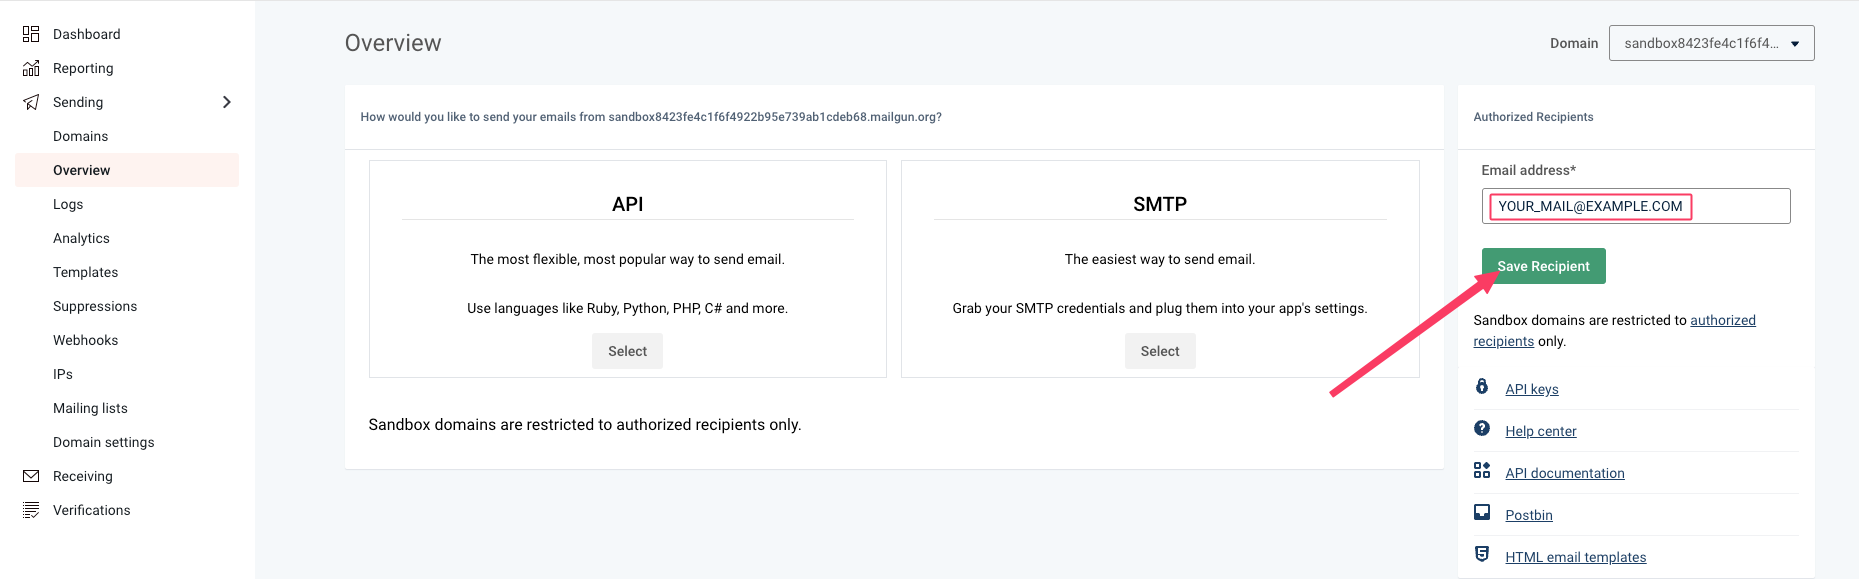
For more information, Please follow Authorized Recipients
To setup and configure Mailgun you need to set these below .env keys. We will discuss how you can get those env variable from mailgun.
MAIL_MAILER=MAIL_HOST=MAILGUN_DOMAIN=MAILGUN_SECRET=MAIL_FROM_ADDRESS=MAIL_PORT=587MAIL_USERNAME=nullMAIL_PASSWORD=nullMAIL_ENCRYPTION=nullADMIN_EMAIL=support@example.com
MAIL_MAILER=mailgunMAIL_HOST=smtp.mailgun.orgTo get
MAILGUN_DOMAINCreate or SignIn a Mailgun account from here https://login.mailgun.com/login After login click sending you will see a domain list there. I will go with this domain below. Just copy this domain and set this as yourMAILGUN_DOMAIN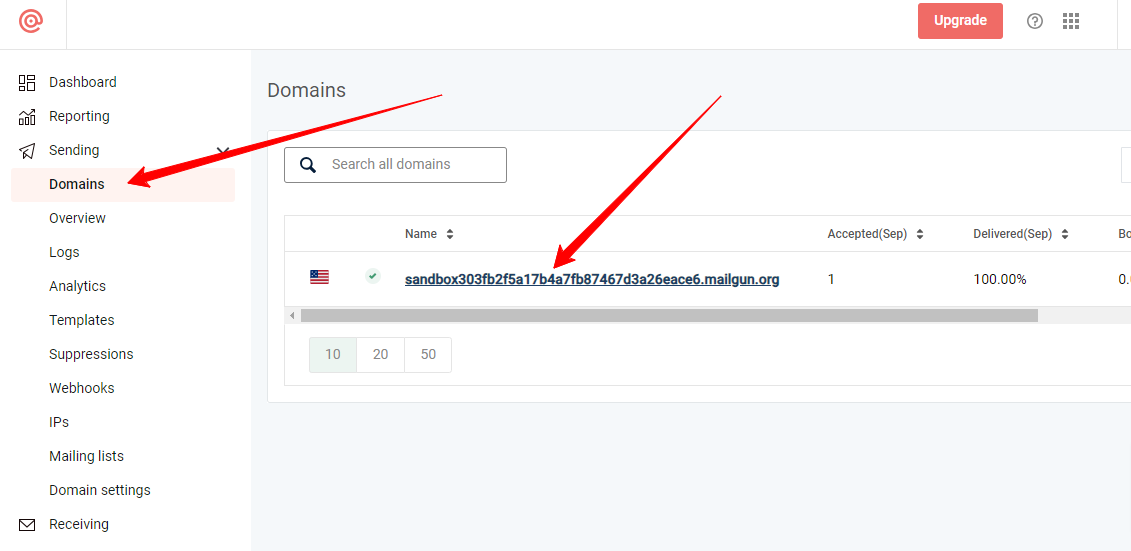
Now to obtain
MAILGUN_SECRETclick on on that domain. You will redirect to an over page like below click on API Keys.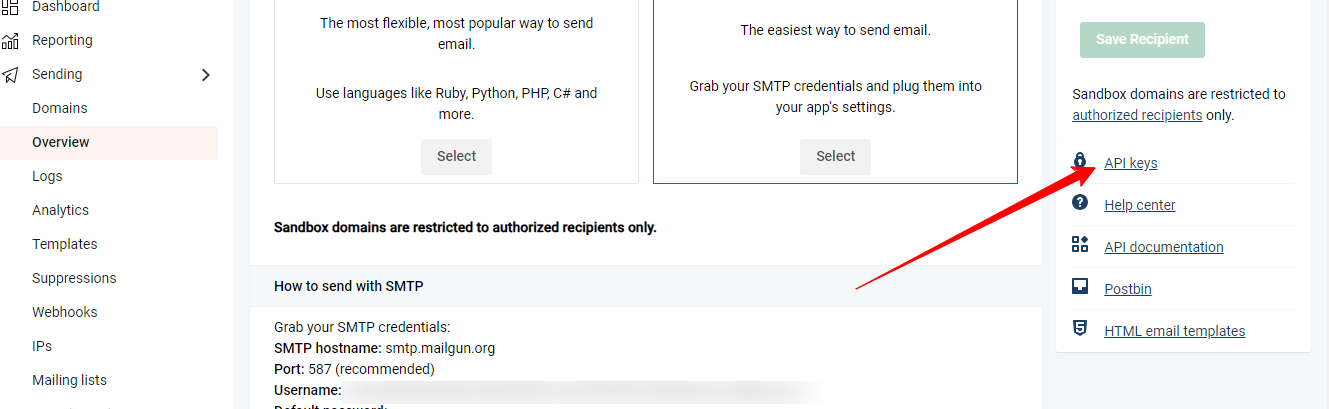
Then it will redirect to page find
Mailgun API keysthen click onAdd new key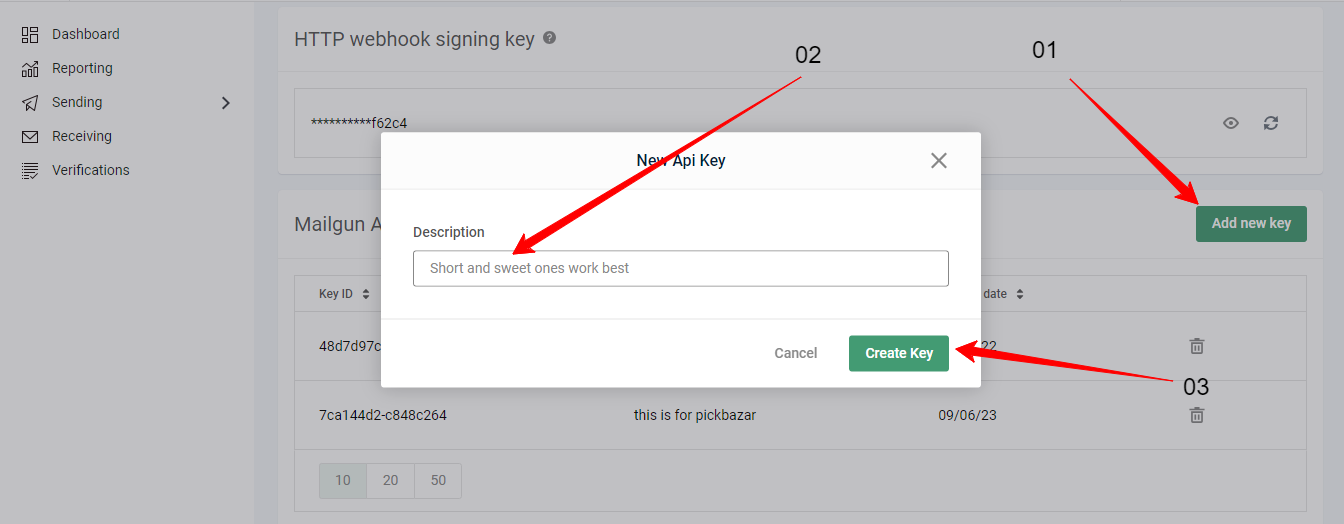
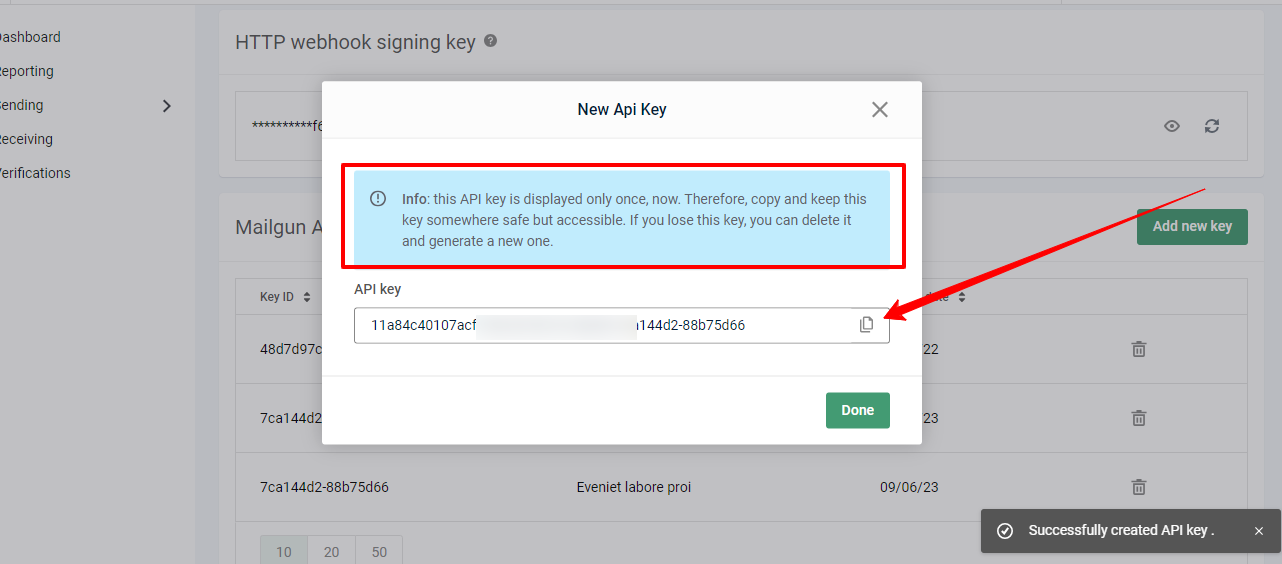
To set
MAIL_FROM_ADDRESSjust type your mail address.Now go to the dashboard -> sending -> Domain Click on the domain then select SMTP. You will see
MAIL_PORT=587MAIL_USERNAME=null
configuration information there like below.
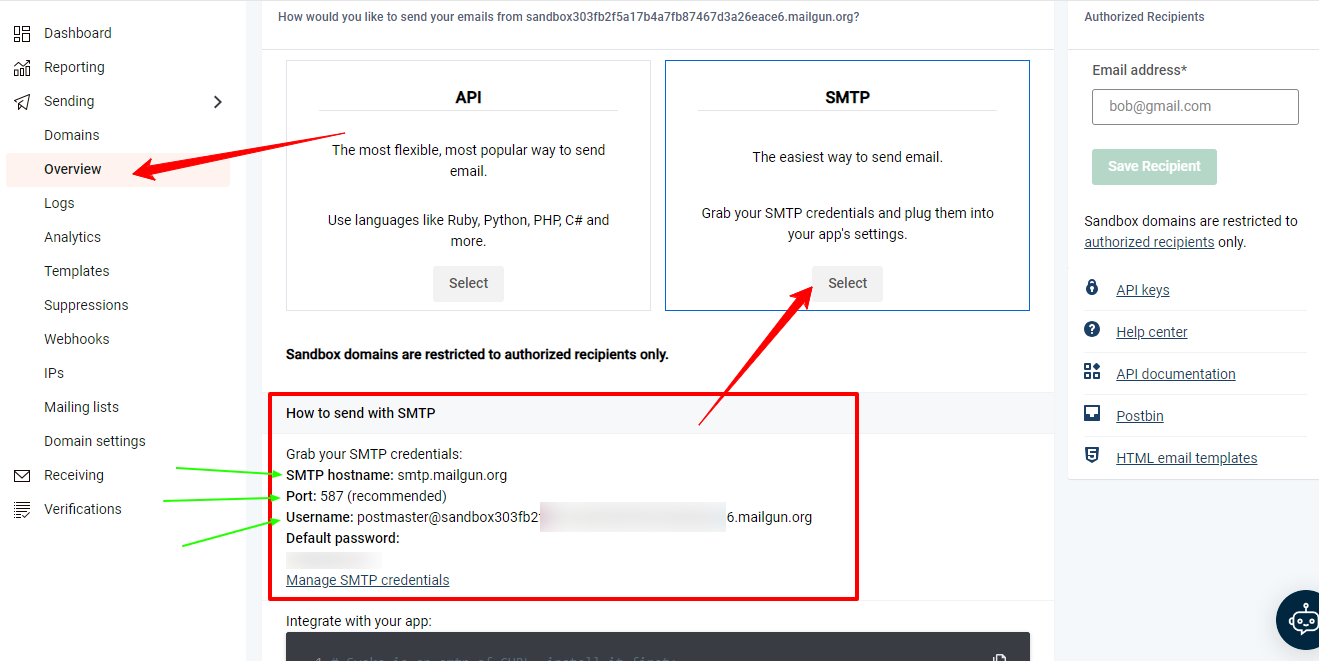
In a Mailgun configuration, you typically don't need to specify a
MAIL_PASSWORDbecause Mailgun uses API keys for authentication, not SMTP passwords. You can setMAIL_PASSWORD=nullor remove it from your .env file.Set your MAIL_ENCRYPTION
MAIL_ENCRYPTION=tlsYou can set your admin email
ADMIN_EMAIL=your_email@example.com
Gmail SMTP Configuration
To setup Gmail SMTP Configuration you need to set these below .env keys. We will discuss how you can get those env variable from Gmail.
MAIL_MAILER=MAIL_HOST=MAILGUN_DOMAIN=MAILGUN_SECRET=MAIL_FROM_ADDRESS=MAIL_PORT=587MAIL_USERNAME=nullMAIL_PASSWORD=nullMAIL_ENCRYPTION=nullADMIN_EMAIL=support@example.com
MAIL_MAILER=smtpMAIL_HOST=smtp.gmail.comYou can ignore
MAILGUN_DOMAINMAILGUN_SECRETfor gmail.To set
MAIL_FROM_ADDRESSjust type your mail address.MAIL_PORT=587To set
MAIL_USERNAME=your@gmail.comjust type your gmail address that you are using for configuration.To get MAIL_PASSWORD from google Create or SignIn to a gmail account. Then go to your account or click the URL https://myaccount.google.com/security Then turn on 2-Step Verification.
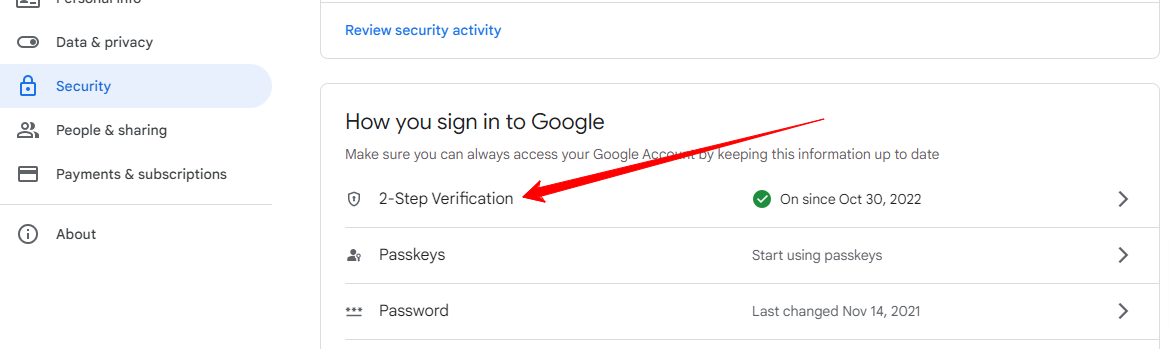
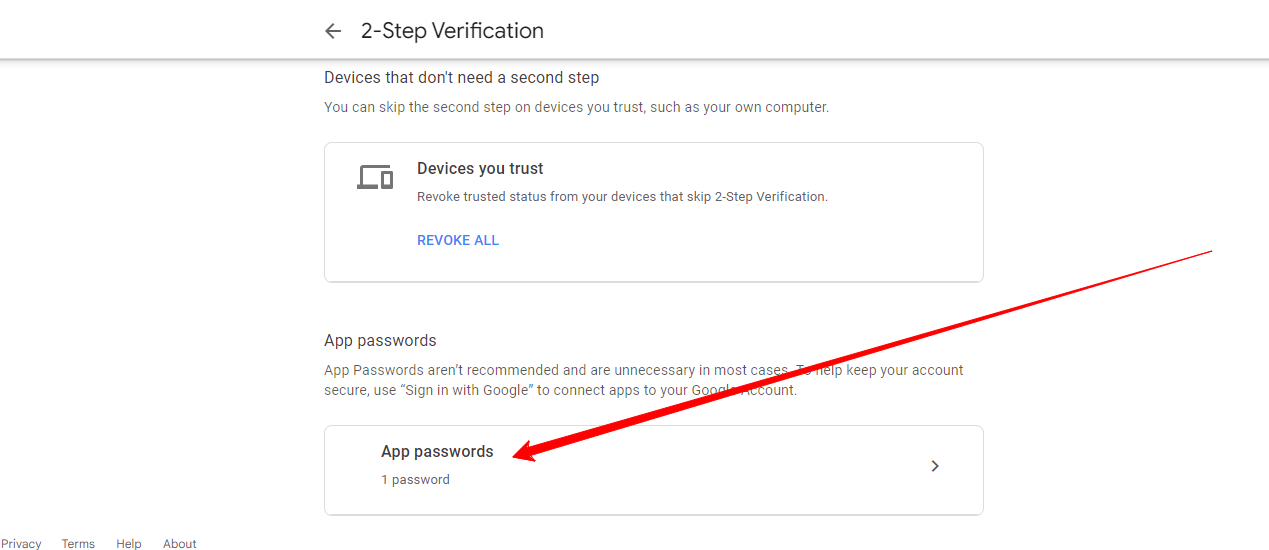
Under 2-Step Verification settings you will see app passwords and click that -
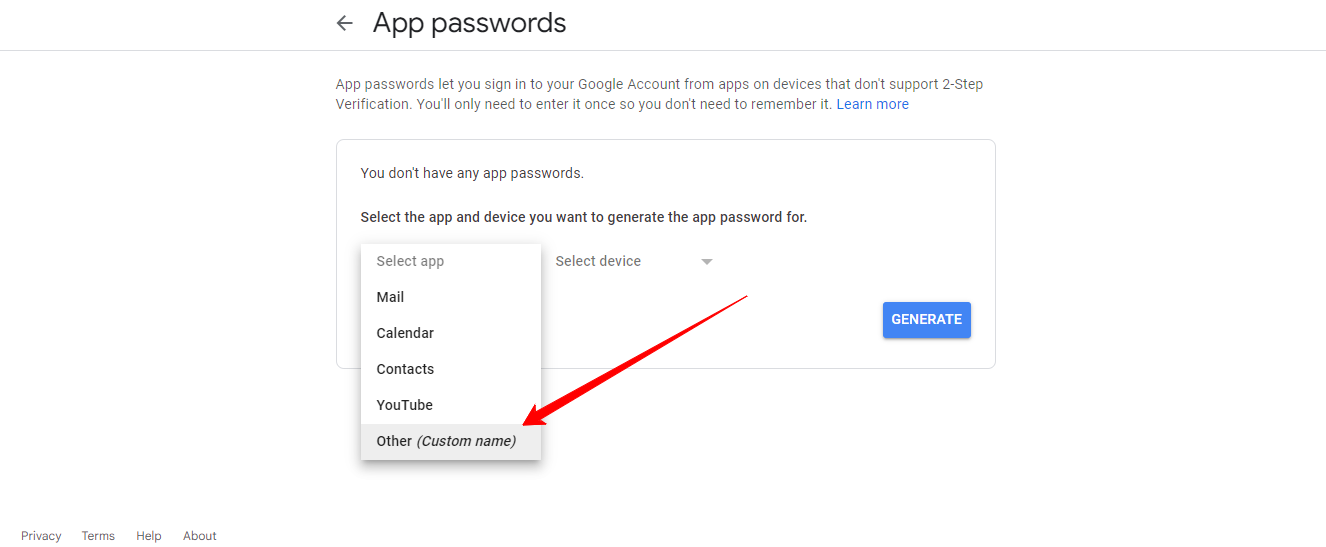
now set your application name under other (custom name)
after typing the name click on generate a propt will popup. like below That is your
MAIL_PASSWORDcopy that.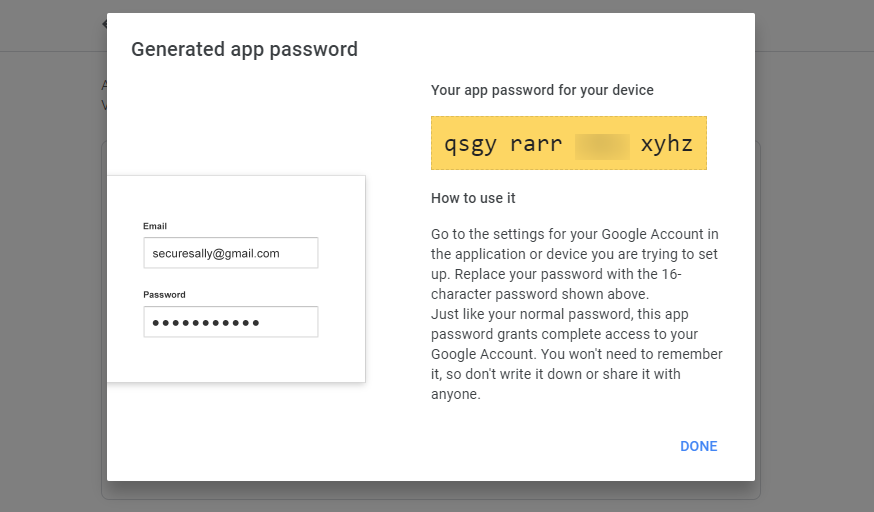
Set your MAIL_ENCRYPTION
MAIL_ENCRYPTION=tlsYou can set your admin email
ADMIN_EMAIL=your_email@example.com
Mailtrap SMTP Configuration
In order to configure Mailtrap SMTP, you must specify the following .env keys. We'll go over how to get those environment variables using Mailtrap.
MAIL_MAILER=smtpMAIL_HOST=sandbox.smtp.mailtrap.ioMAIL_PORT=MAIL_USERNAME=nullMAIL_PASSWORD=null
- MAIL_MAILER=smtp
- MAIL_HOST=ssandbox.smtp.mailtrap.io
- To get MAIL_POR Create or SignIn a Mailtrap account from here https://mailtrap.io/signin. After login follow the following steps shown below to get the
MAIL_PORT,MAIL_USERNAME&MAIL_PASSWORD.
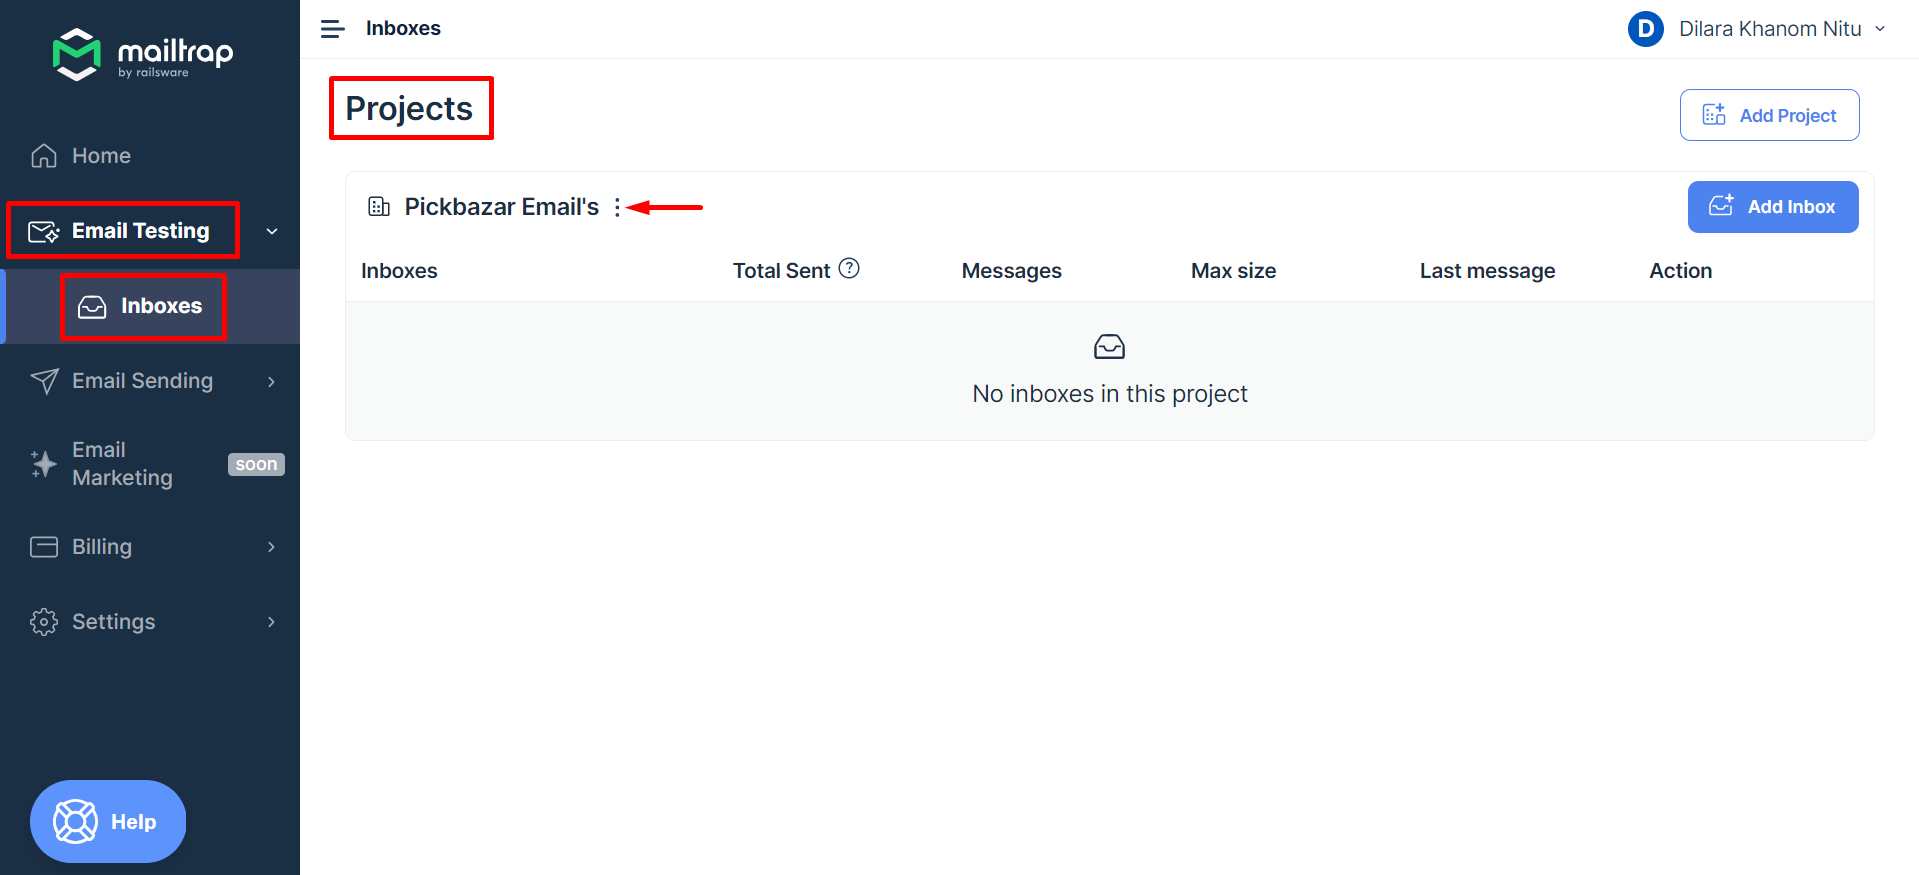
Step 01: Project Creation.
Create a project to organize the emails into one central directory. Navigate to Inboxes from Email Testing and click on Add Project.
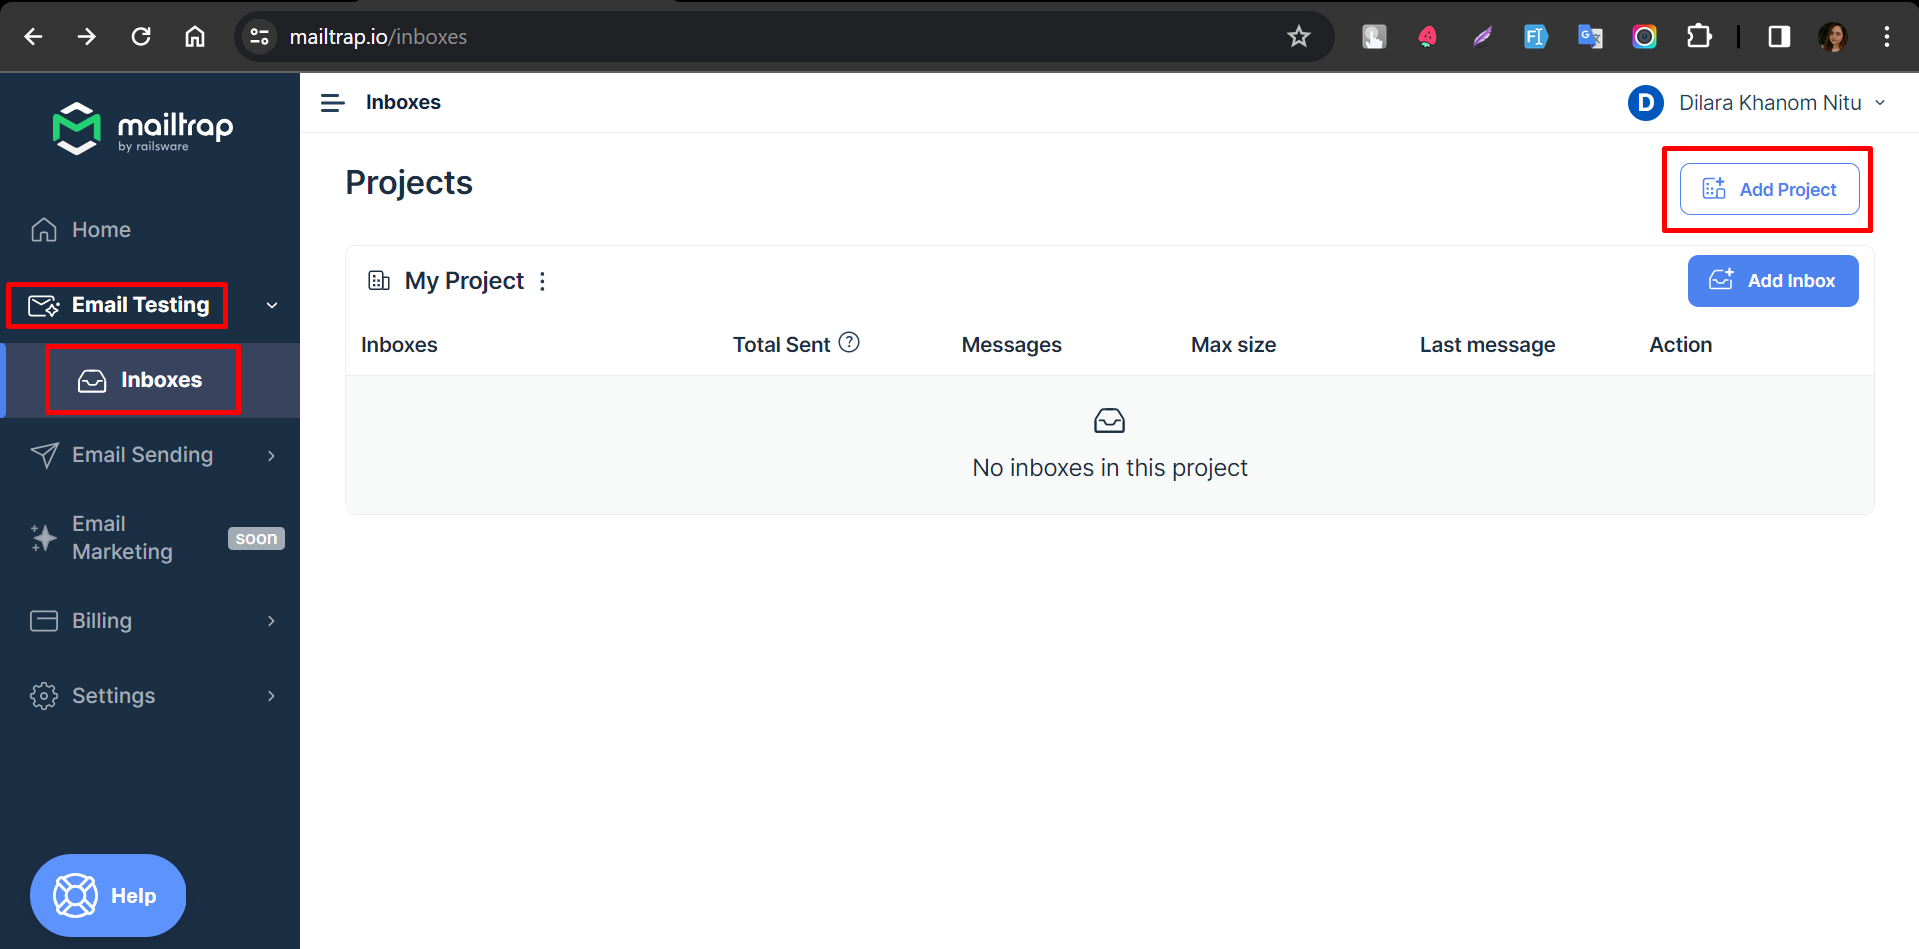
Insert a project name and click on the Add button to create a project sucessfully.

After creating a poject the Inboxes module will look something like this.
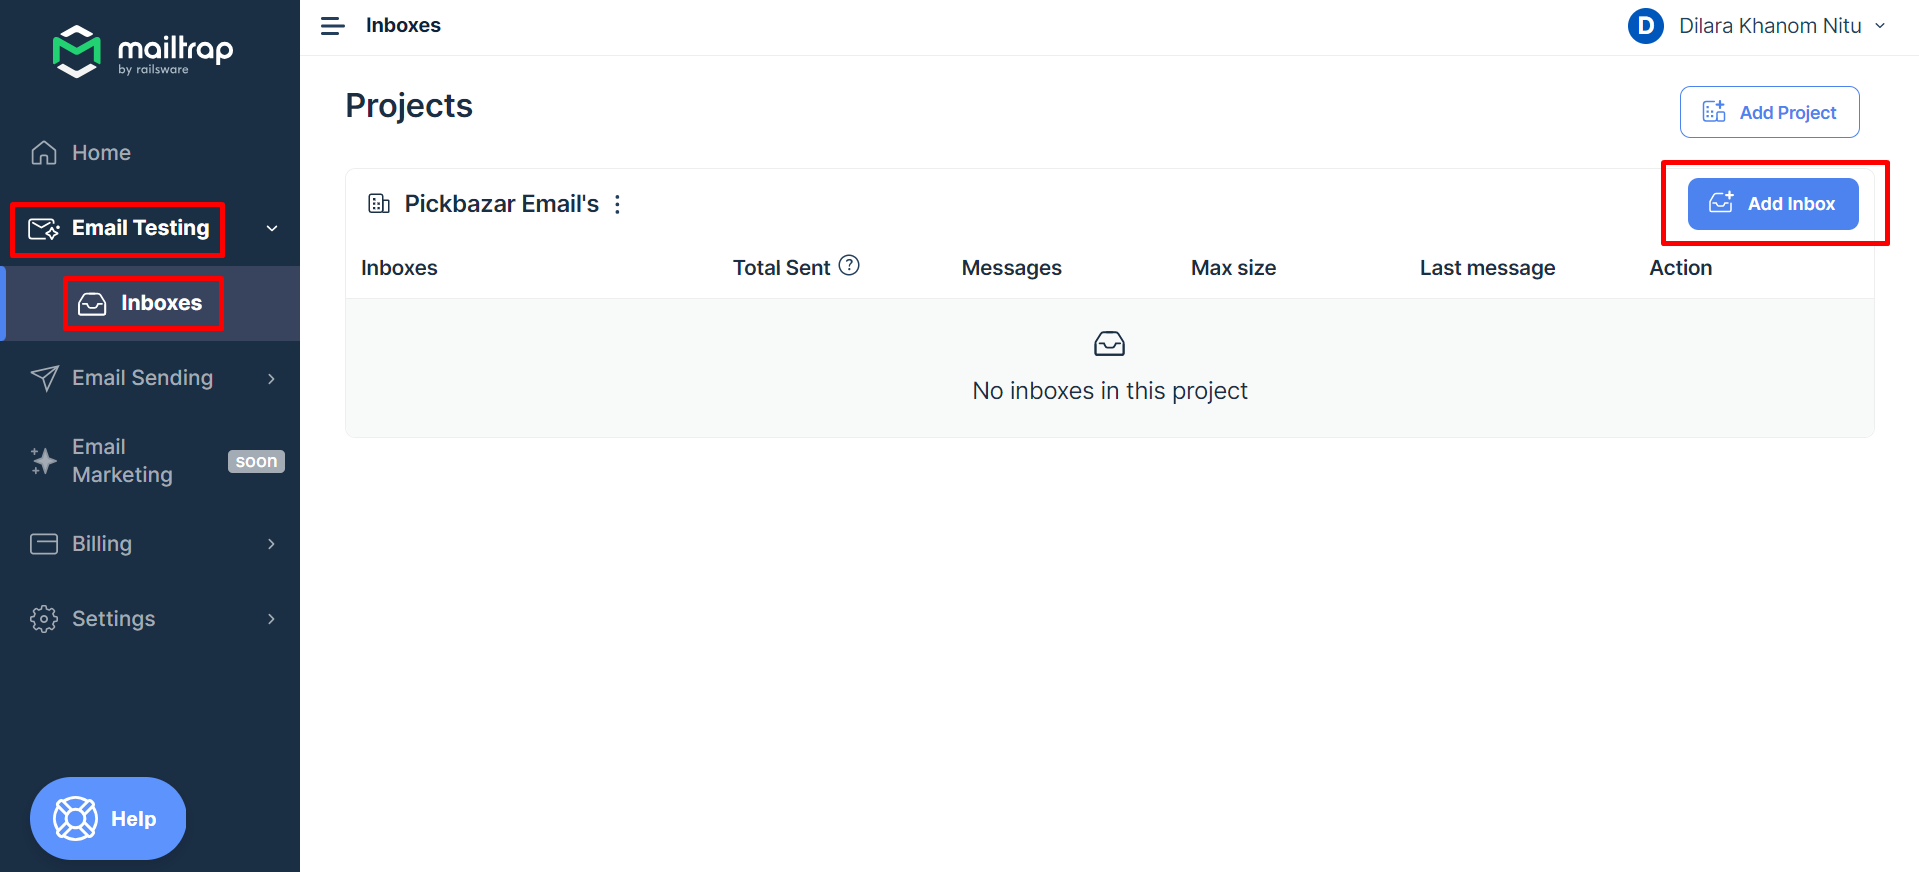
Step 02: Adding Inbox.
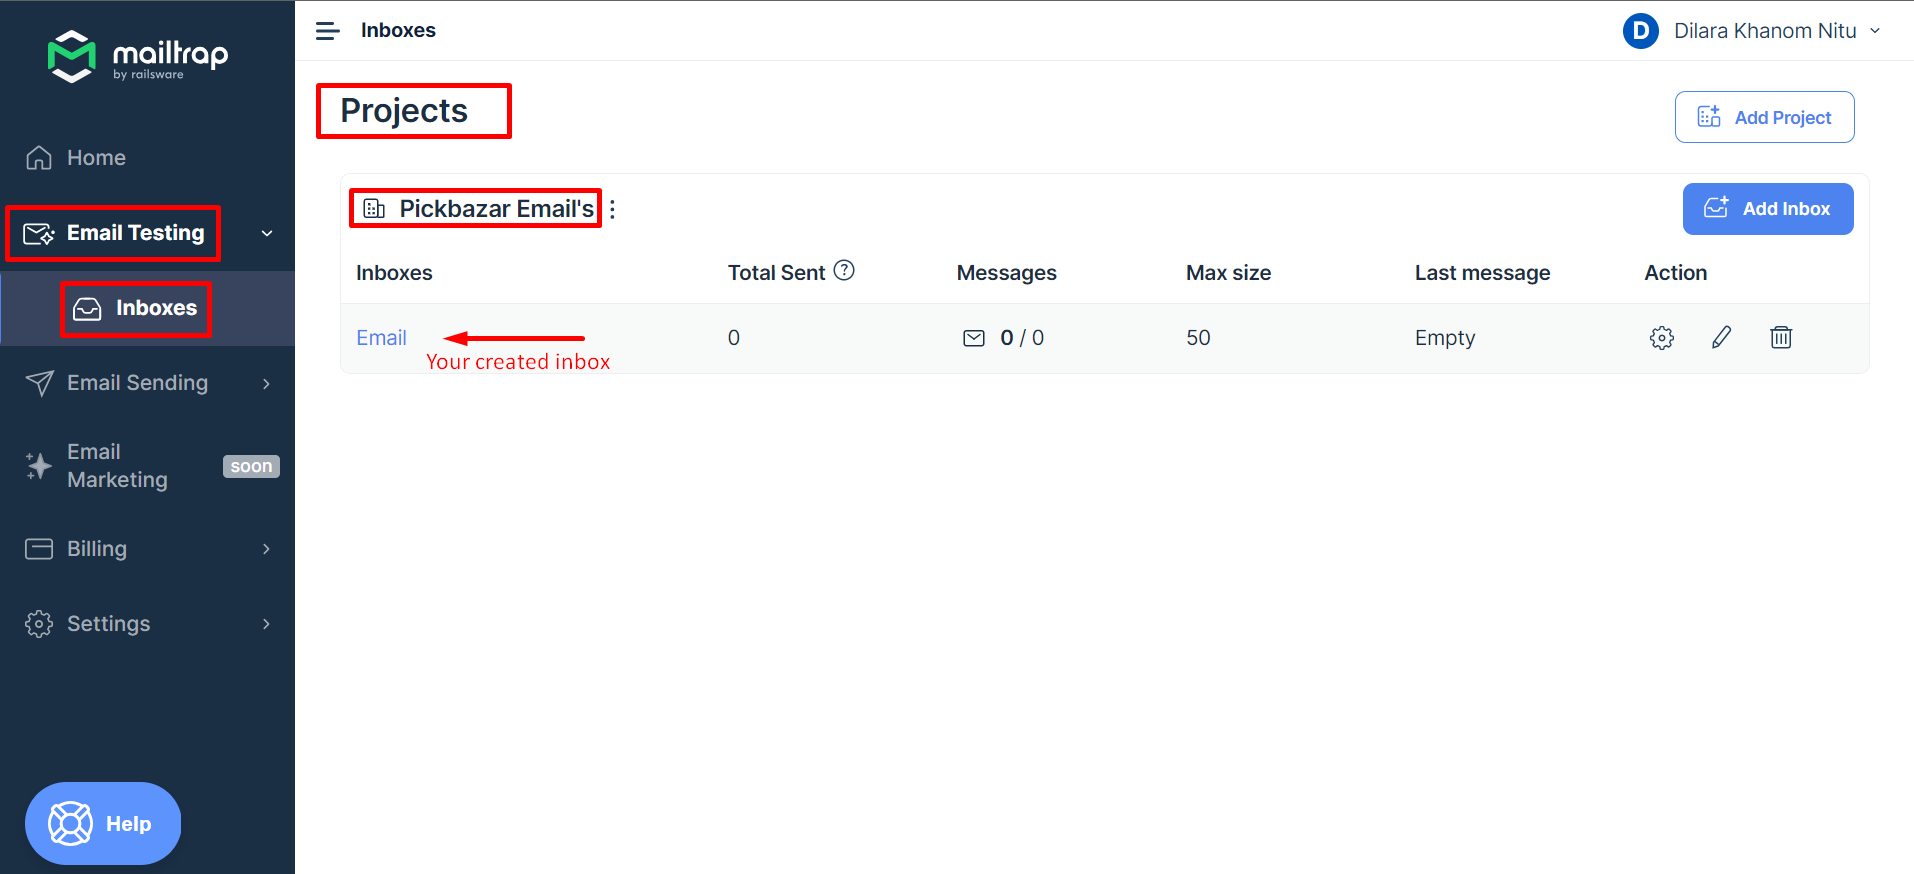
To create an Inbox, click on Add Inbox, Insert the inbox name and then click in the Save button.
After creating an inbox you'll have an interface that looks something like the image given below.
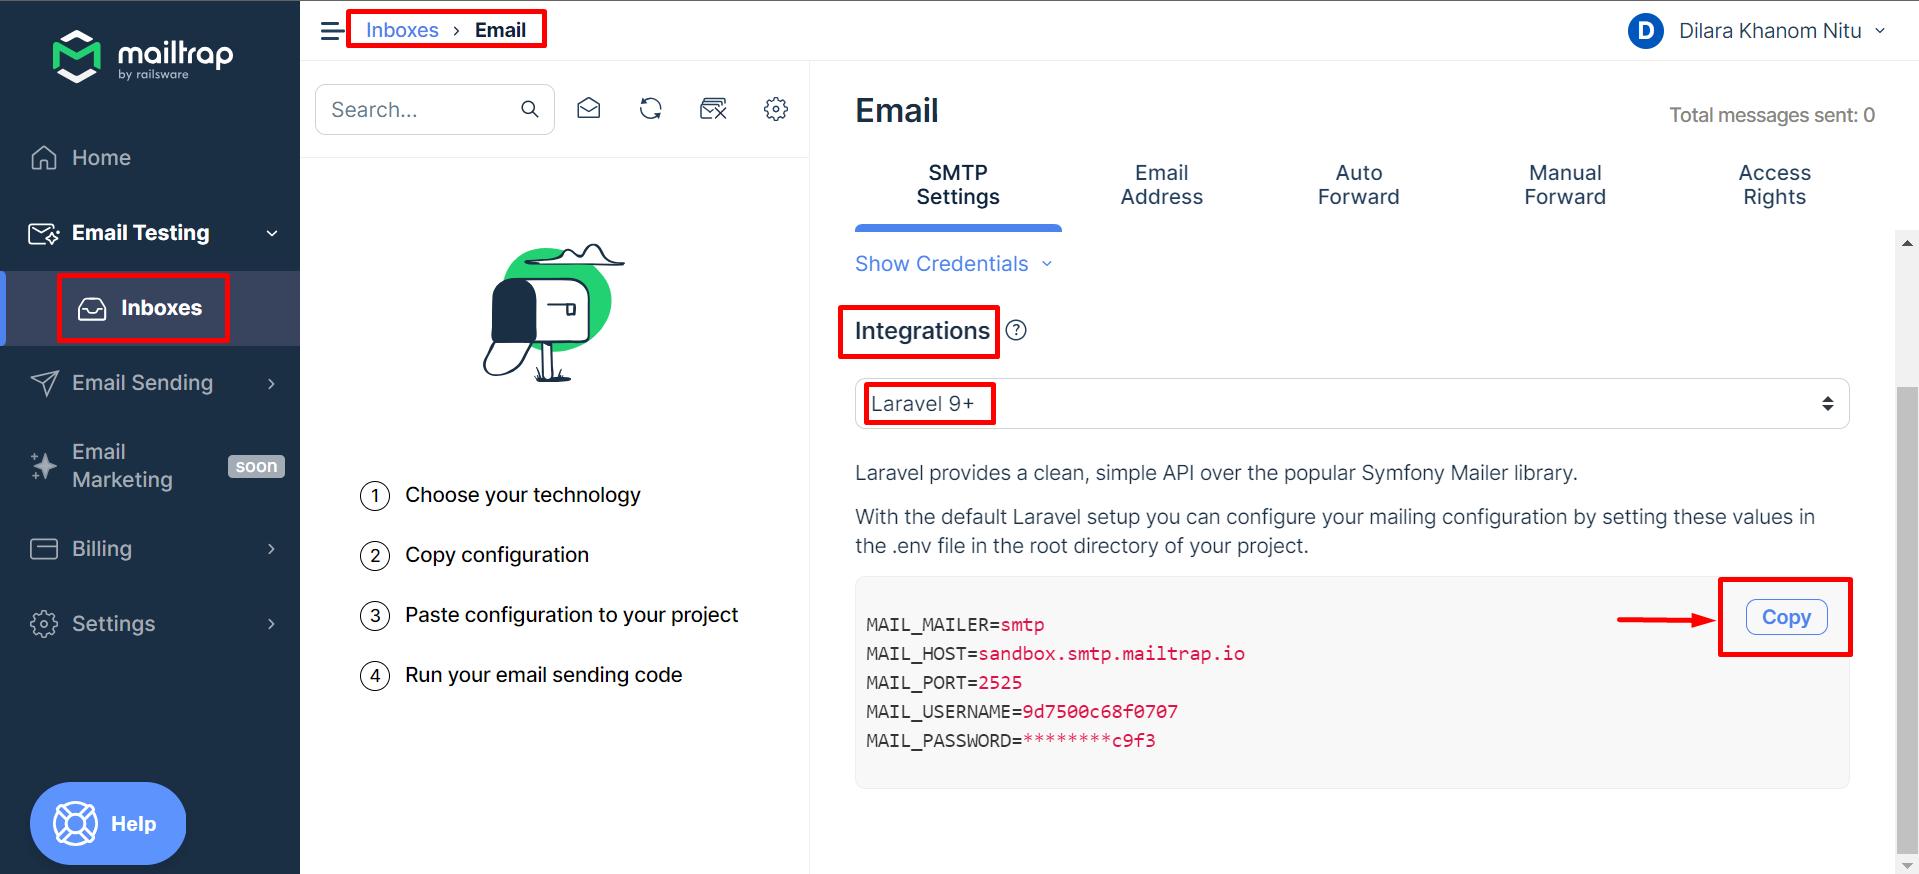
Step 03: Configure your Mailing Configuration.
You'll be redirected to the Email and SMTP Settings by clicking on the inbox that you've created. From there, select the integration to Laravel 9+.
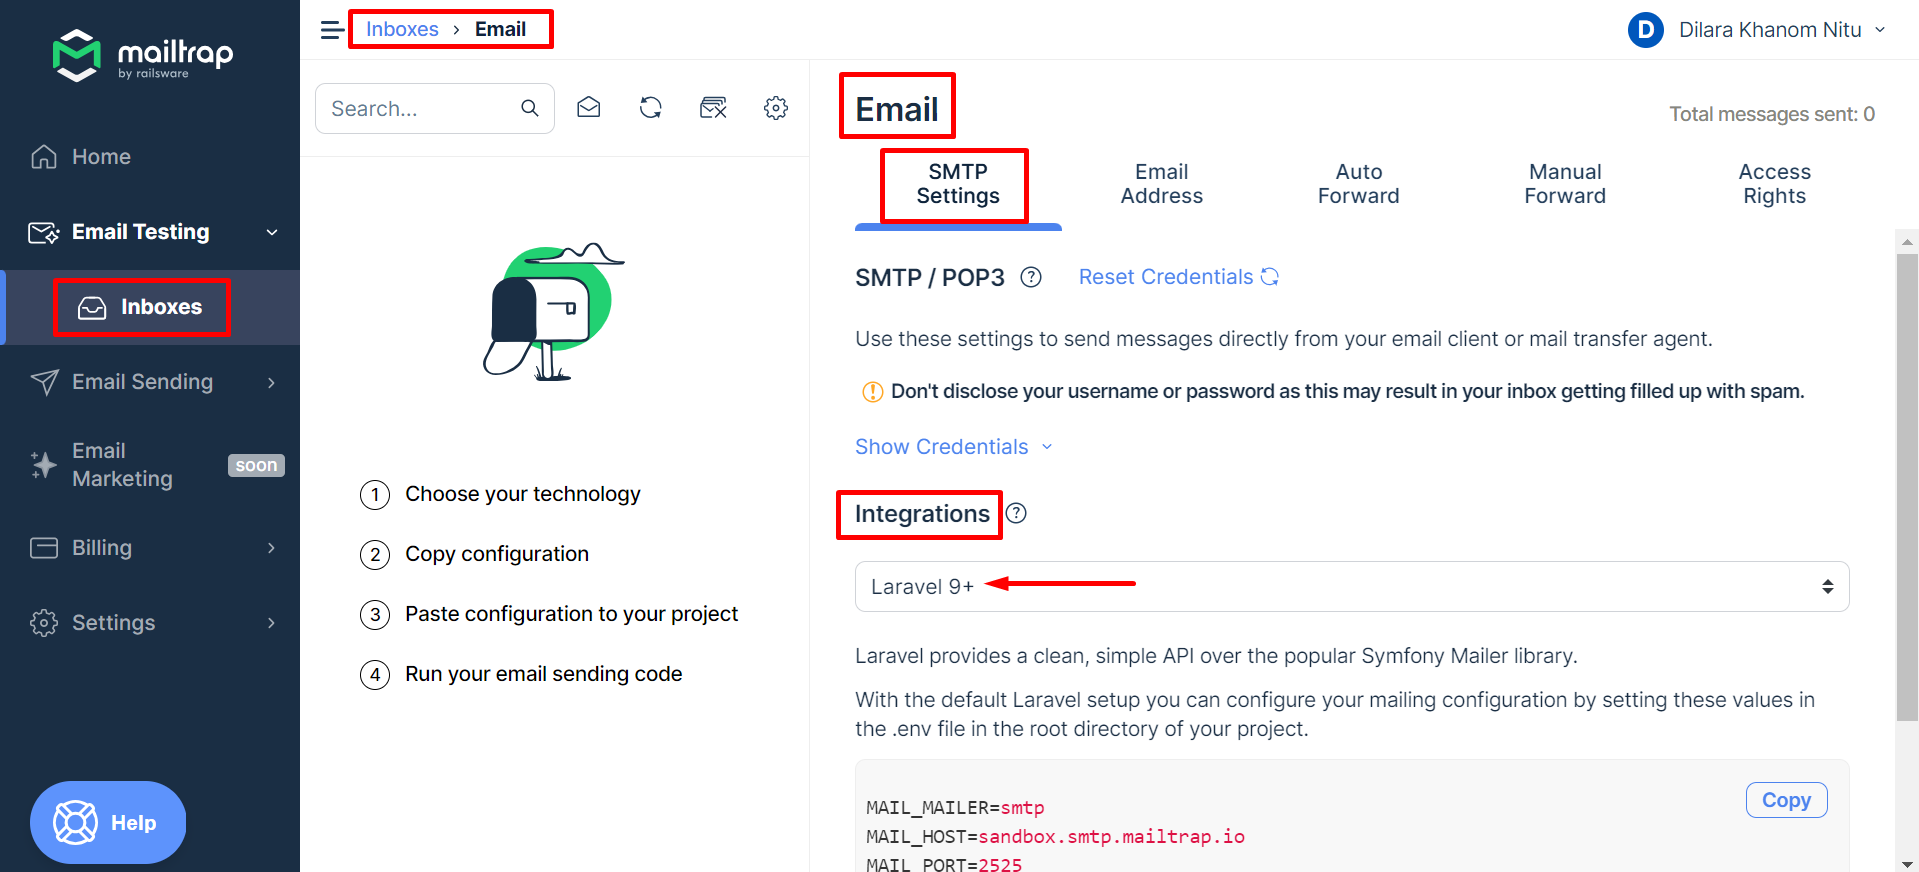
Now, with the default Laravel setup you can configure your mailing configuration by setting these values in the .env file in the root directory of your project. Click on the Copy button to copy the values.