Social Login
You can use a social network like Google or Facebook as a login provider like email/username and password. To set up social login, follow the below procedure,
For Google, follow this procedure,
- At first go to Google Console dashboard (https://console.cloud.google.com/)
- From the console, create a new project

- After creating the project, go to
APIs & Services
 -> OAuth consent screen.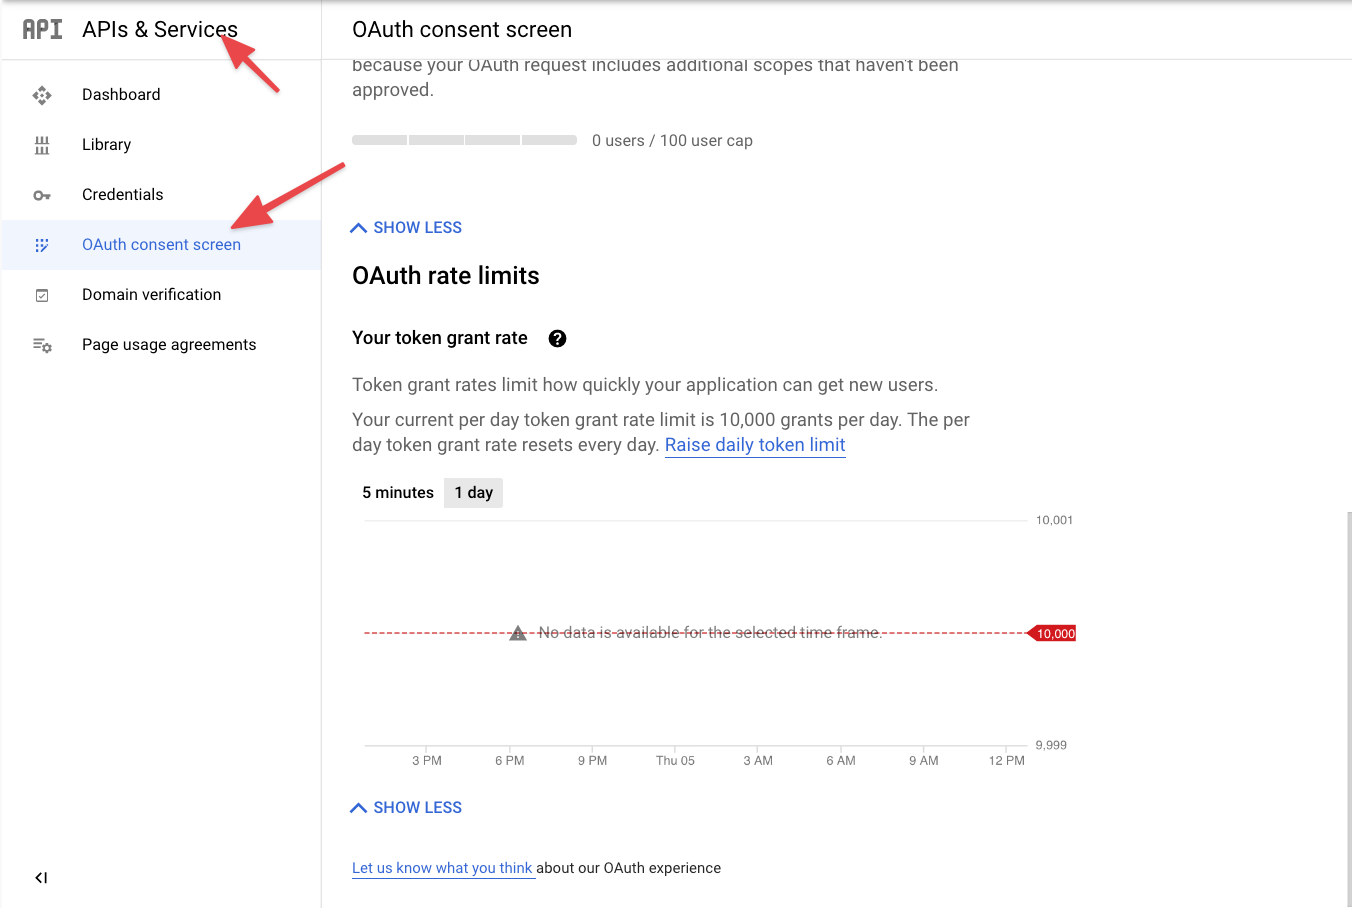
- Create an
External OAuth Consent.Add all the required fields. - Then, go to the
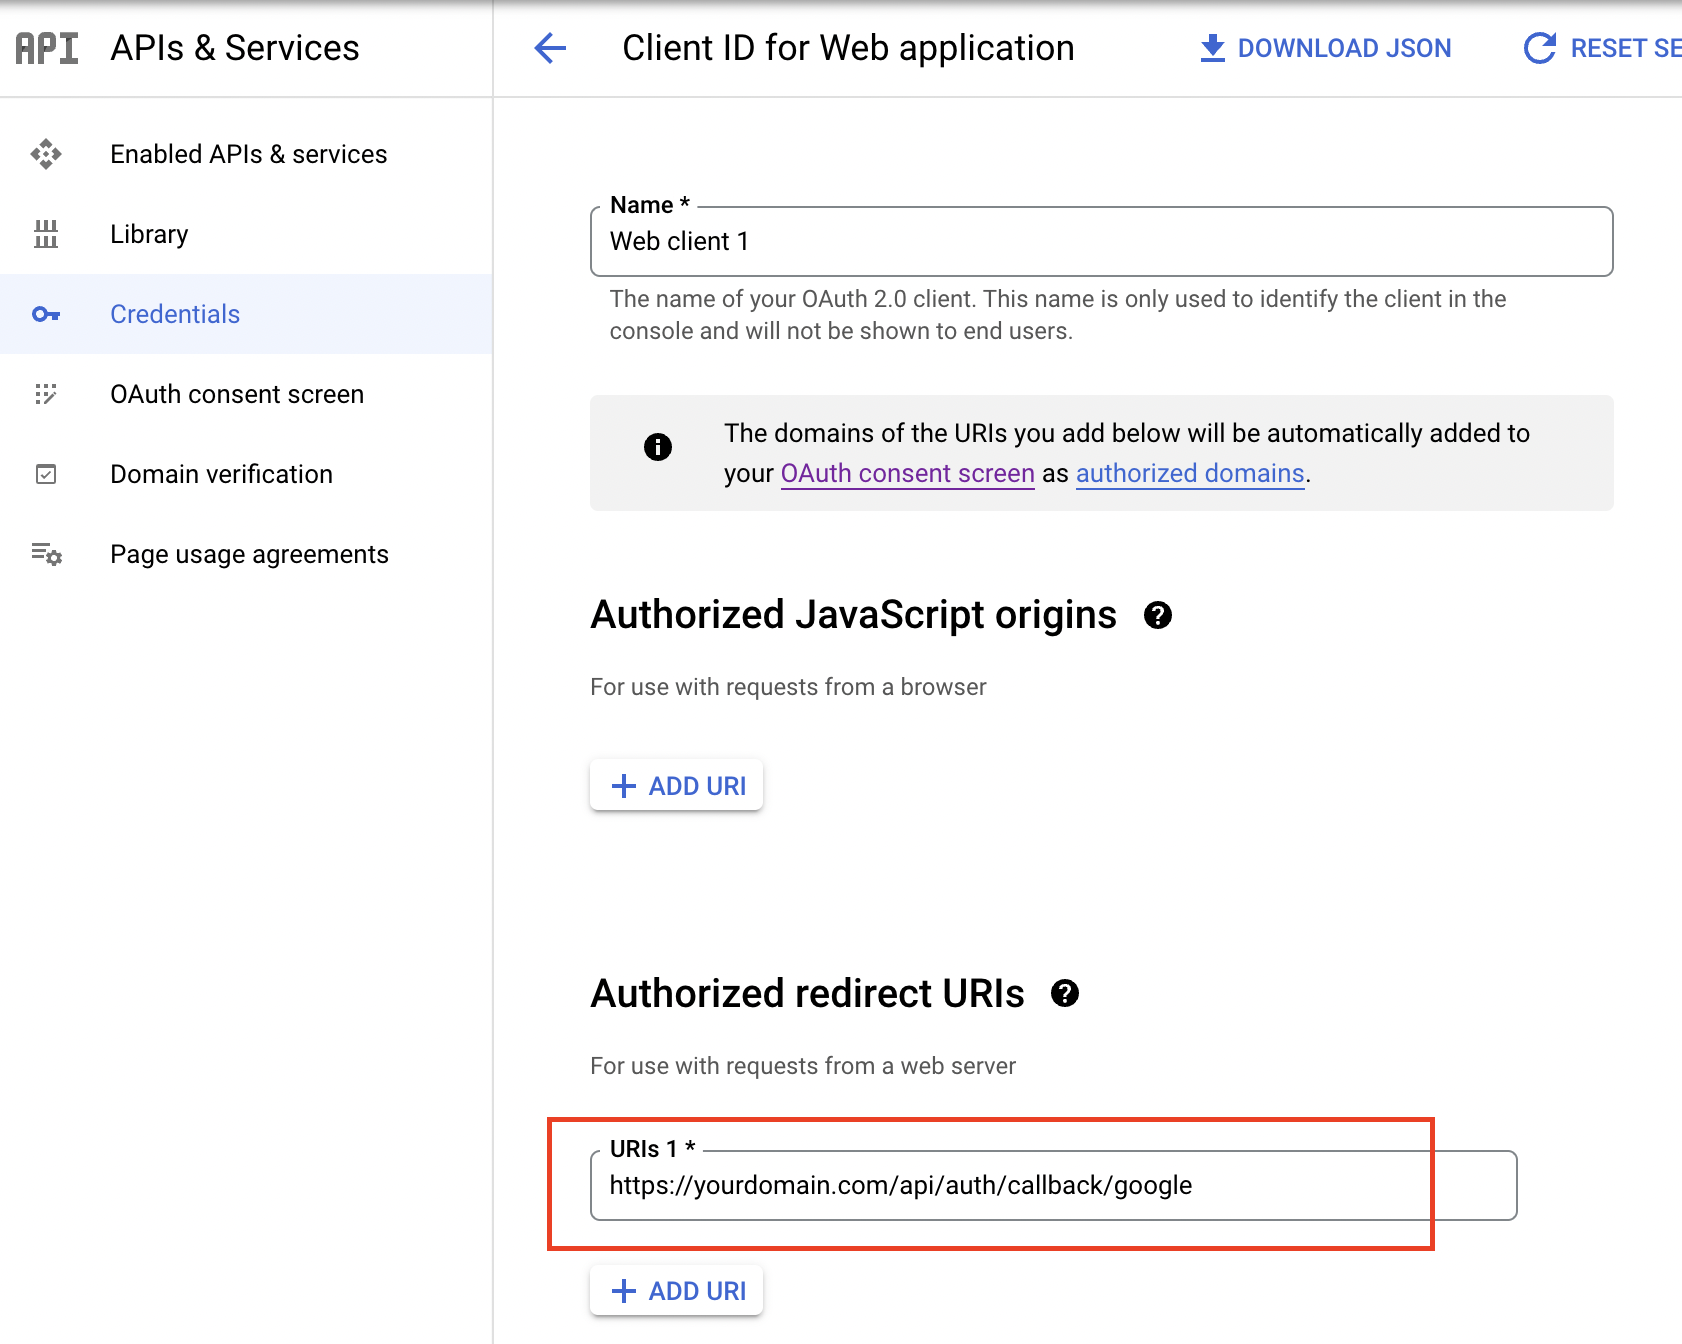
credentialssection and createOAuth Client ID. Add an
 Authorized redirect URIs. The format of the URIs should be:
http://yourdomain.com/api/auth/callback/google
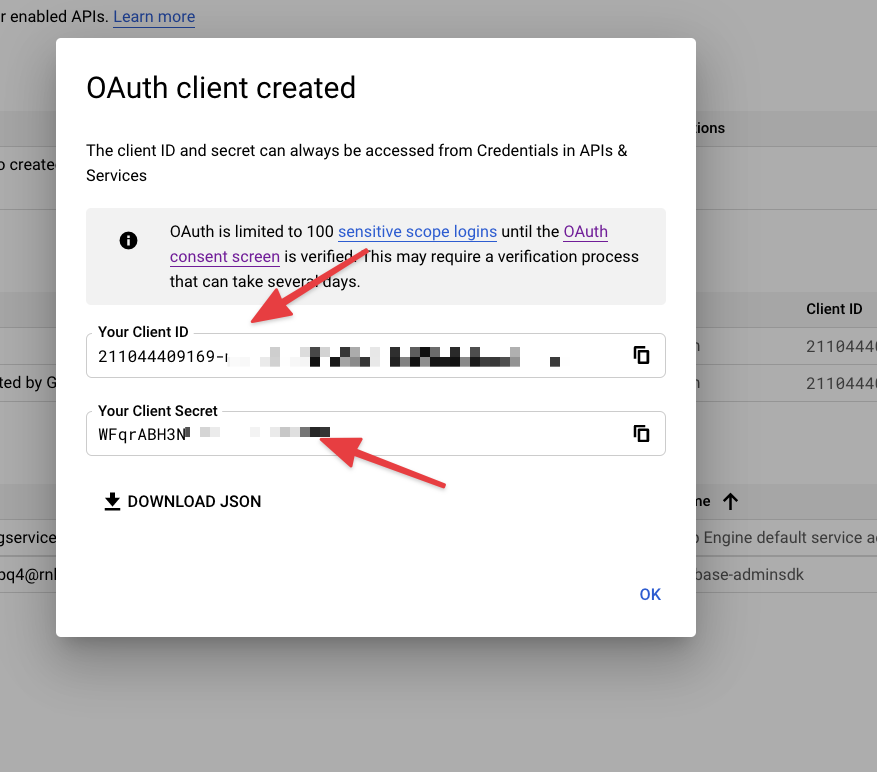
 6. Then you'll get your credentials,
Then open
api/.envand add API ID and credentials,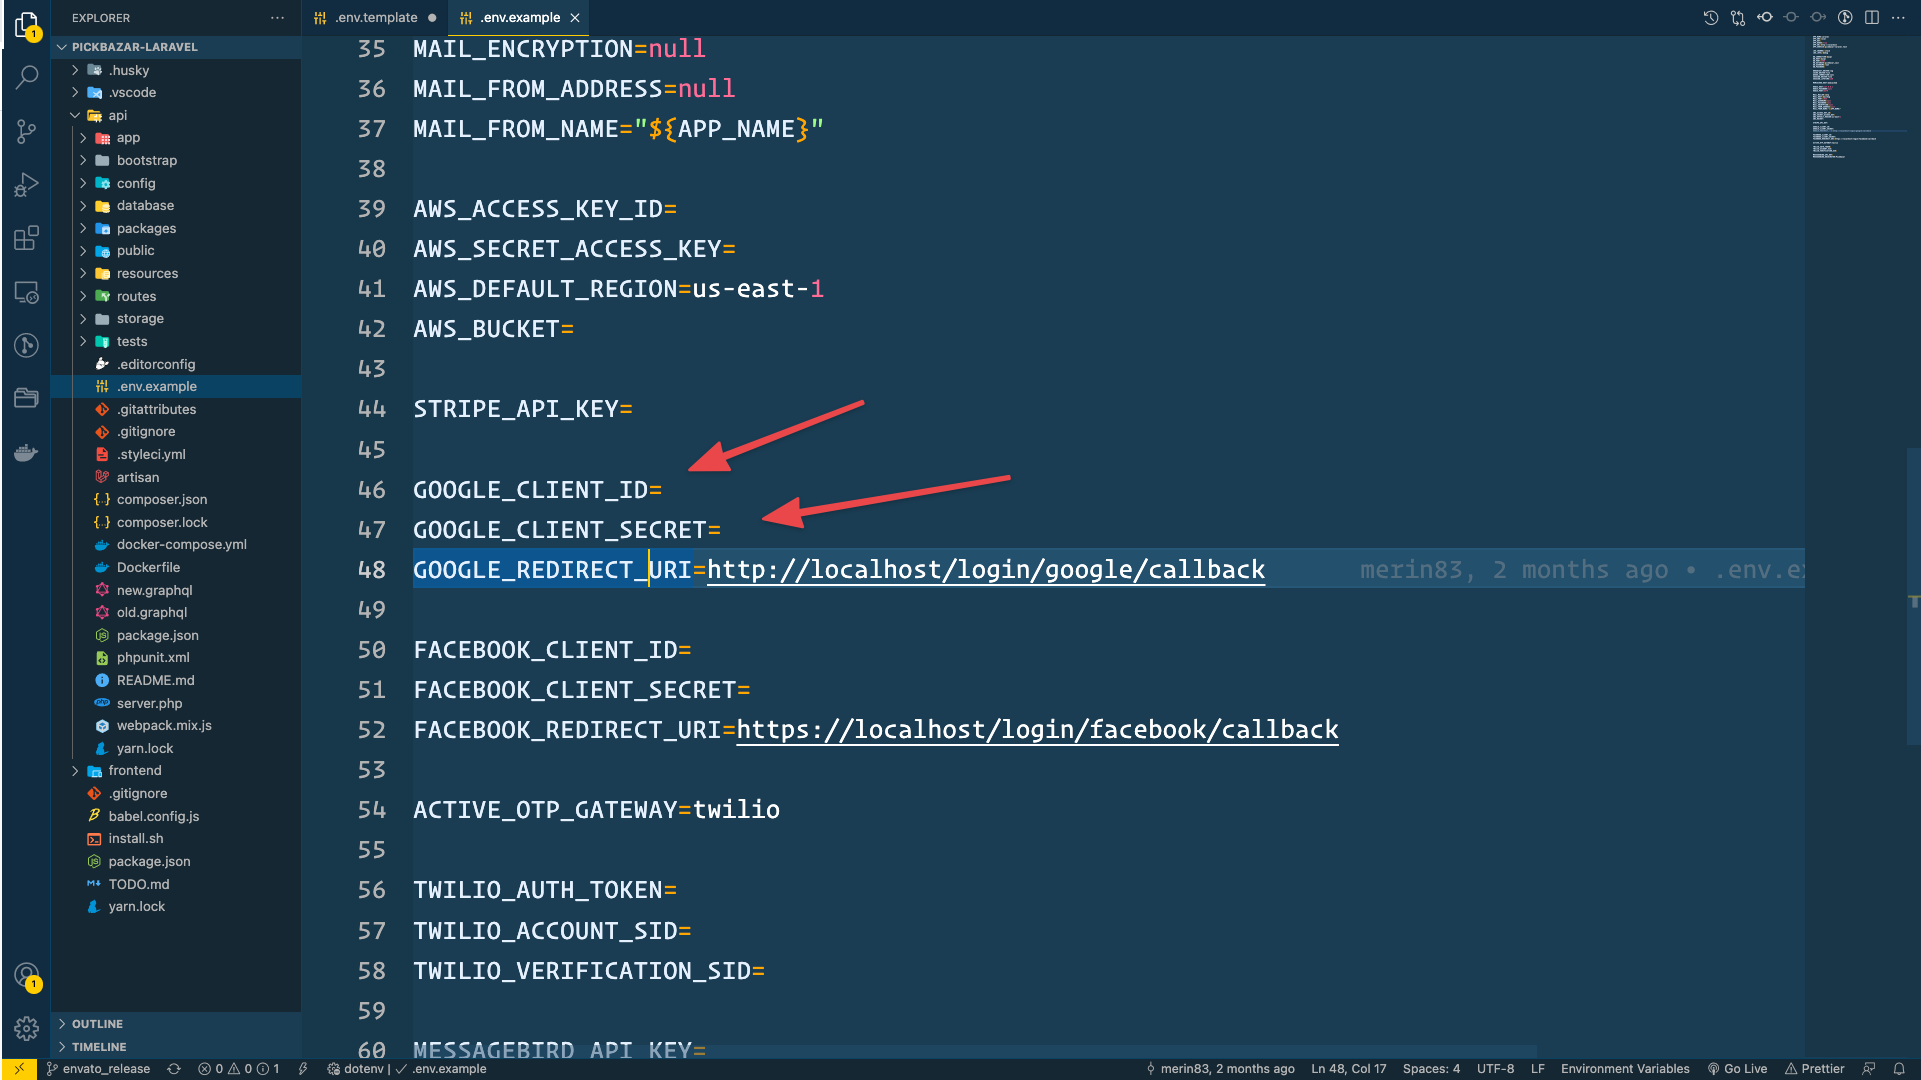
Then go to this
https://generate-secret.now.sh/32site and generate a secret key.Then open
shop/.envand add credentials toGOOGLE_CLIENT_IDandGOOGLE_CLIENT_IDandNEXTAUTH_URLalso add aSECRETcode.
NEXTAUTH_URL=YOUR_SHOP_DOMAINGOOGLE_CLIENT_ID=GOOGLE_CLIENT_ID=SECRET=
After configuration, make sure you rebuild your project using this command,
For REST API
yarn build:shop-restyarn build:admin-rest
And for GraphQL,
yarn build:shop-gqlyarn build:admin-gql
Go to Facebook developer dashboard (https://developers.facebook.com/apps/)
Then create a new app for pickbazar
After that, set up
Facebook Login.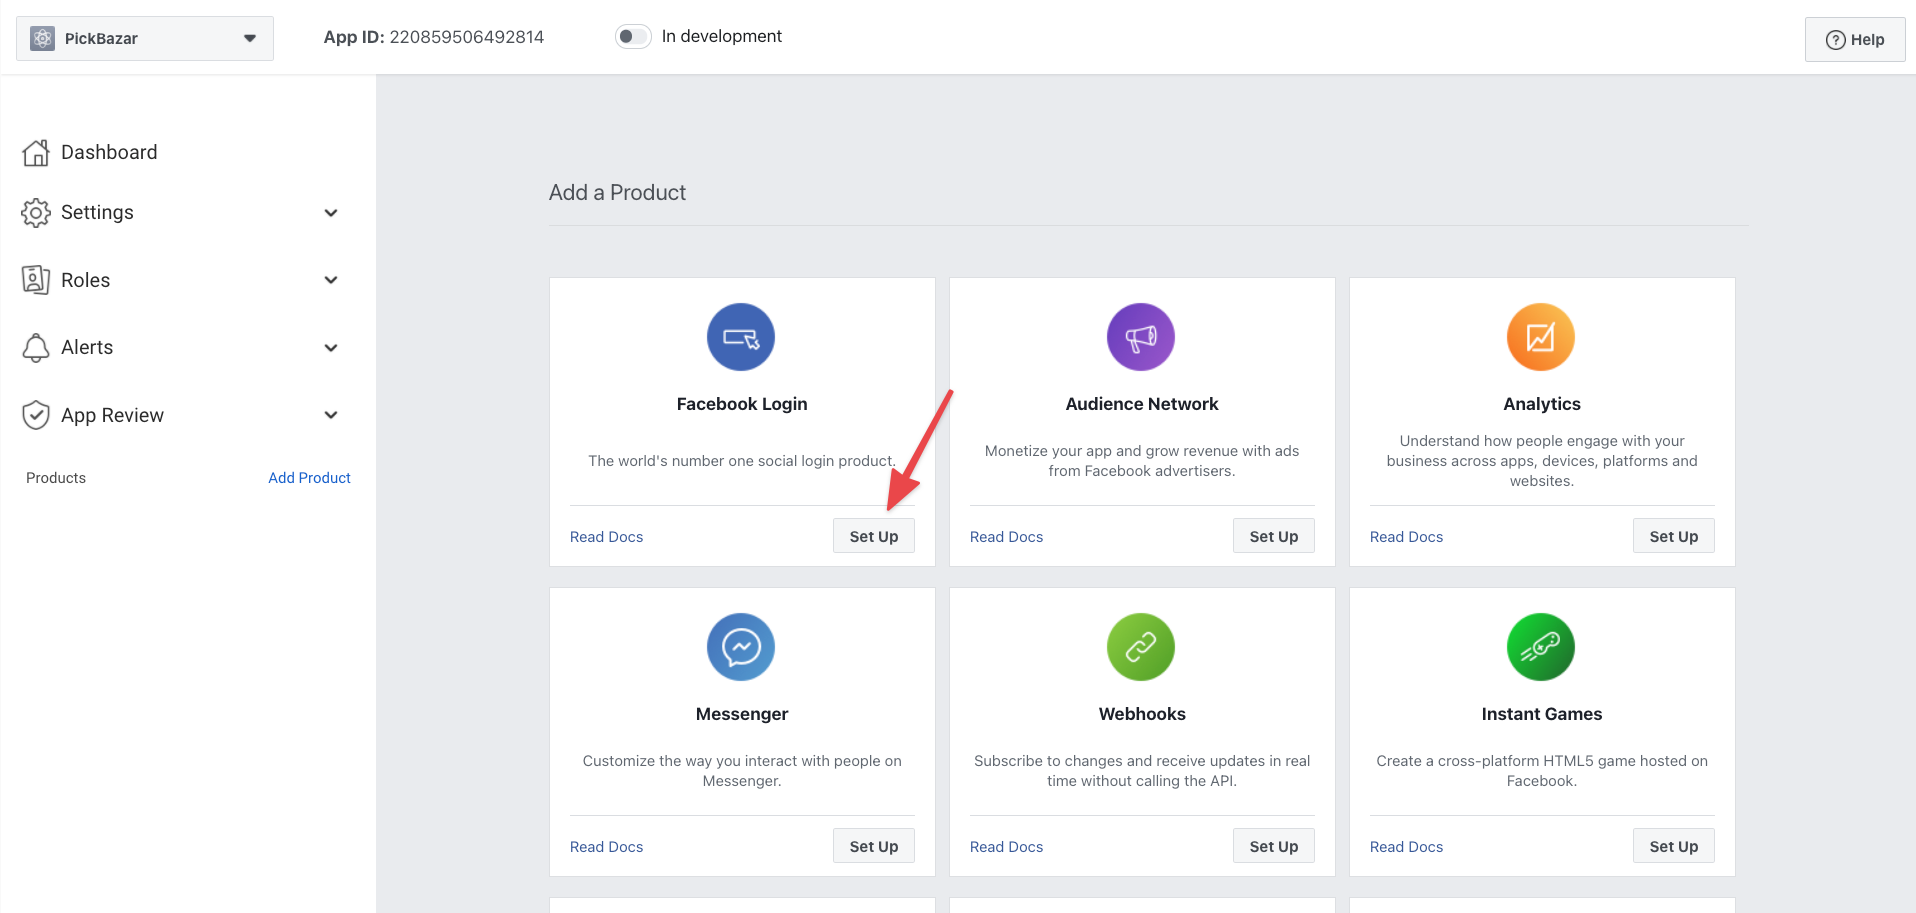
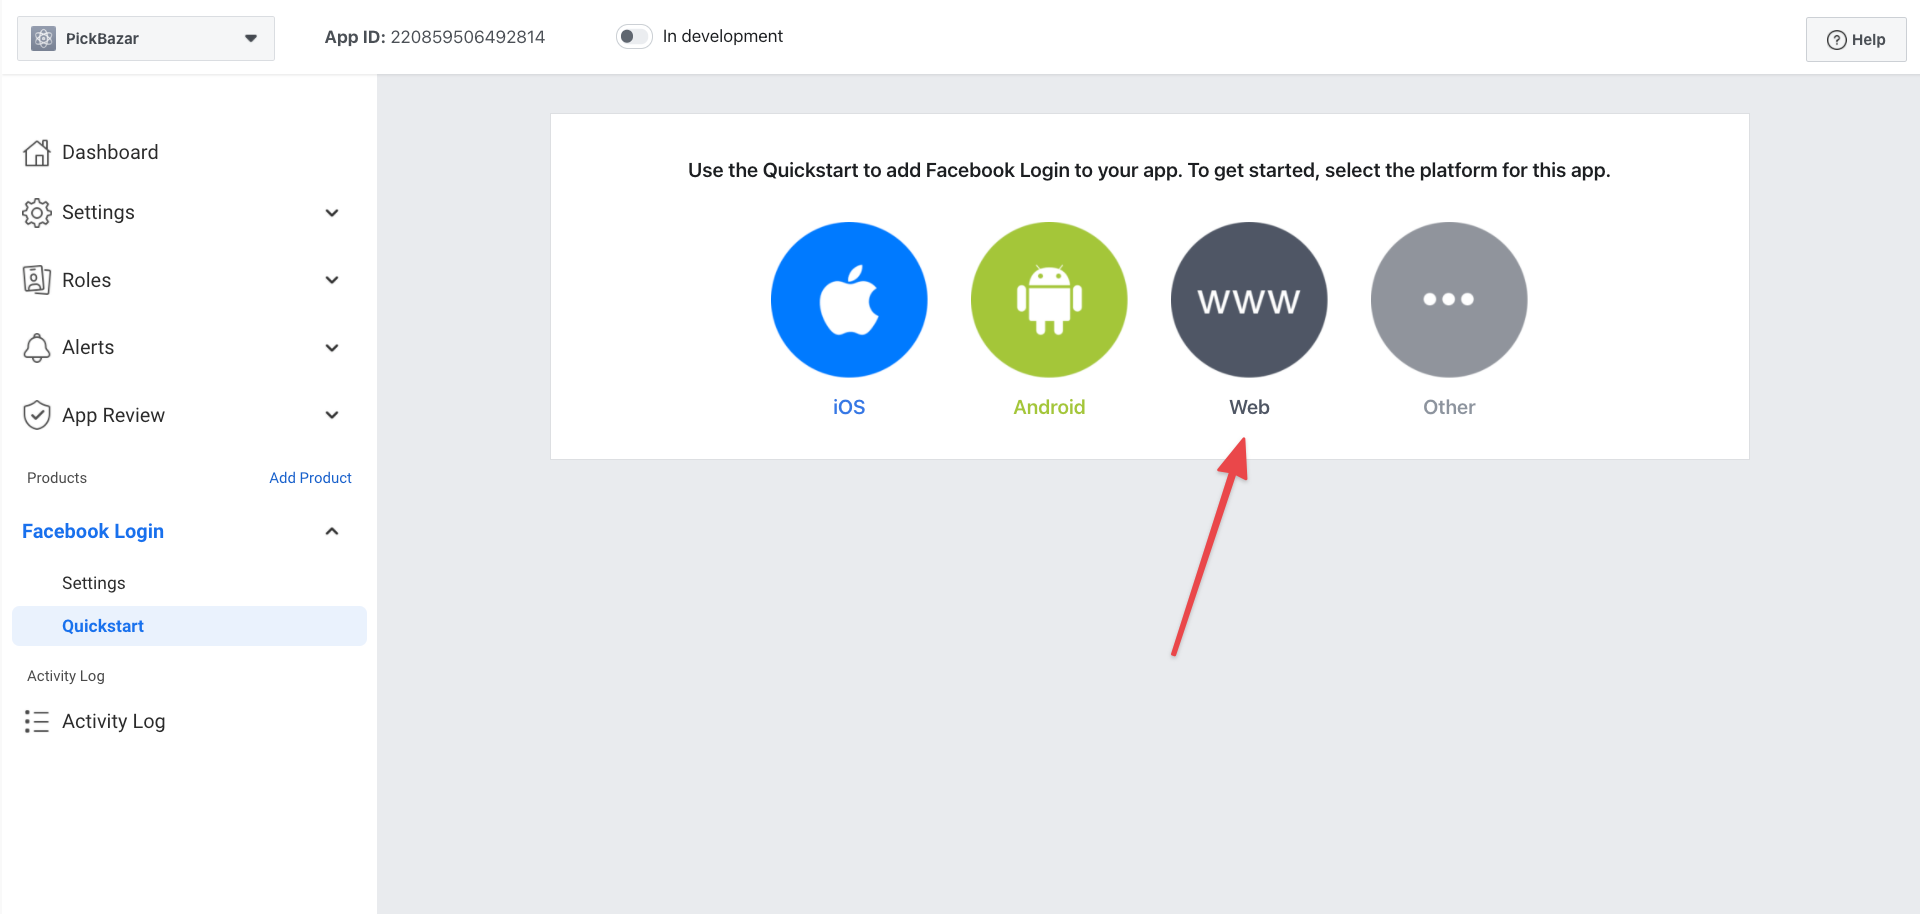
Then provide all the necessary information.
After that, go to the settings page, and on that page, you'll get all the credentials.
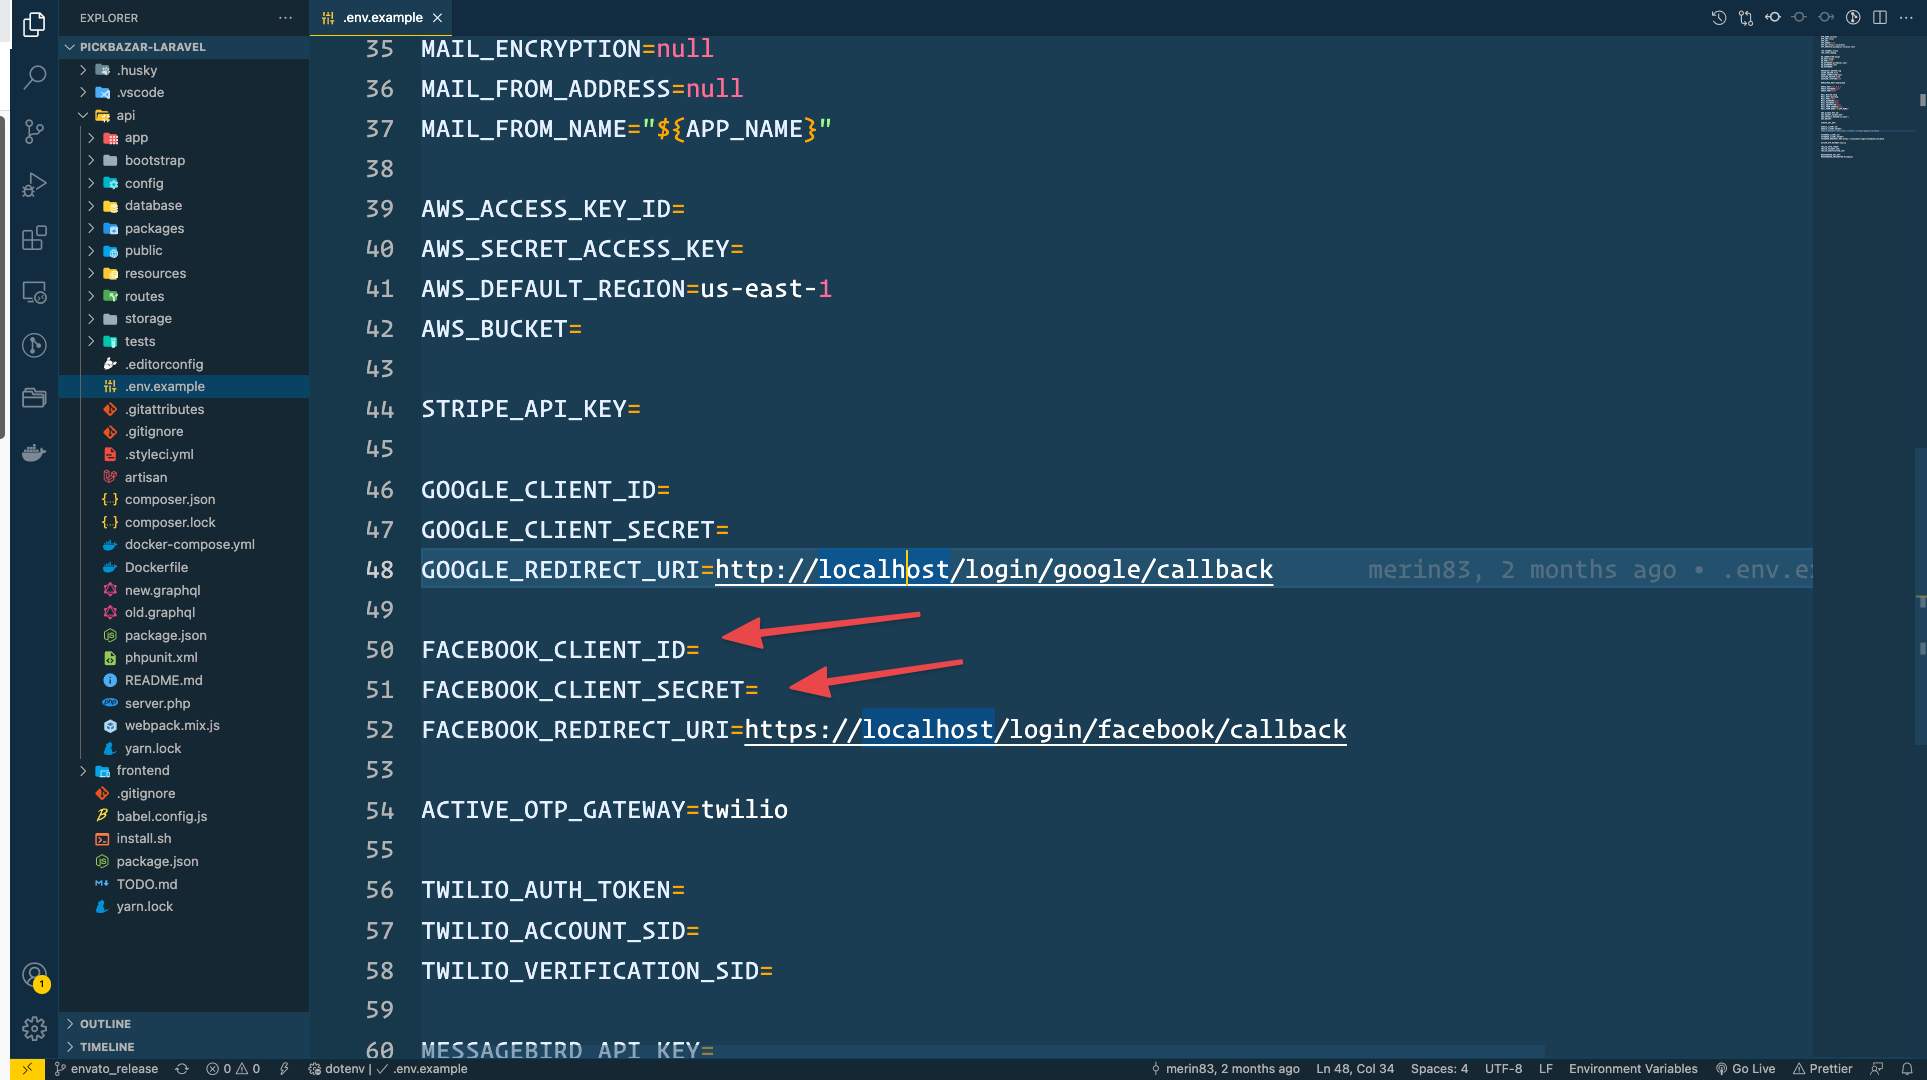
Then open
api/.envand add API ID and credentials,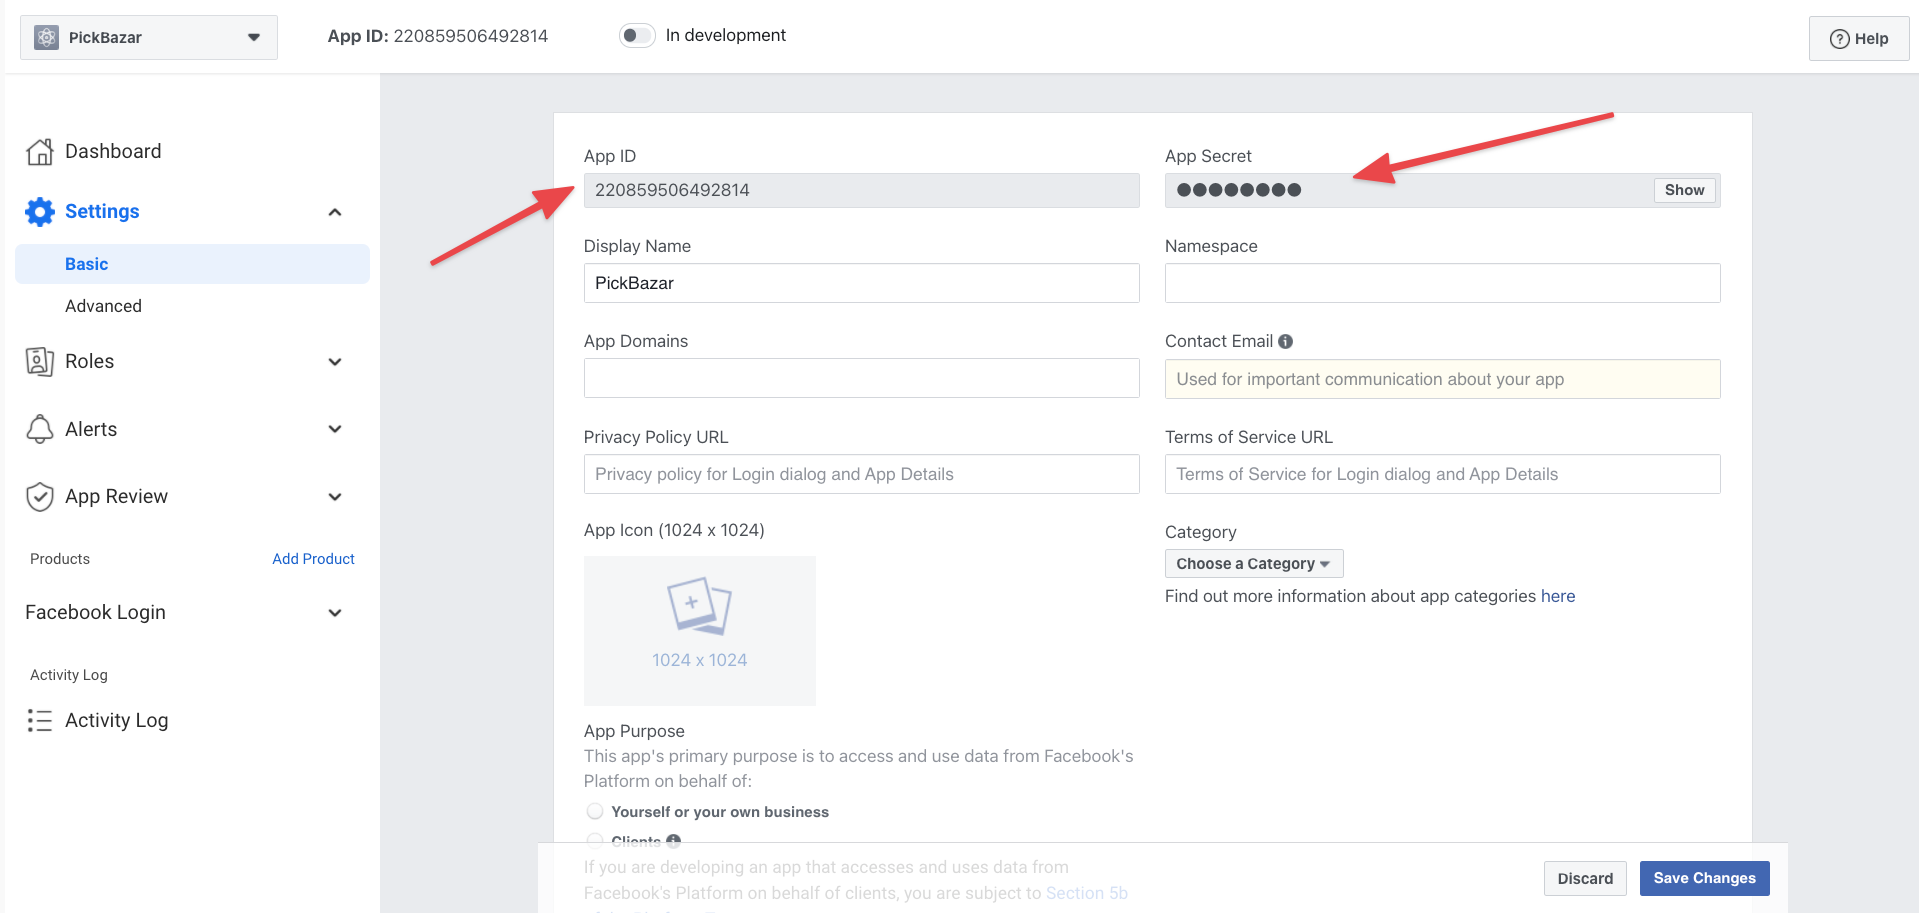
Then go to this
https://generate-secret.now.sh/32site and generate a secret key.Then open
shop/.envand add credentials toFACEBOOK_CLIENT_ID,FACEBOOK_CLIENT_SECRET,NEXTAUTH_URLalso add aSECRETcode.
NEXTAUTH_URL=YOUR_SHOP_DOMAINFACEBOOK_CLIENT_ID=FACEBOOK_CLIENT_SECRET=SECRET=
For Facebook, make sure you apply verification for the APP. Otherwise, the Facebook login won't work. (https://developers.facebook.com/docs/app-review/)
After configuration, make sure you rebuild your project using this command,
For REST API
yarn build:shop-restyarn build:admin-rest
And for GraphQL,
yarn build:shop-gqlyarn build:admin-gql