Multilingual
Enabling the multilanguage function is not advised if your website or business doesn't need multiple languages. Maintaining every language at once will become more challenging as a consequence. Make sure your website or business requires multilanguage functionality before turning it on.
Step 1: Enable Multilingual Feature
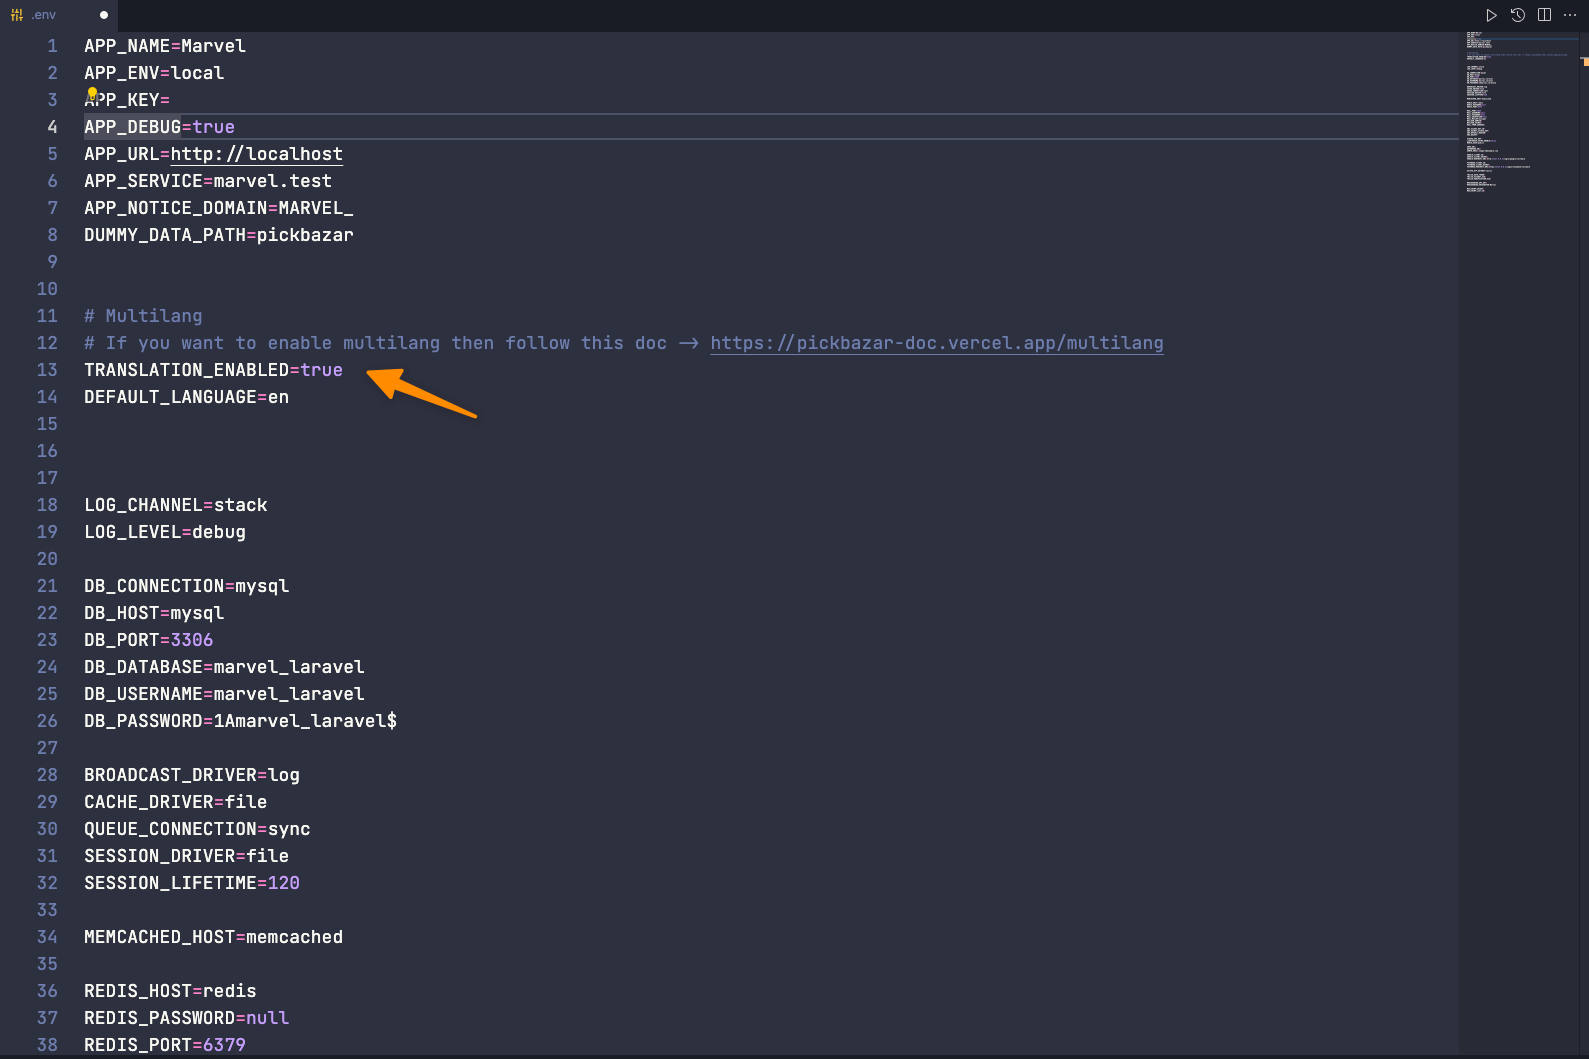
API:
At first open api -> .env and make true of ``
TRANSLATION_ENABLED=true
Admin
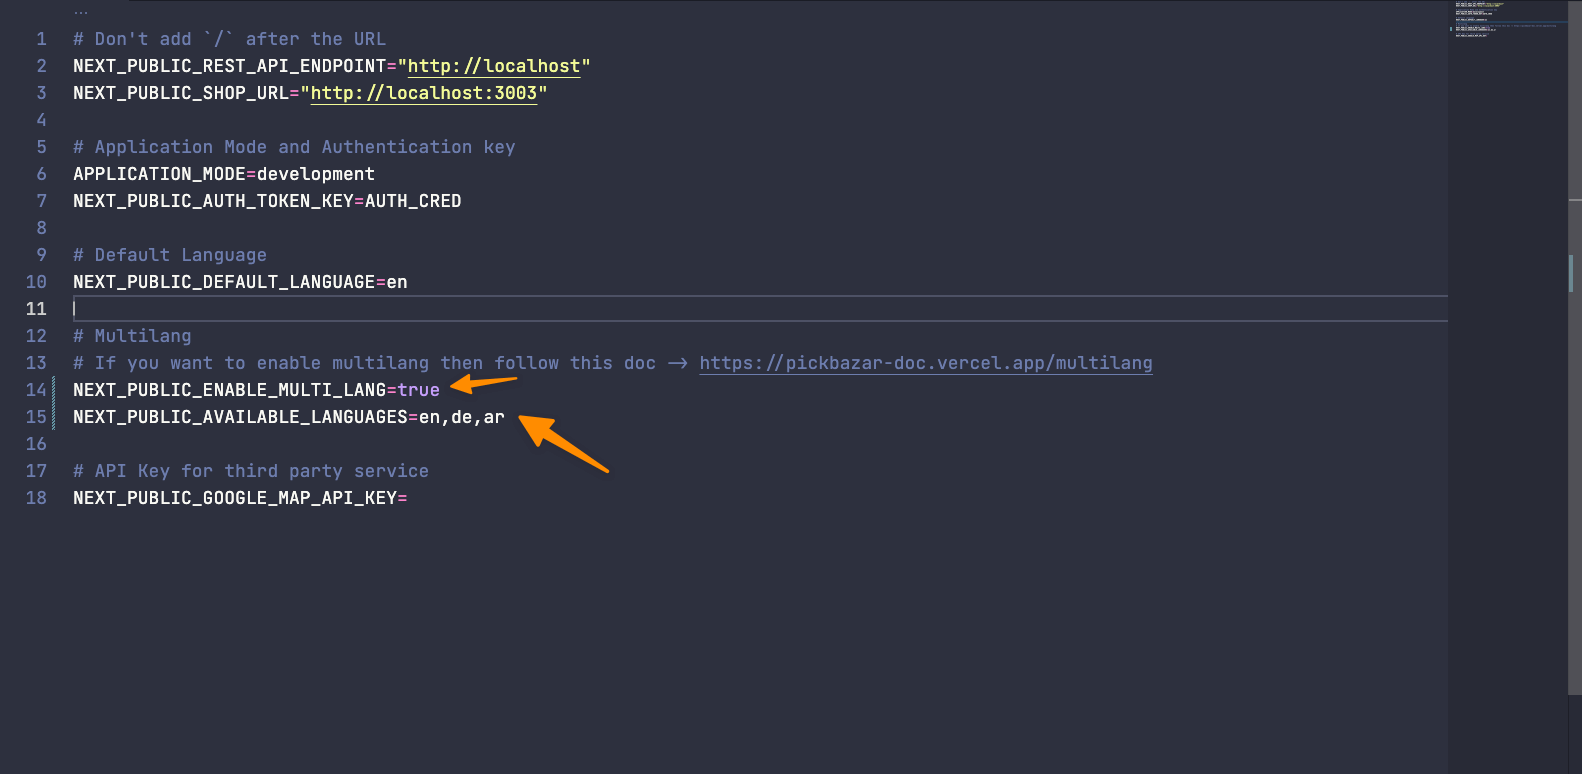
For admin,
update admin -> rest -> .env and update,
NEXT_PUBLIC_ENABLE_MULTI_LANG=true
And add available language to NEXT_PUBLIC_AVAILABLE_LANGUAGES with a comma separator.
For example, at your site, you want to support three languages, one is English, and the rest of the two will be german and Arabic. Then NEXT_PUBLIC_AVAILABLE_LANGUAGES will be like this,
NEXT_PUBLIC_AVAILABLE_LANGUAGES=en,de,ar
For graphql
.envwill be atadmin -> graphql -> .env
Shop
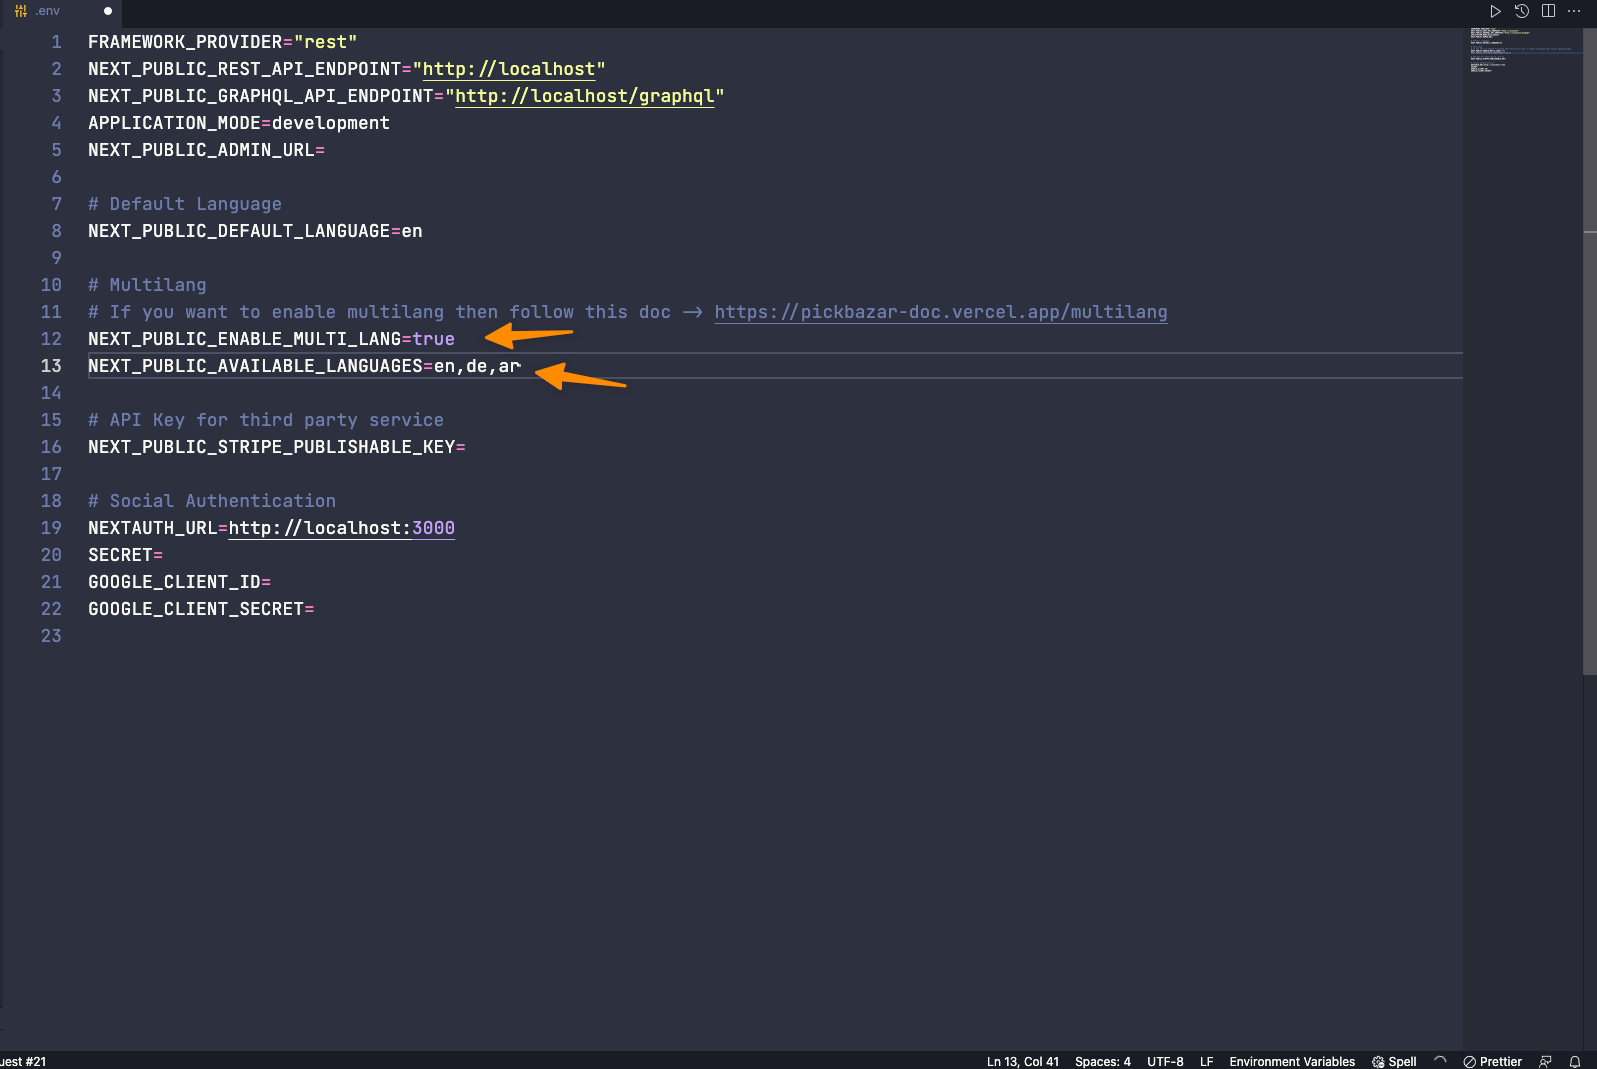
For shop, similarly,
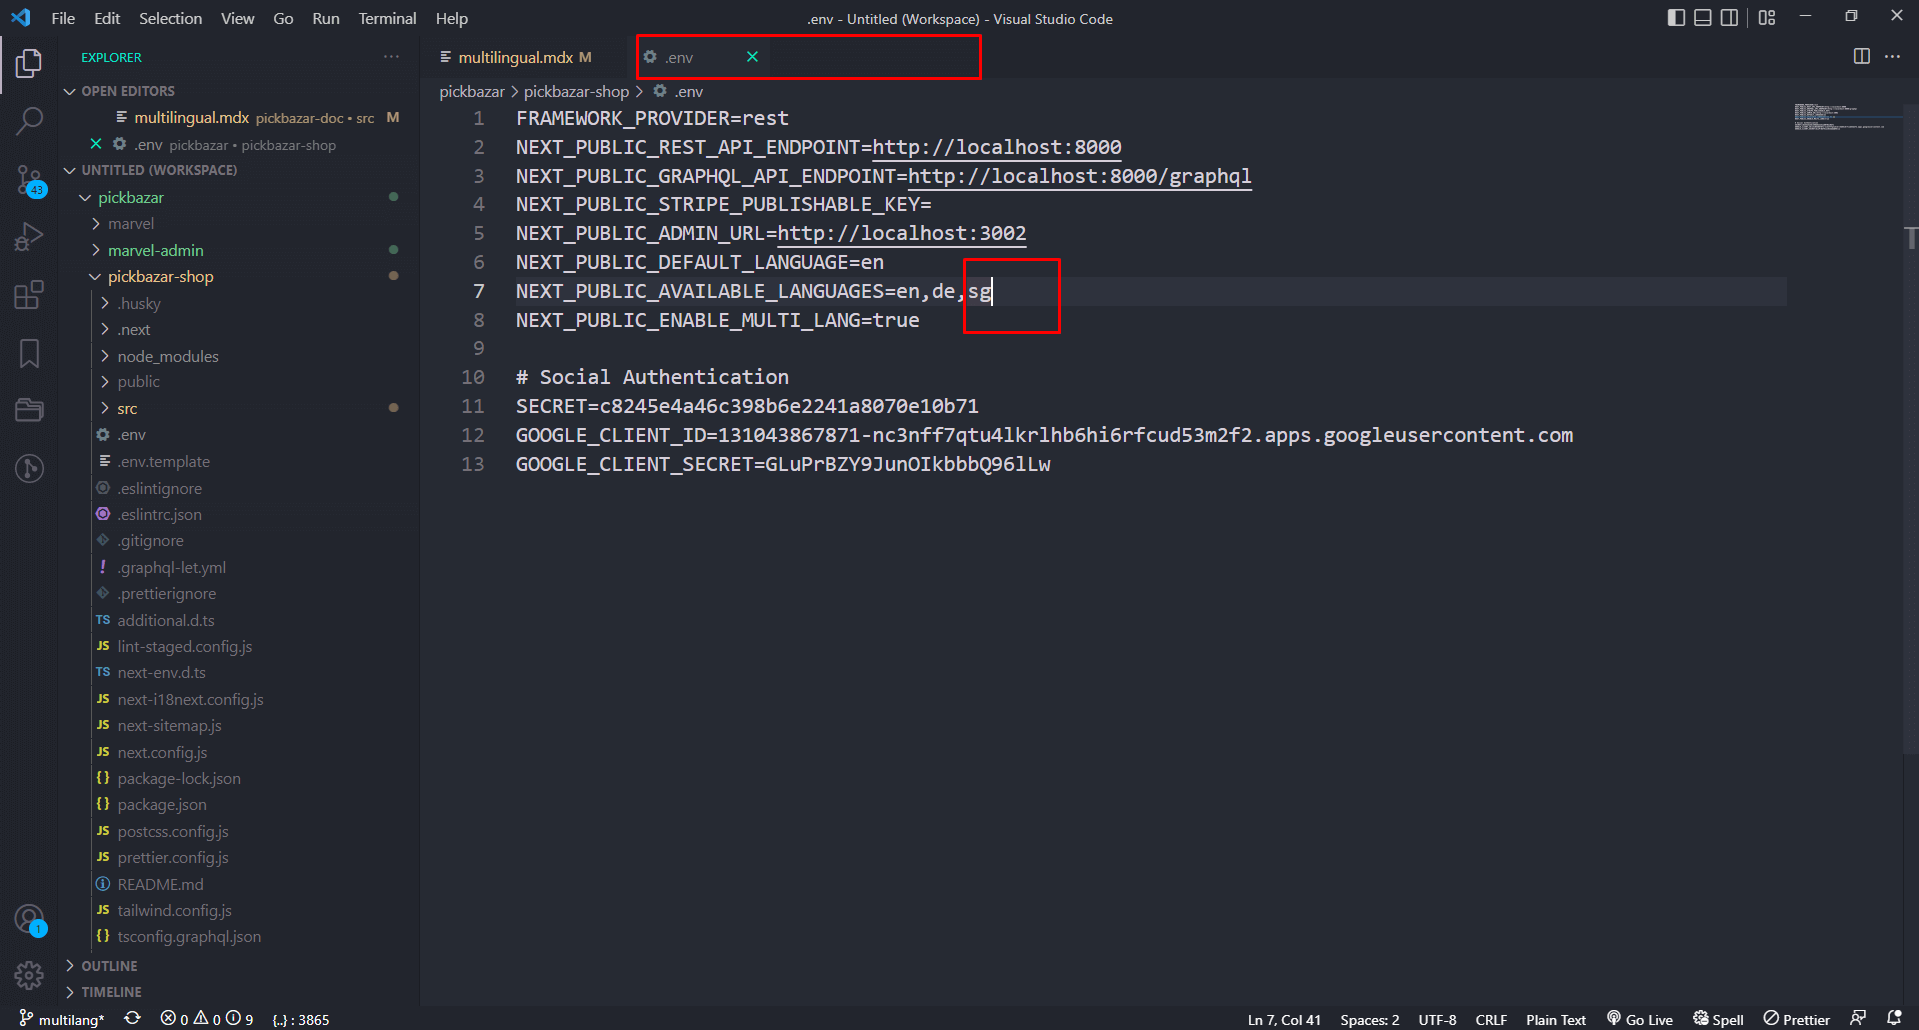
update shop -> .env and update,
NEXT_PUBLIC_ENABLE_MULTI_LANG=true
And add available language to NEXT_PUBLIC_AVAILABLE_LANGUAGES with a comma separator.
For example, at your site, you want to support three languages, one is English, and the rest of the two will be german and Arabic. Then NEXT_PUBLIC_AVAILABLE_LANGUAGES will be like this,
NEXT_PUBLIC_AVAILABLE_LANGUAGES=en,de,ar
After that, if you already host your site on server then make sure you redeploy the API and rebuild the frontend,
https://pickbazar-doc.vercel.app/faq#how-to-rebuild-the-project
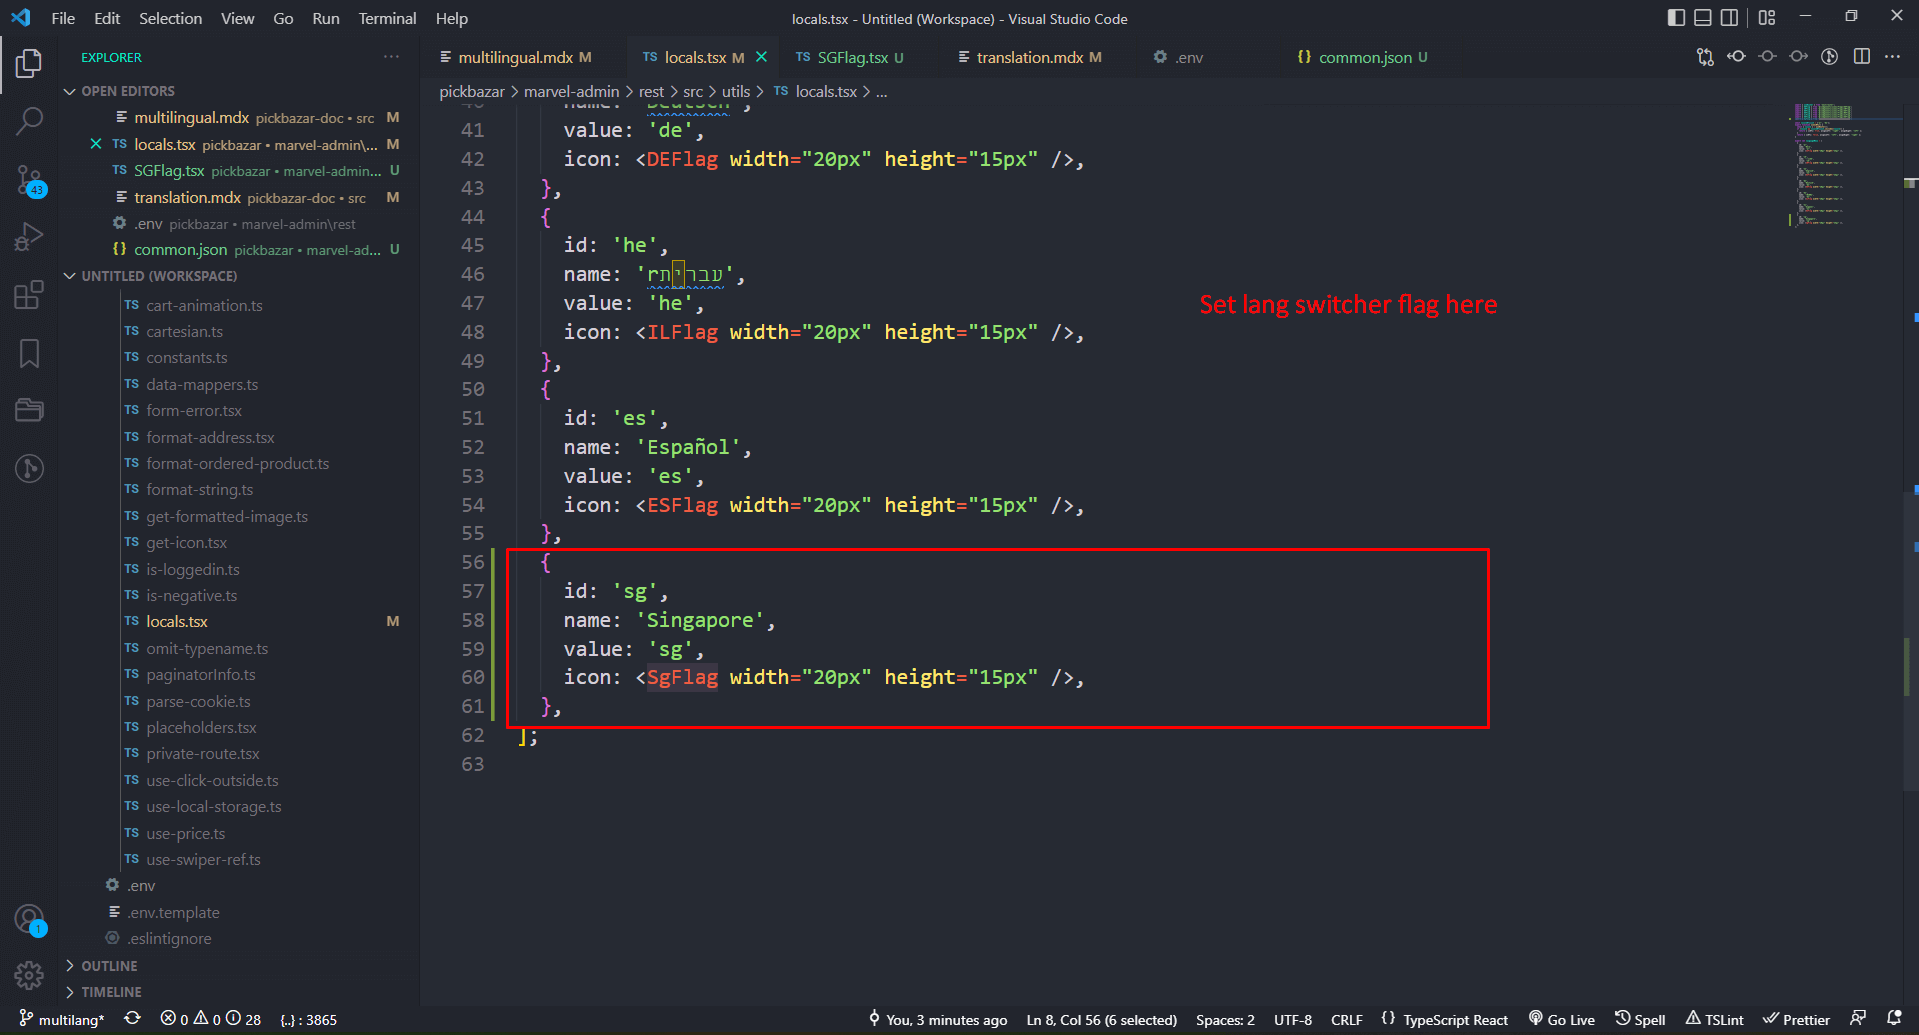
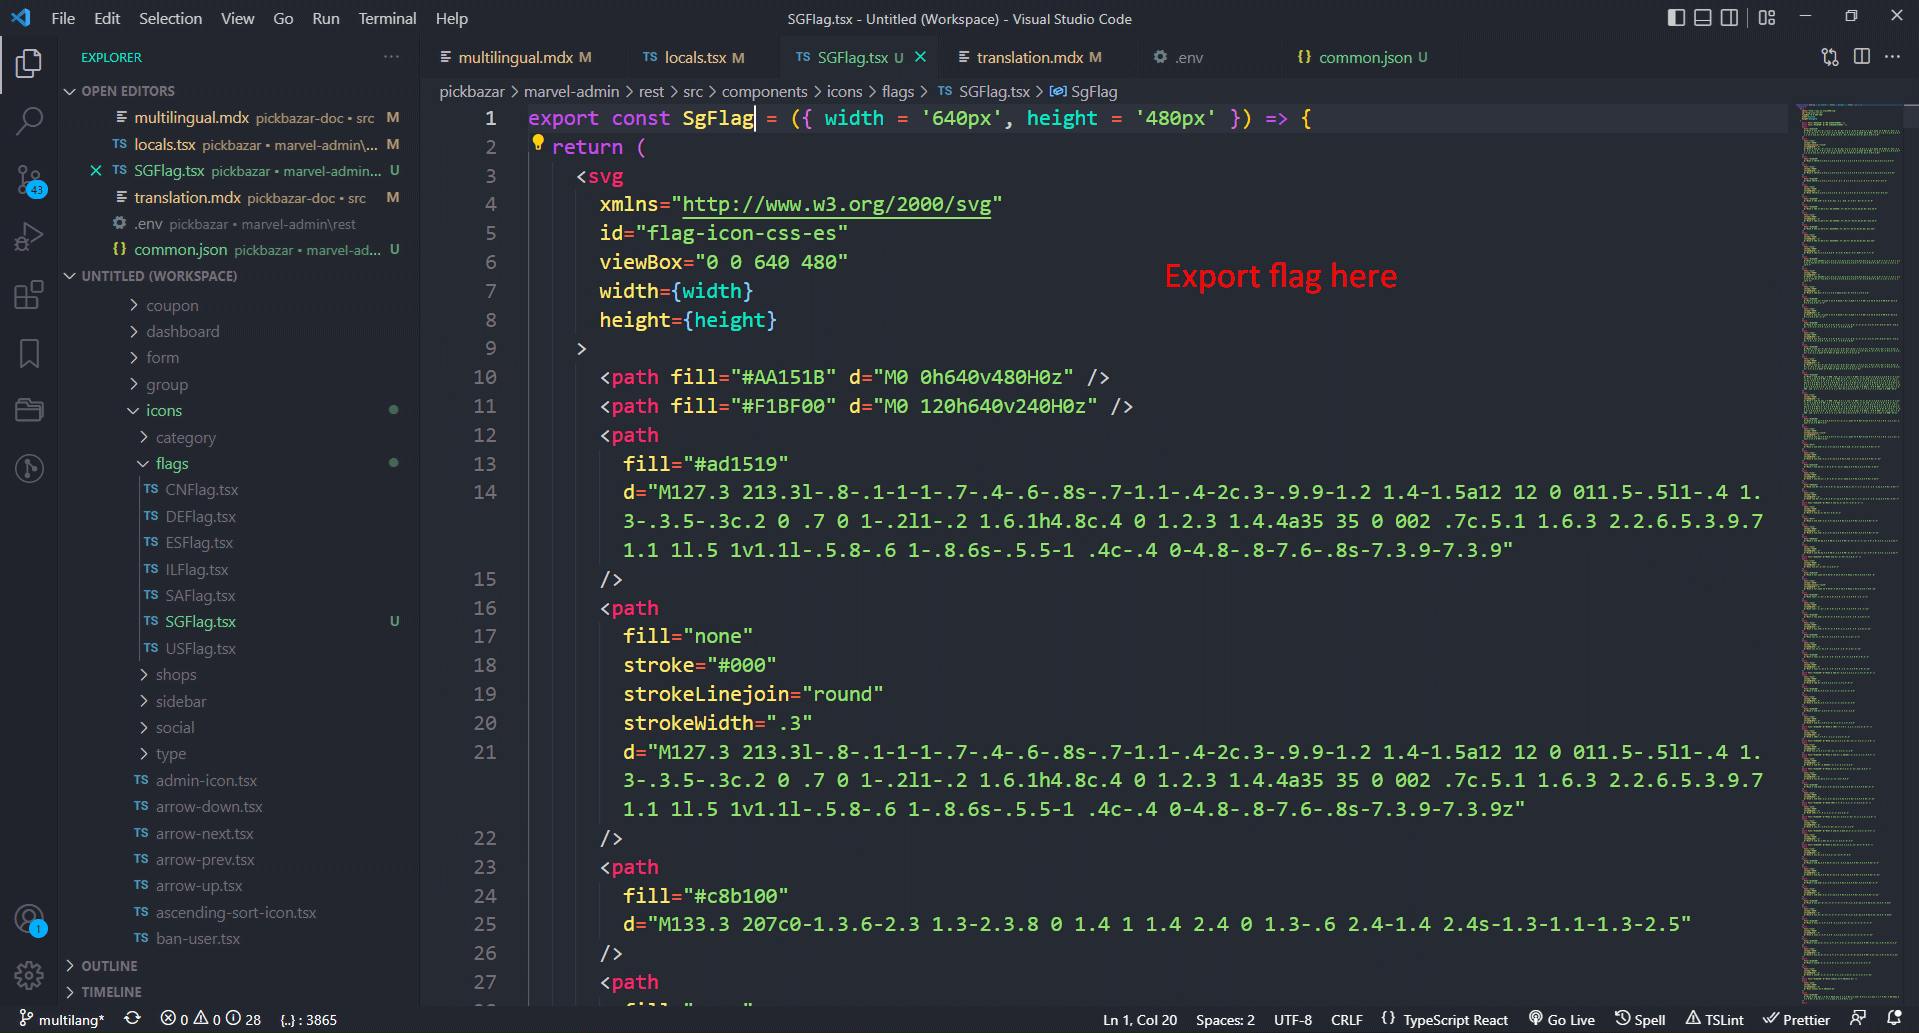
Step 2: How to add new language in admin?
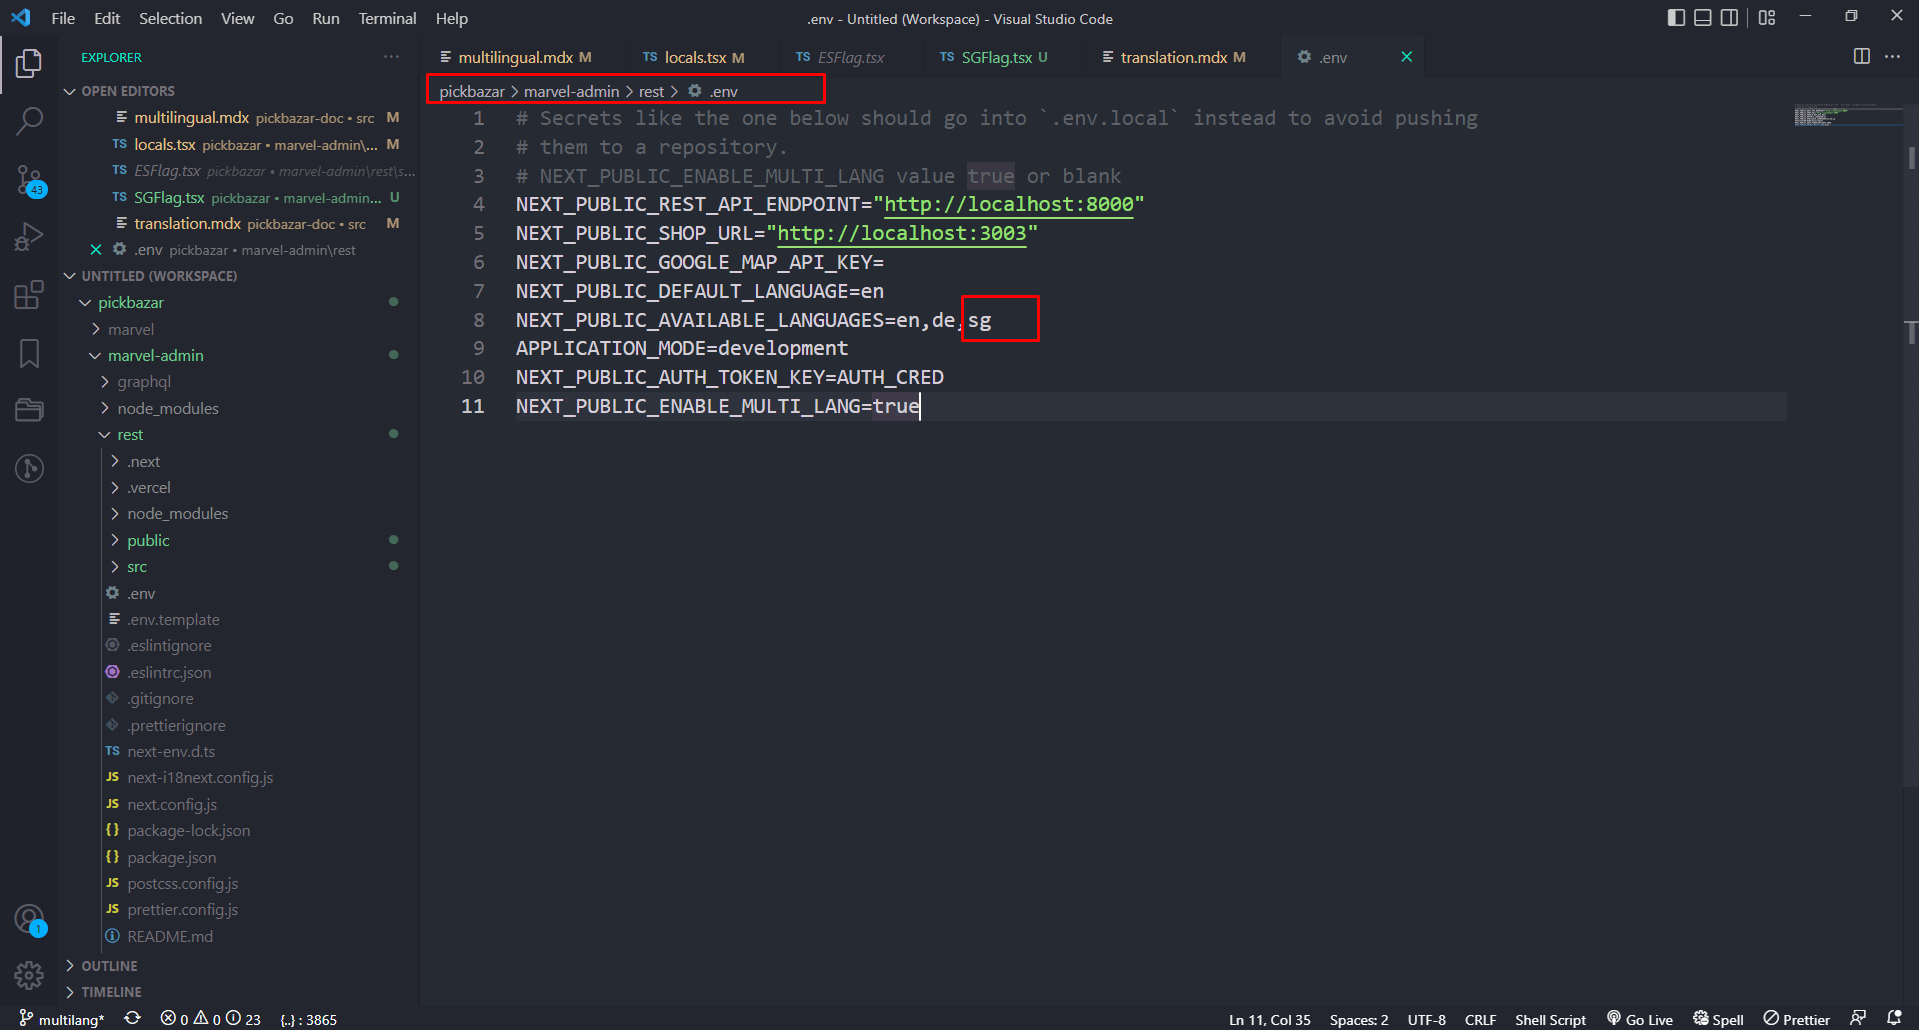
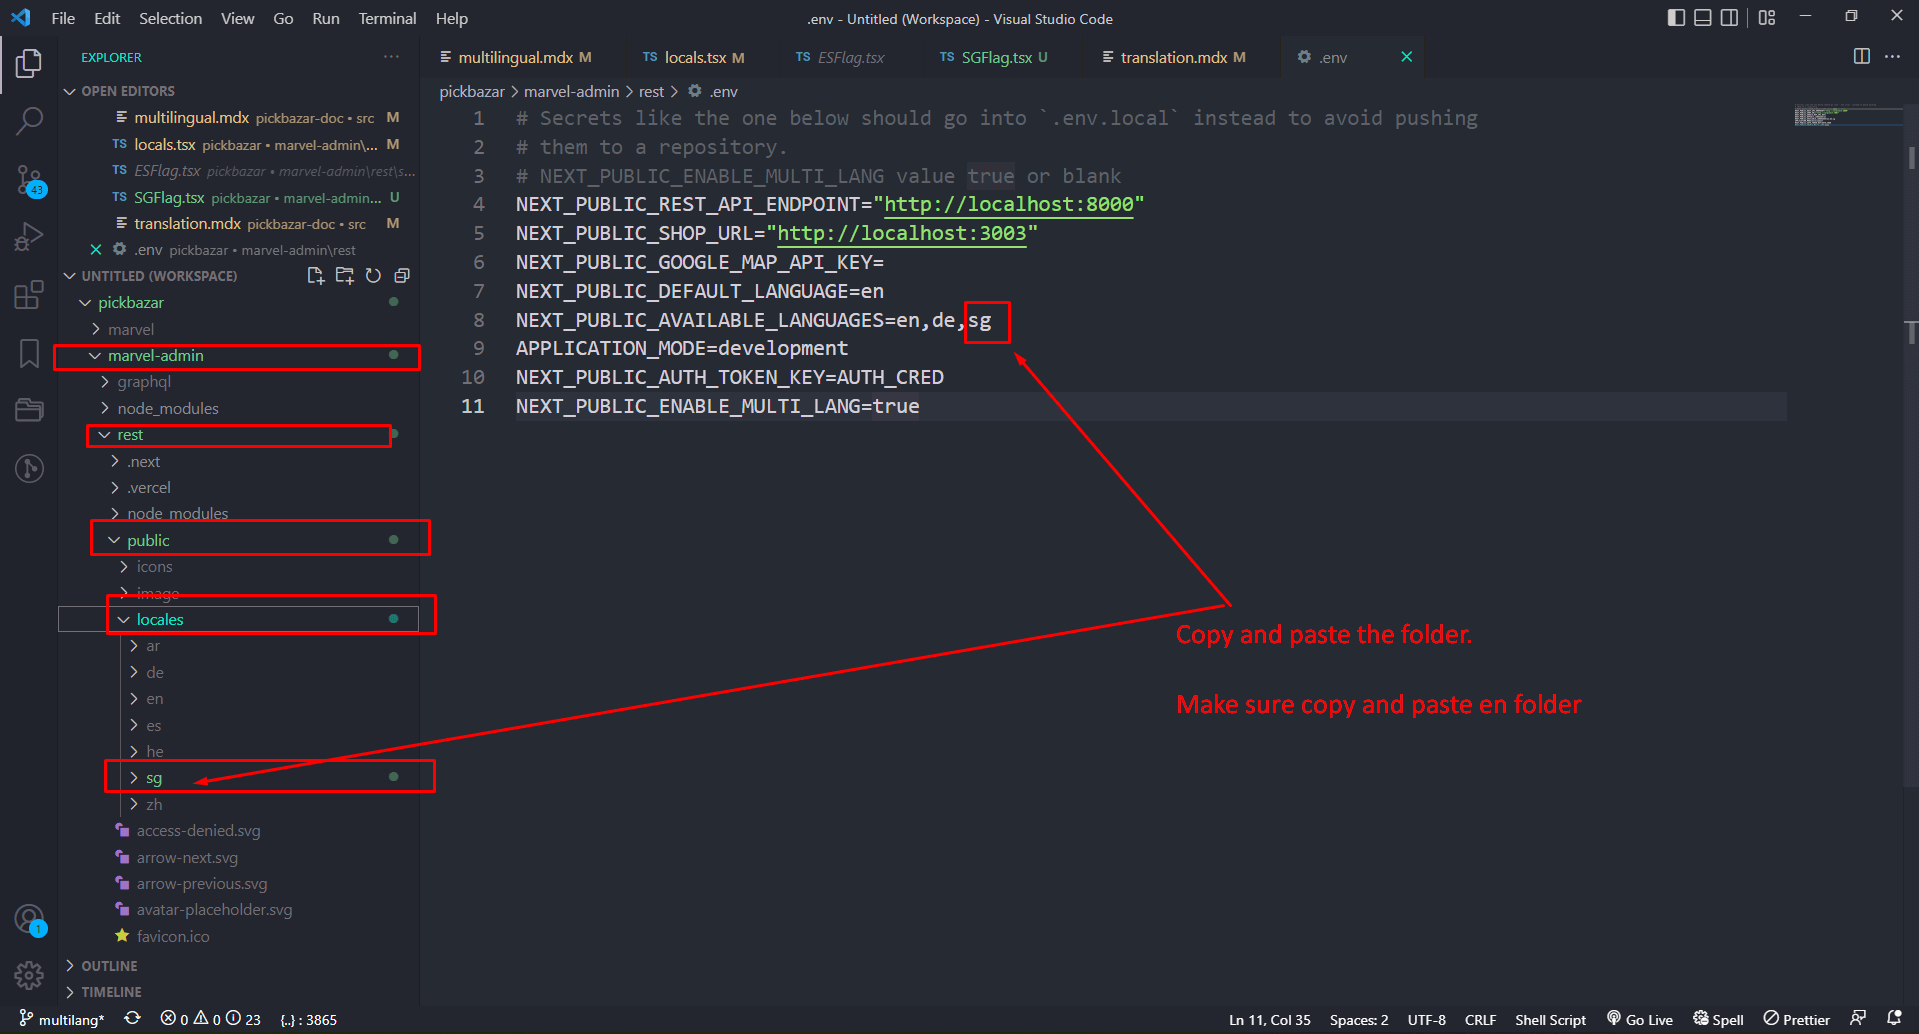
File Location
admin\rest\public\locales\sg\banner.json
File Location
admin\rest\src\utils\locals.tsx
File Location
admin\rest\src\components\icons\flags\
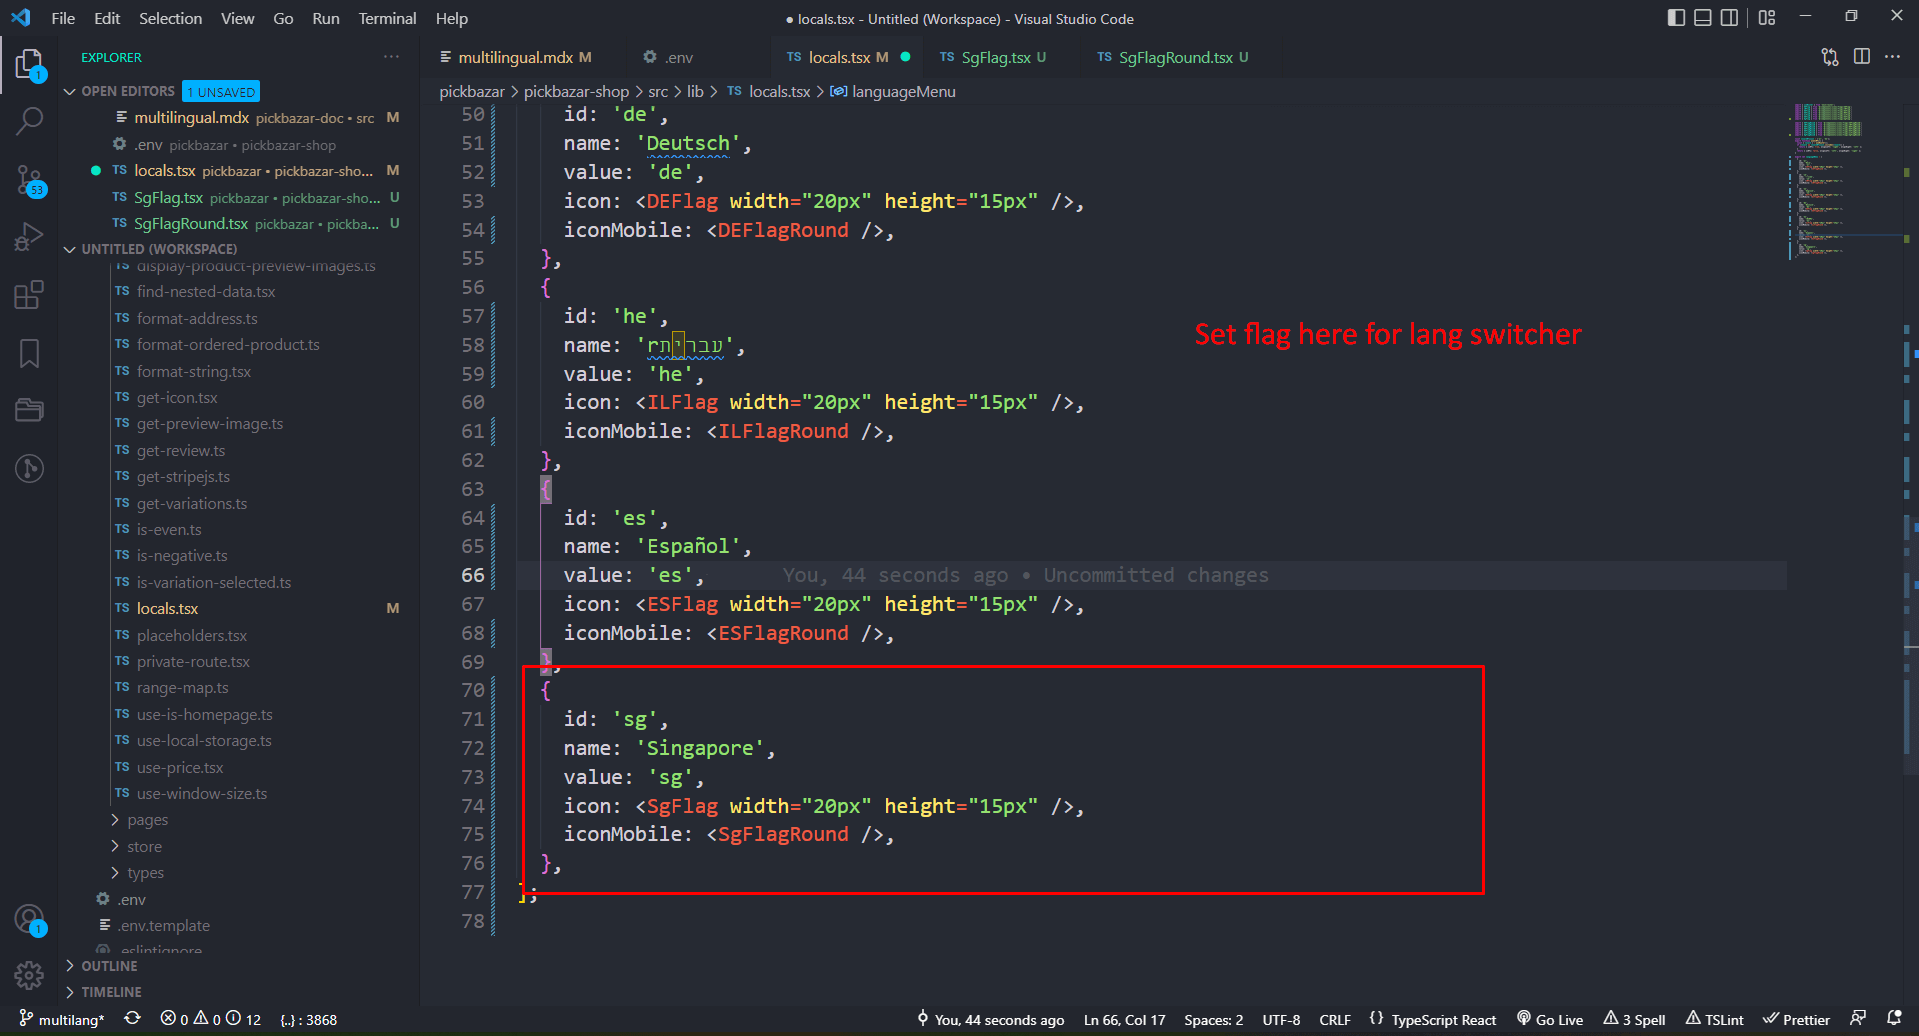
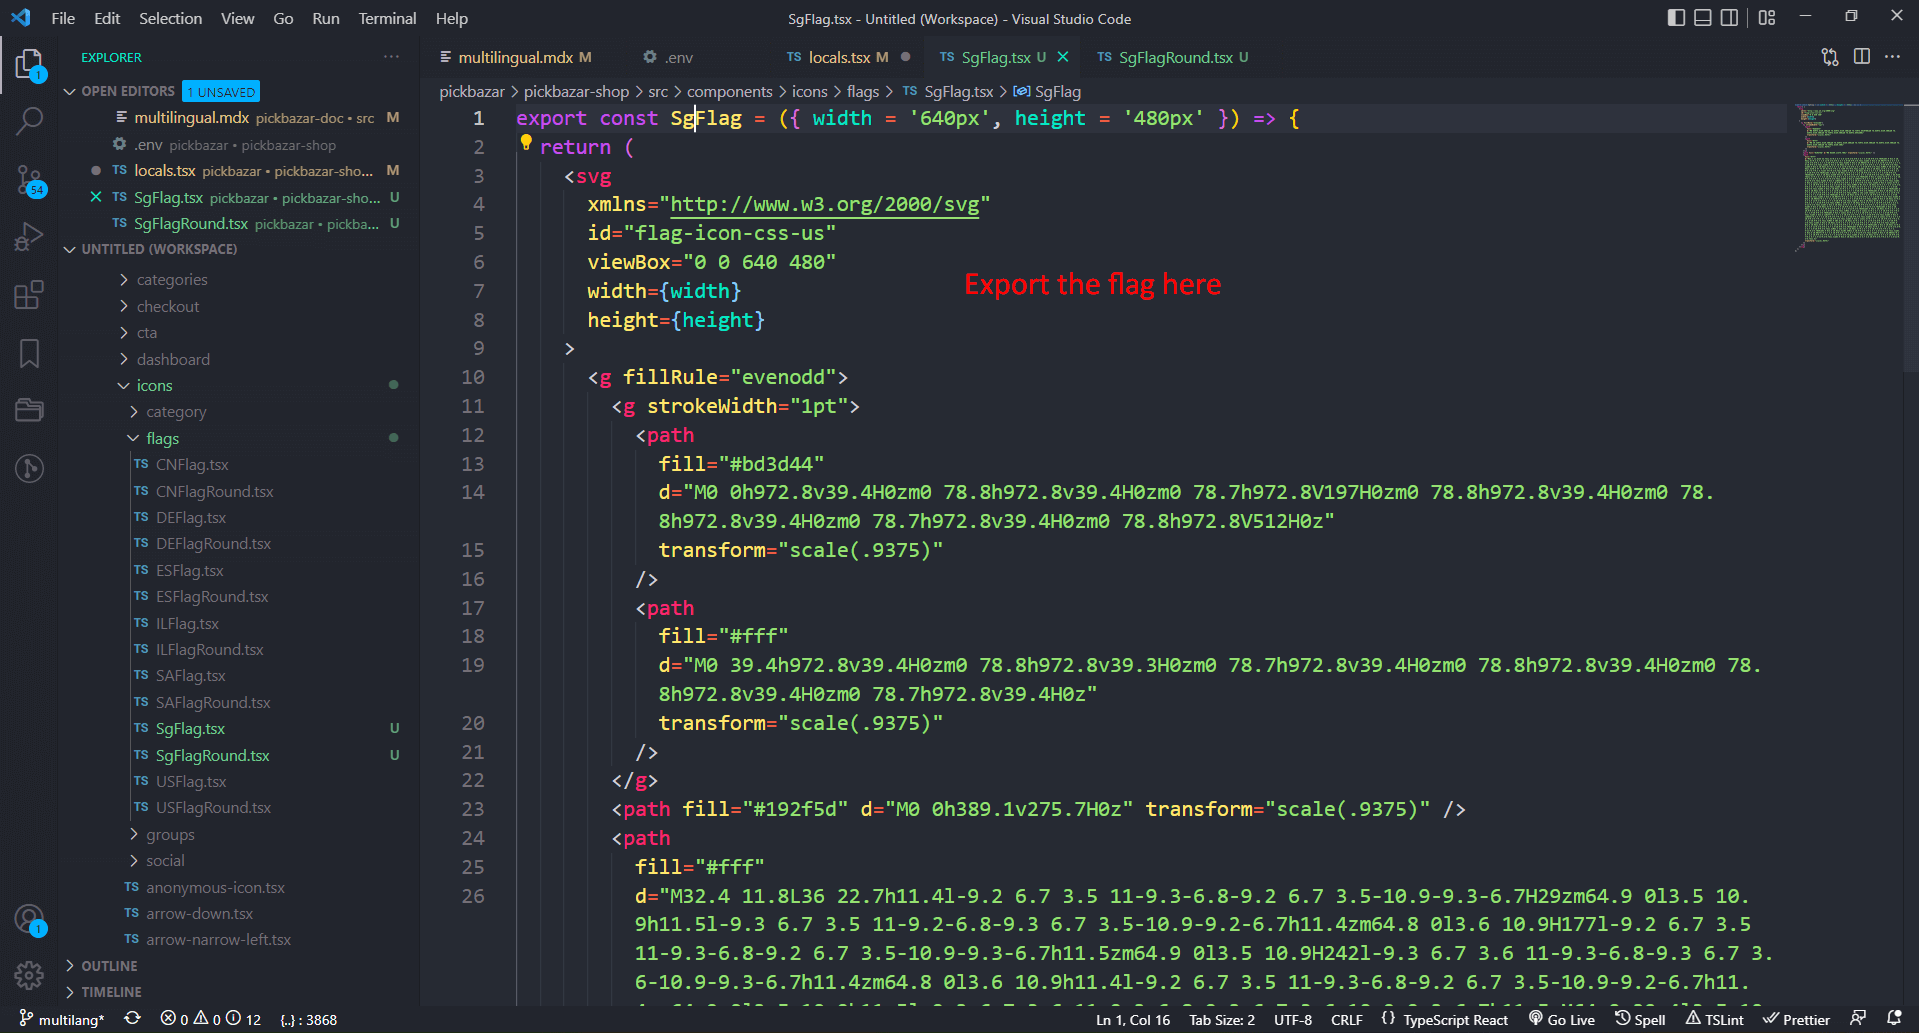
Step 3: How to add new language in shop?

File Location
shop\public\locales\sg\banner.json
File Location
shop\src\lib\locals.tsx
File Location
shop\src\components\icons\flags\
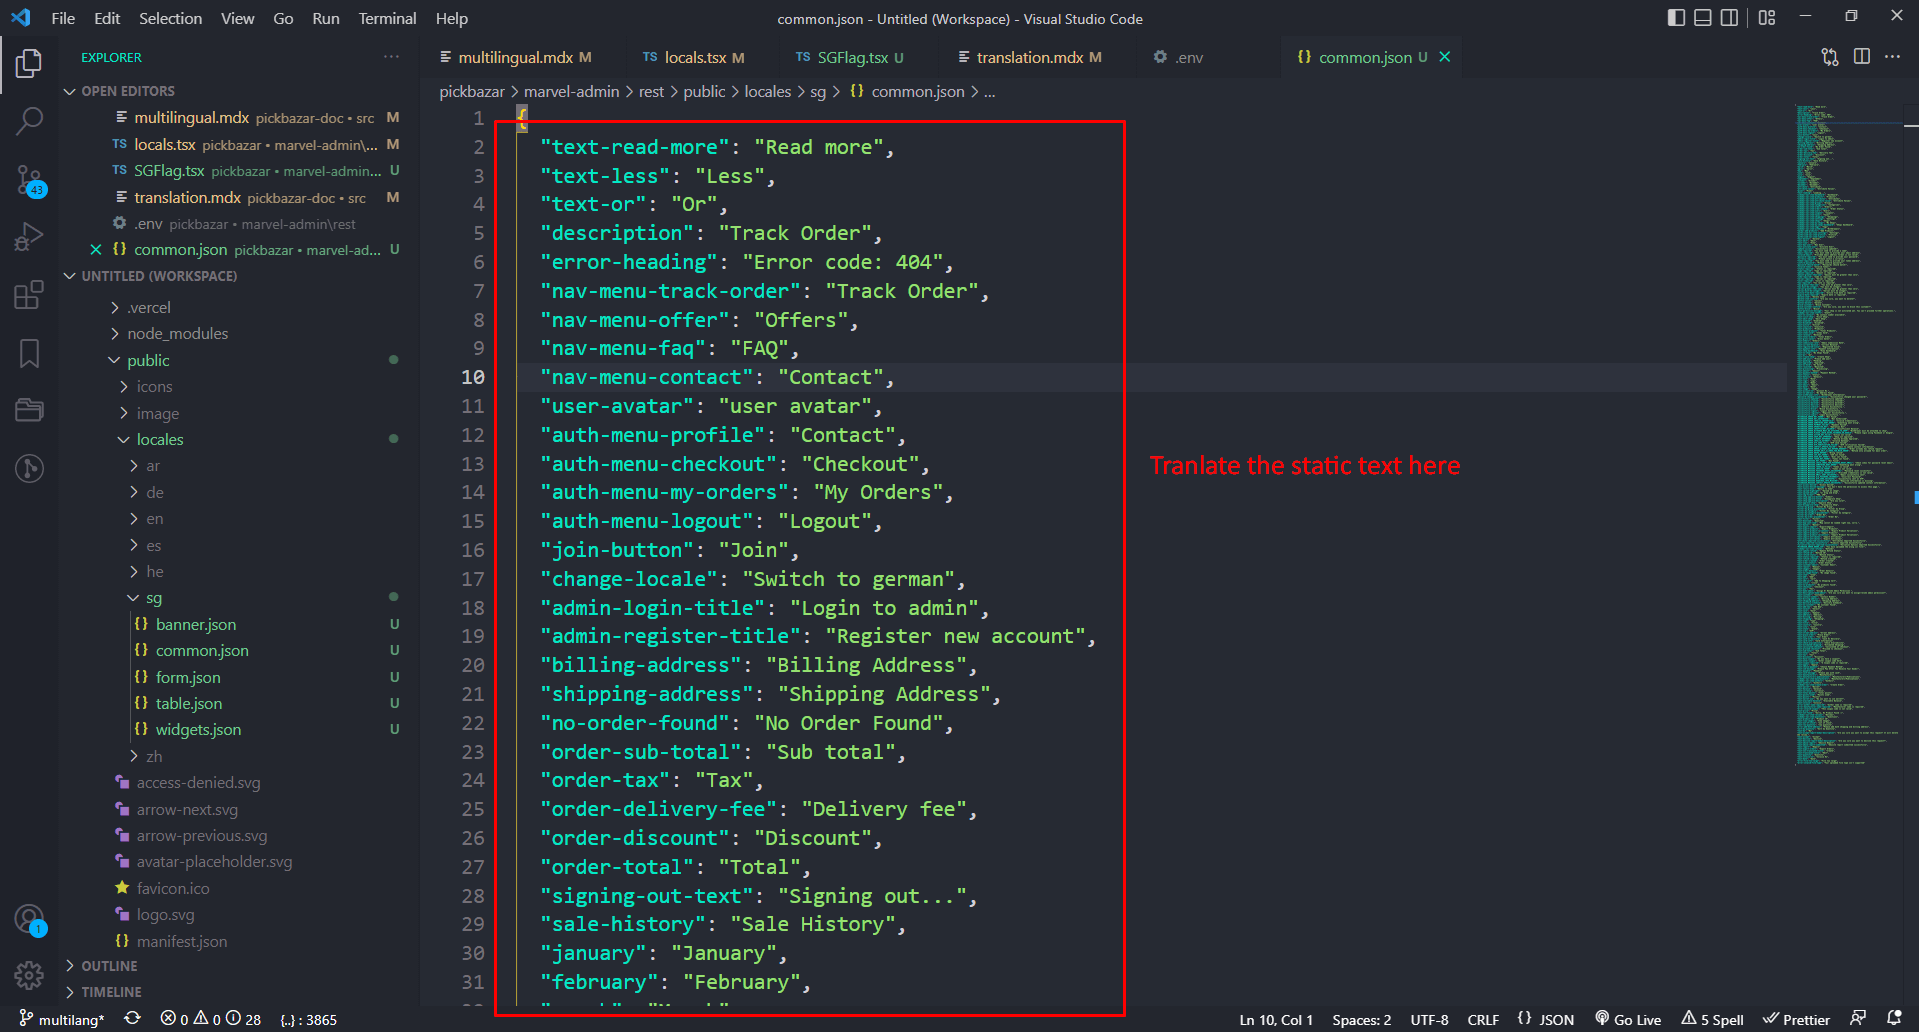
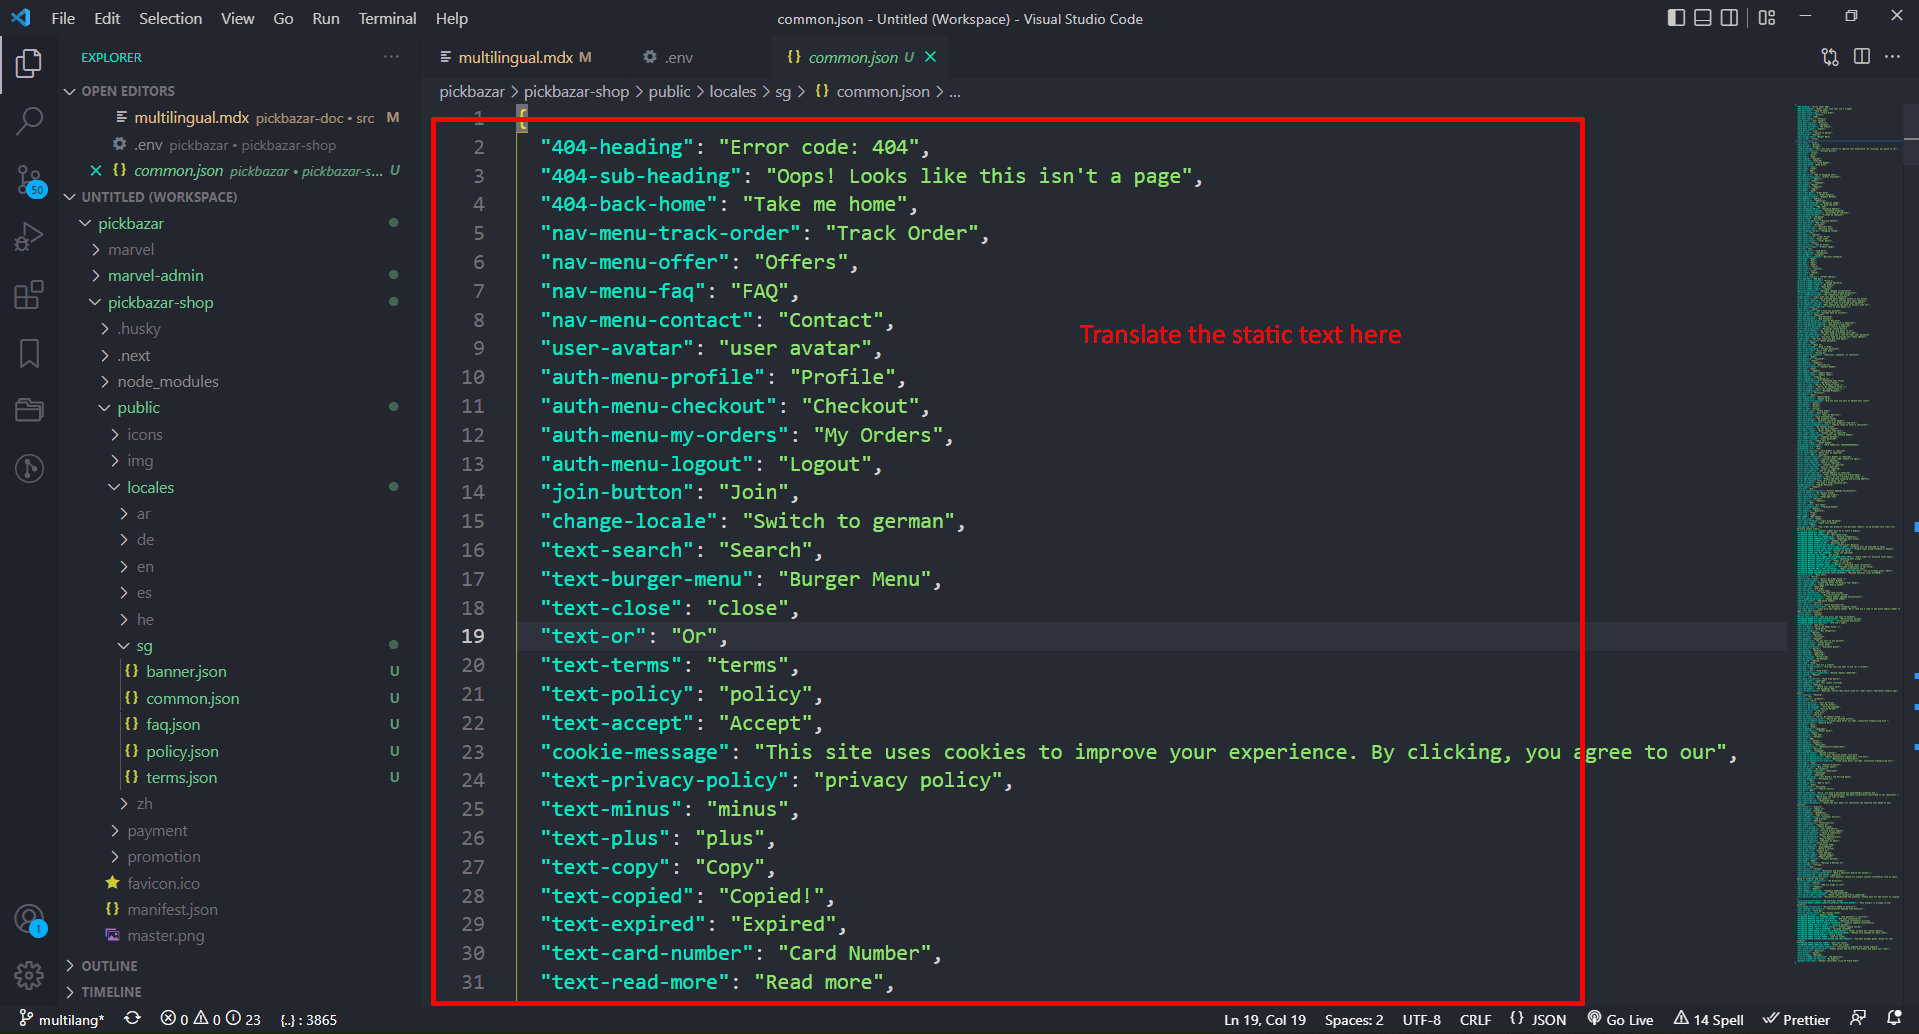
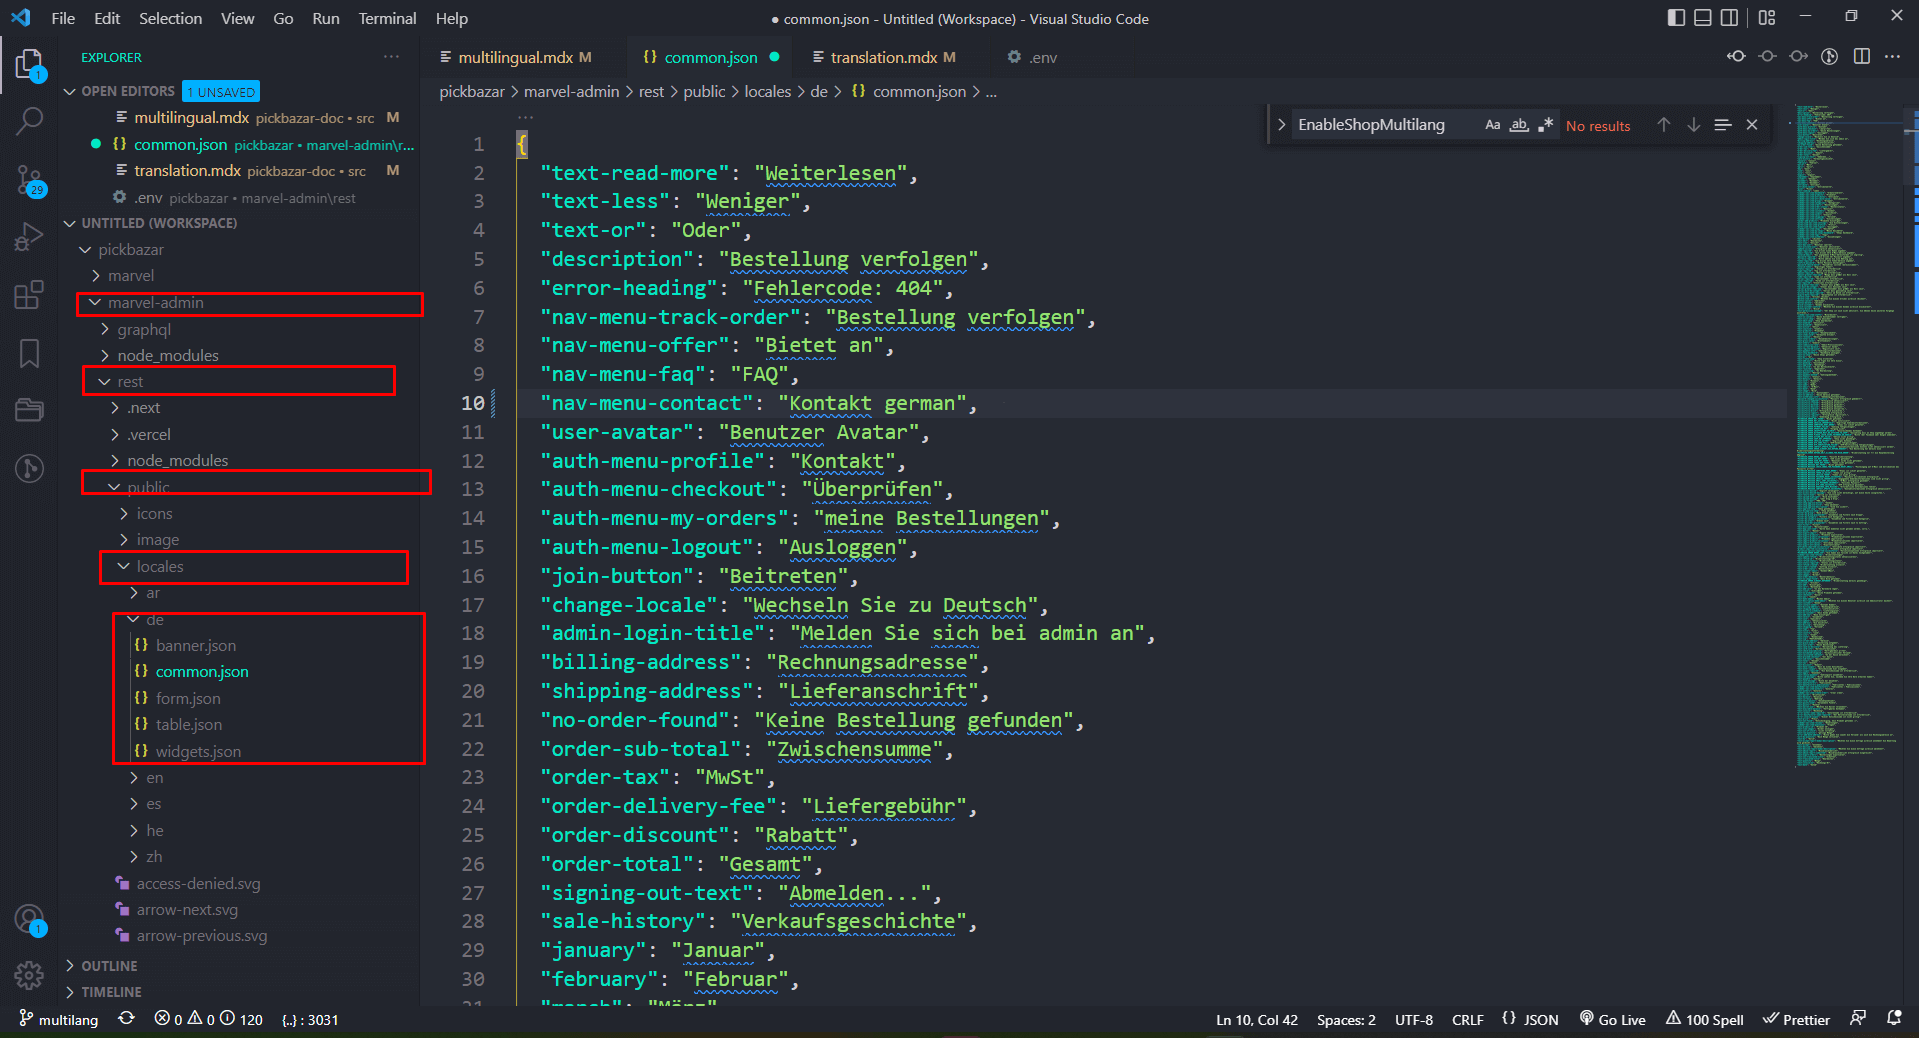
Step 3: How to translate static content for admin?
File Location
admin\rest\public\locales\de\common.json
Step 4: How to translate static content for shop?
File Location
shop\rest\public\locales\de\common.json

Step 5: How to translate content?
Now after successfully configuring the Multilingual follow this procedure to translate your existing content to another one.
Data Type
Now before starting the translation, you've to understand about dependent and non-dependent data at pickbazar.
On Pickbazar, some data are considered dependent data since they are needed to construct other data, whereas independent data are called non-dependent data.
For example,
To create product types, categories, tags, author, manufacture, attributes, etc are required.
And for coupons or settings, no prior data is required.
Translating types, categories, tags, authors, manufacturers, and characteristics is now a must for translating a product. Without it, you won't be able to add categories or kinds while translating a product since such translations haven't been completed yet.
For your convenience, we have created a work sequence for you. Simply adhere to this sequence, and the procedure will be quite simple.
1. Settings2. Order Status3. Group4. Author5. Manufacturer6. Tags7. Categories8. Attributes9. Products
Translate Settings
If you want to translate the settings,
just go to your admin -> settings
It'll open default language settings.
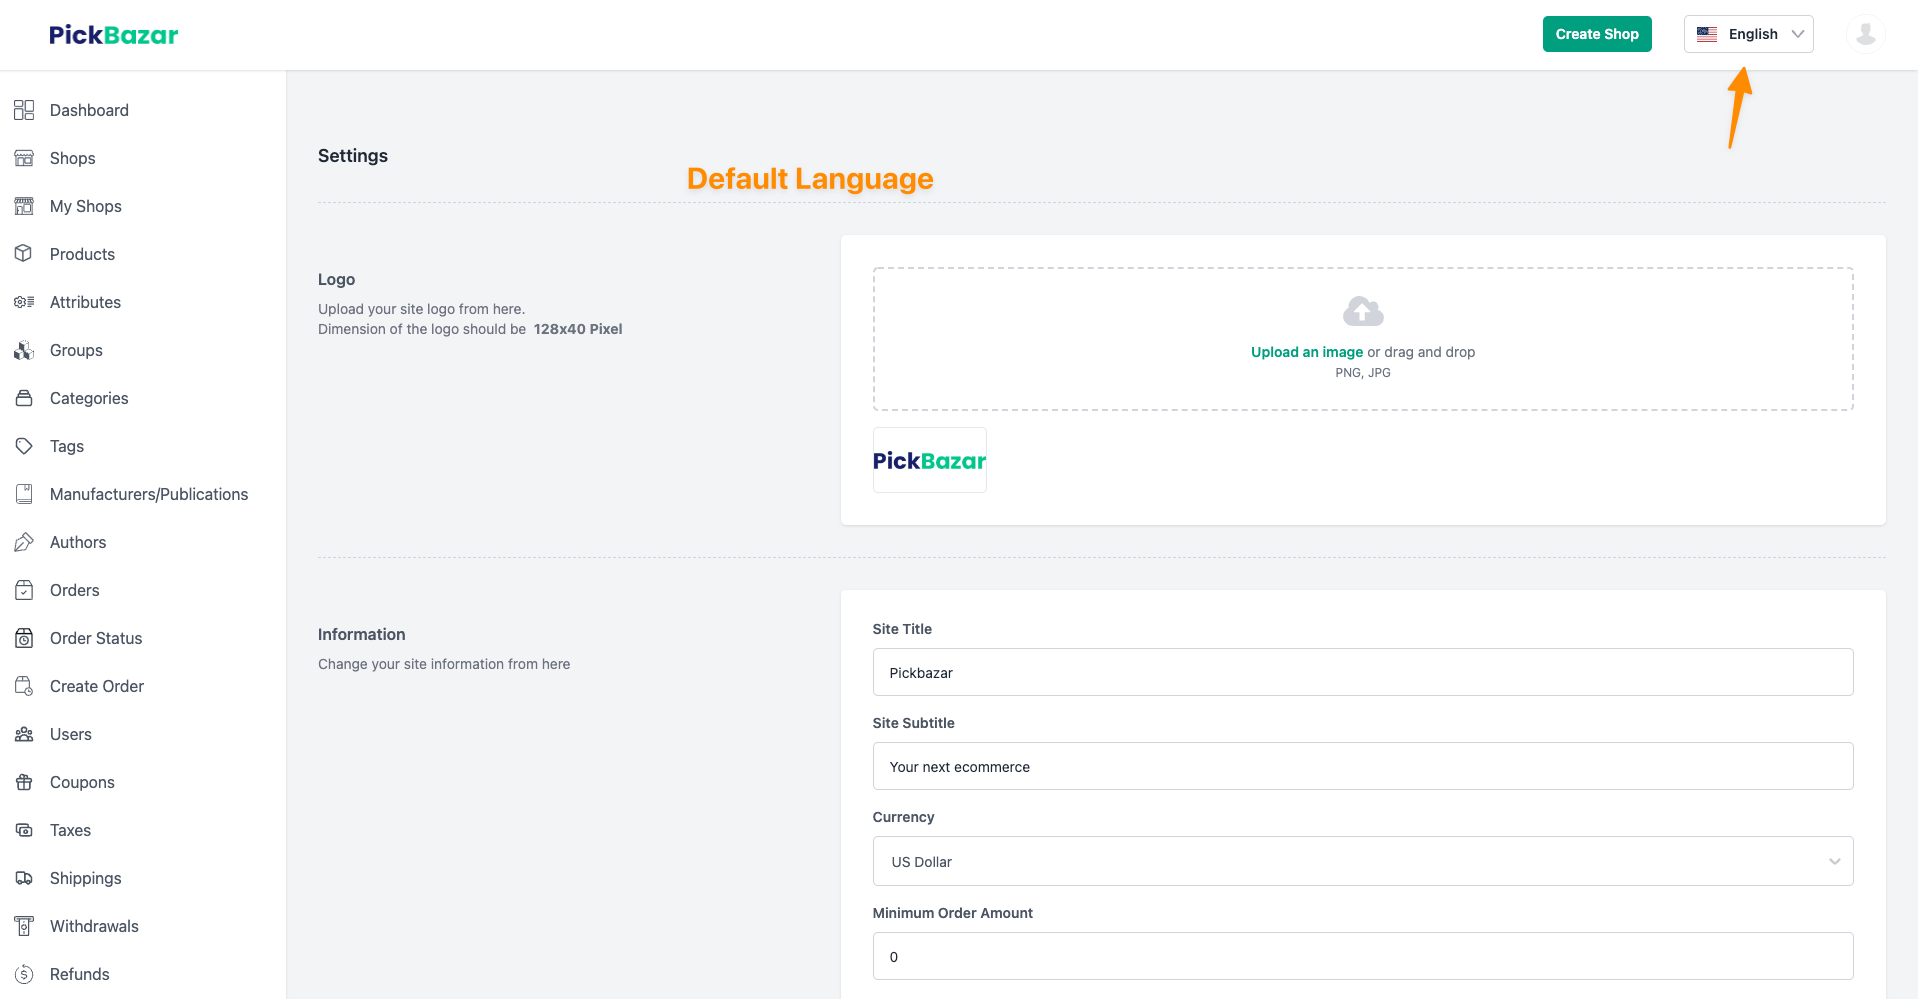
Then change the language from the navbar, and the settings page will be redirected,

Then update the text of the settings page and click save.
Translate Order Status
To translate the order status,
- Go to the order status page from the admin
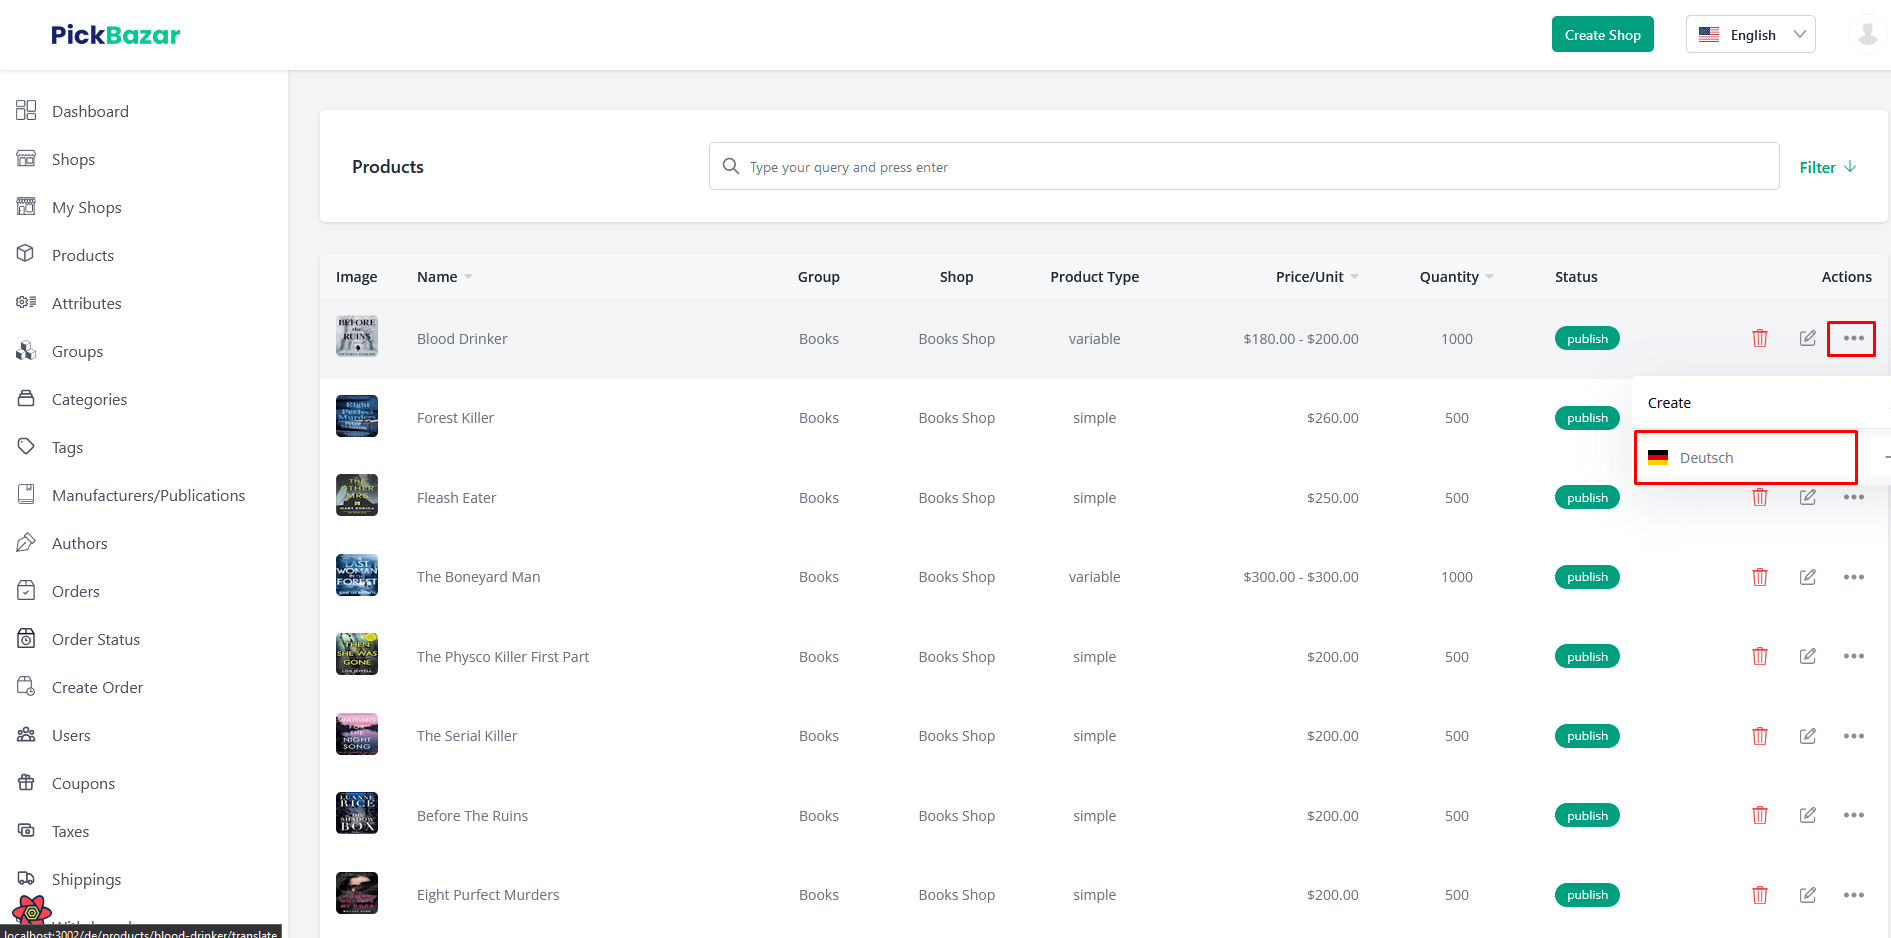
- Then click
Three Dotand Create translate,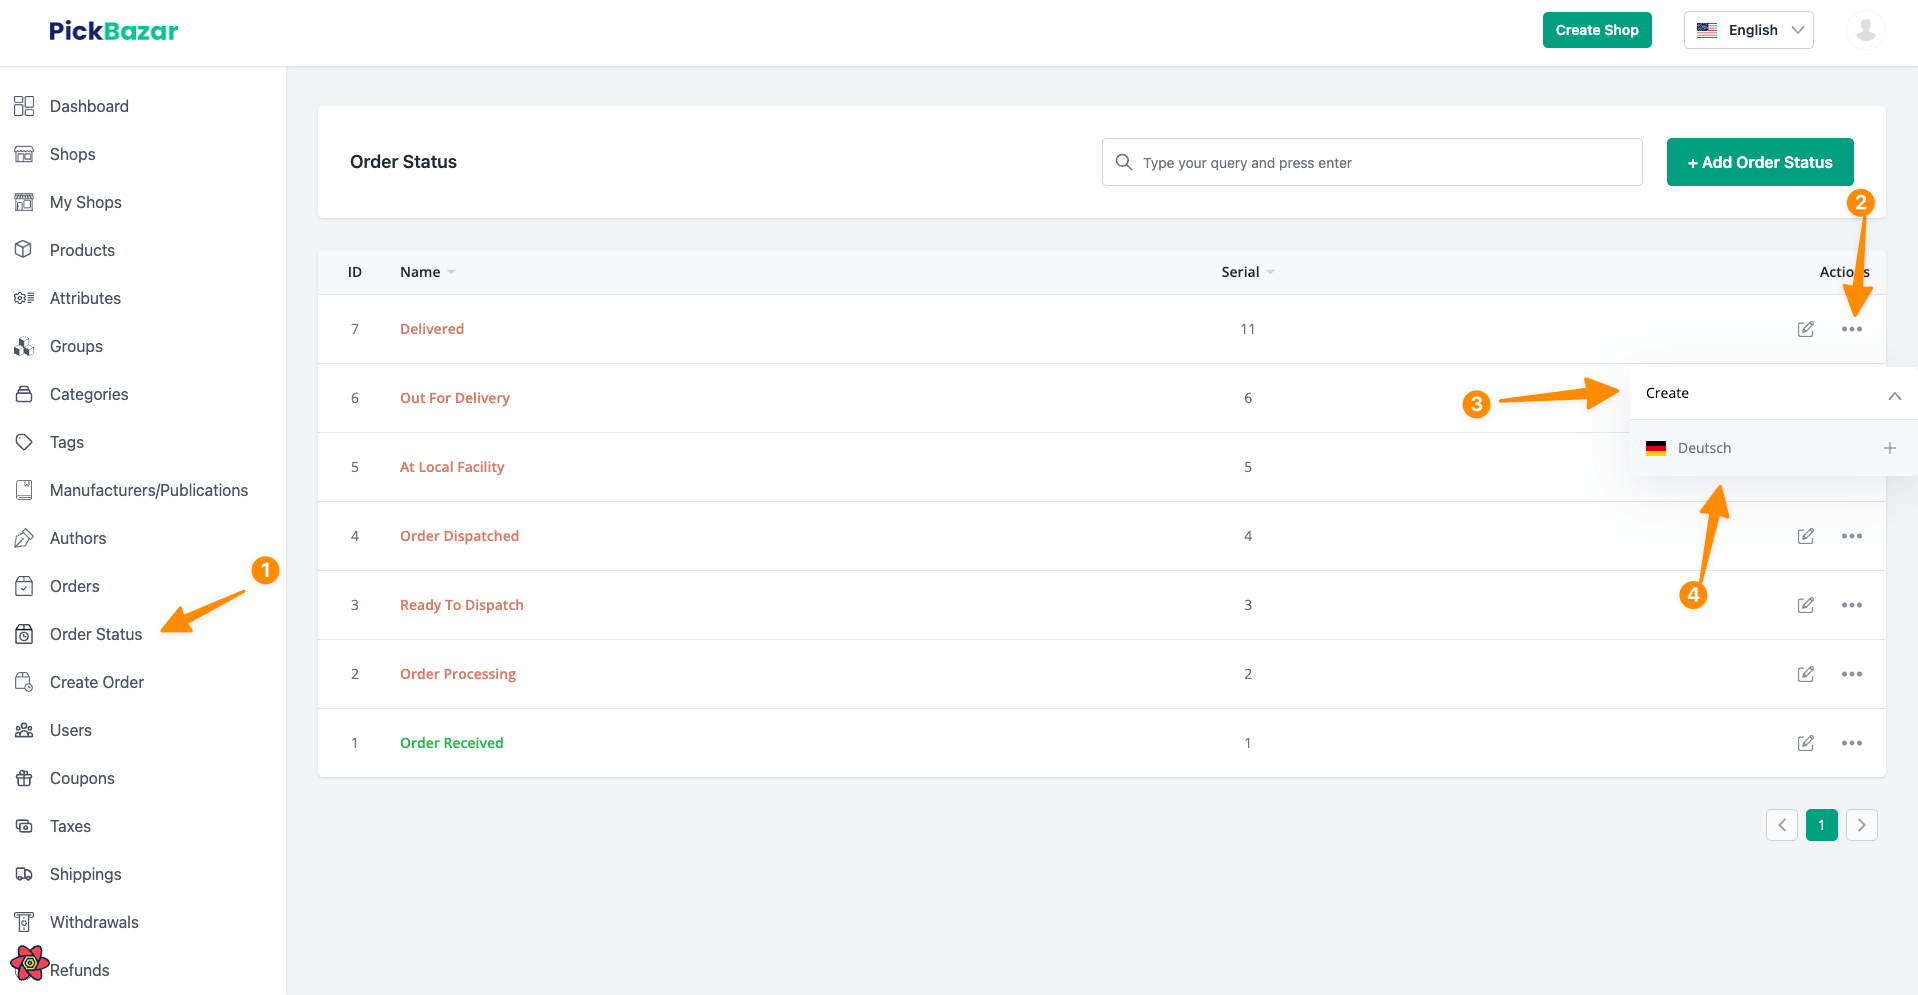
- Then translate the text and click Save.
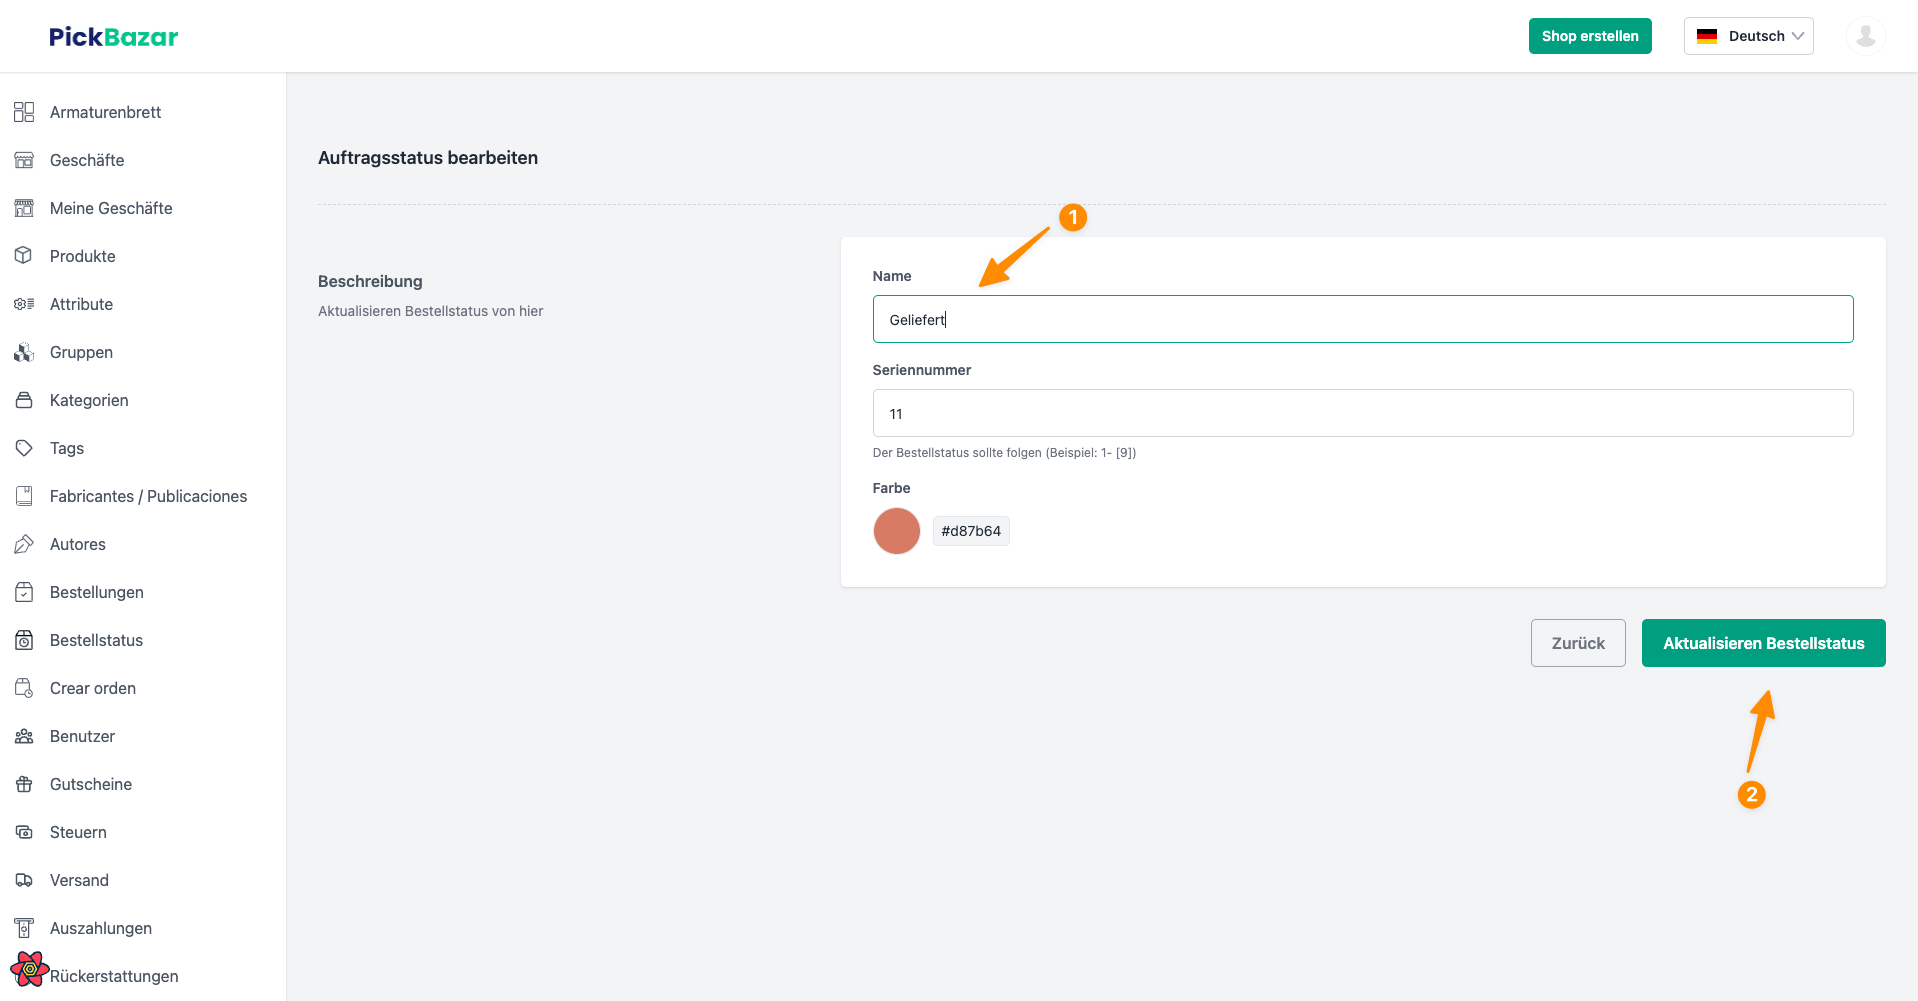
Similarly, translate all the order status.
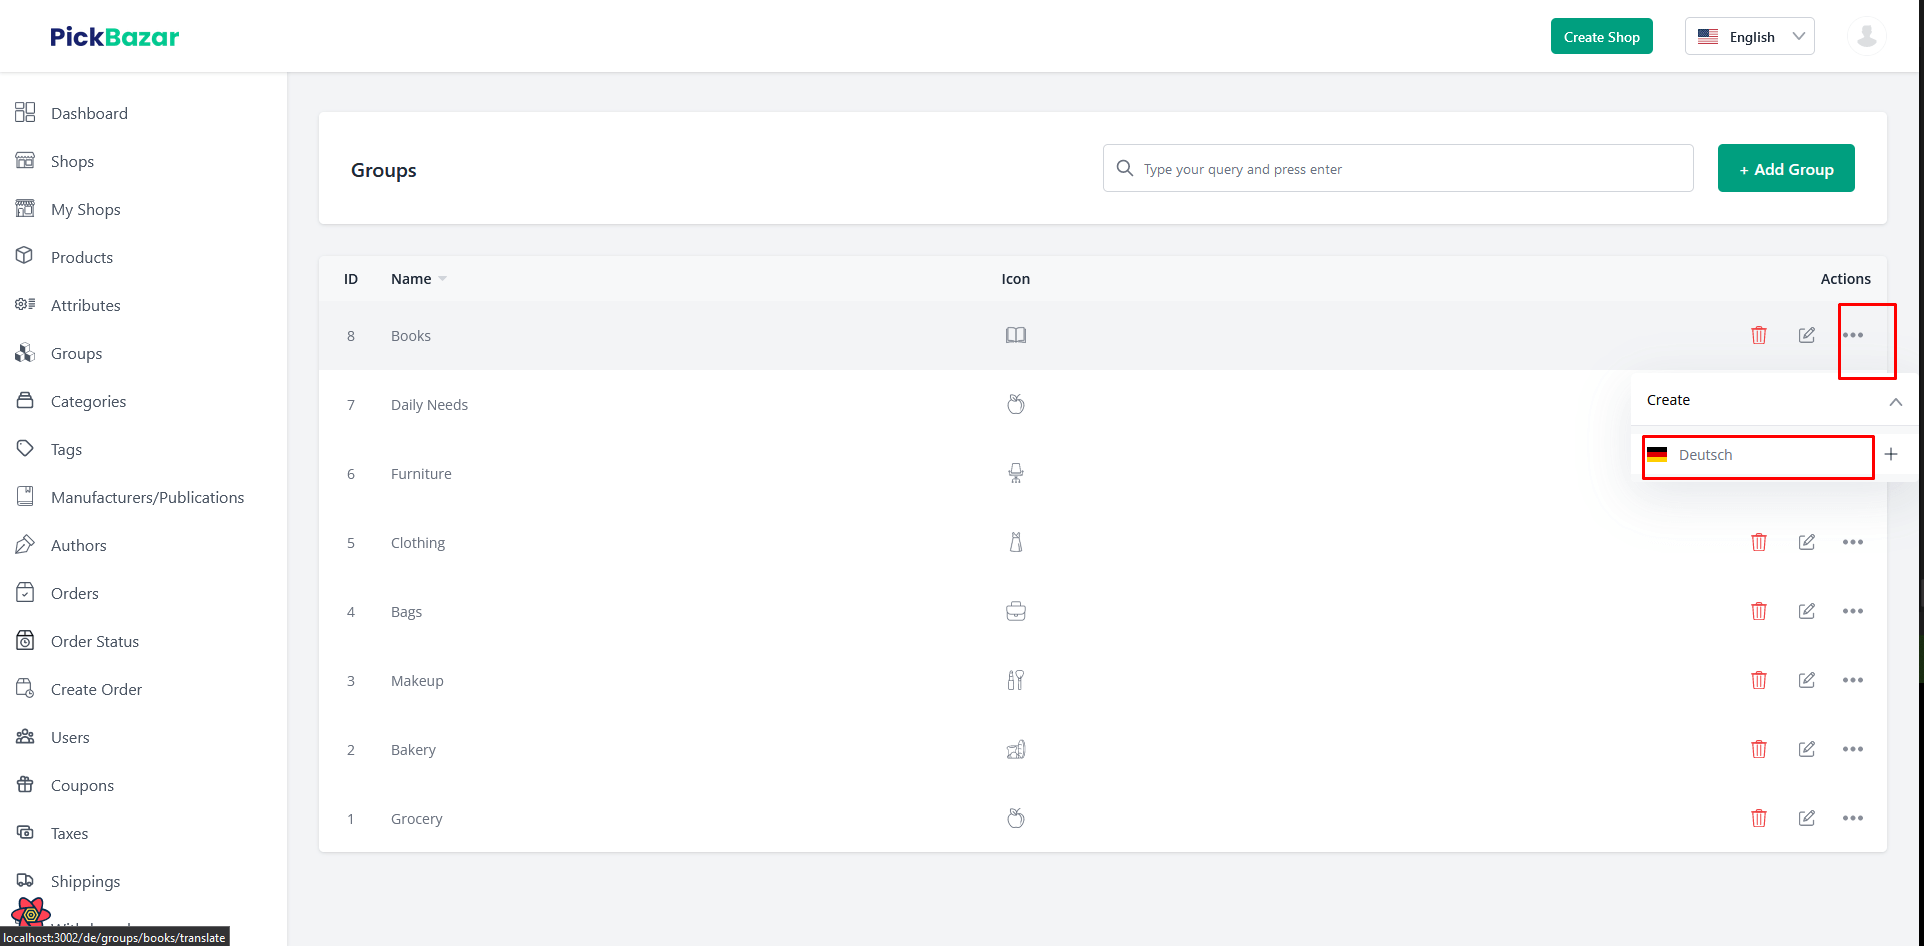
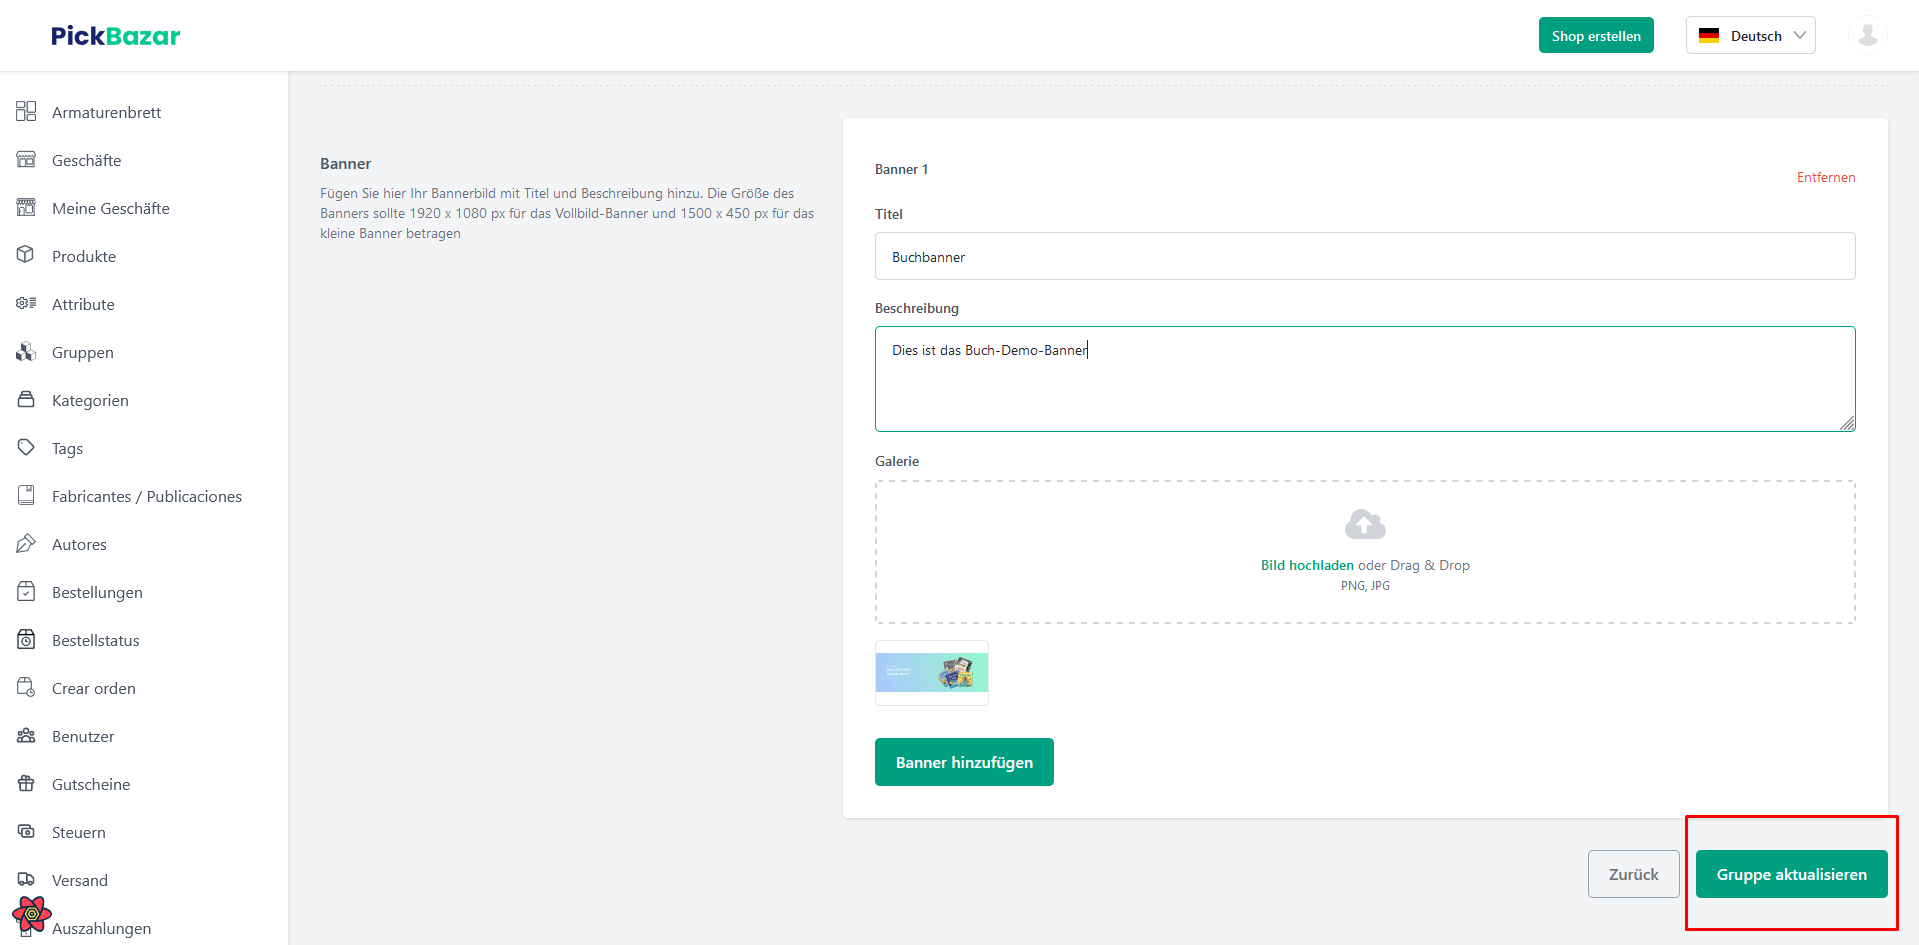
Translate Group, Author, Manufacturer, Tags, Categories:
Follow order status procedure to translate Group, Author, Manufacturer, Tags, and Categories.
Translate Products
Translate Simple Products:
Similarly, just edit three dots and translate the product.
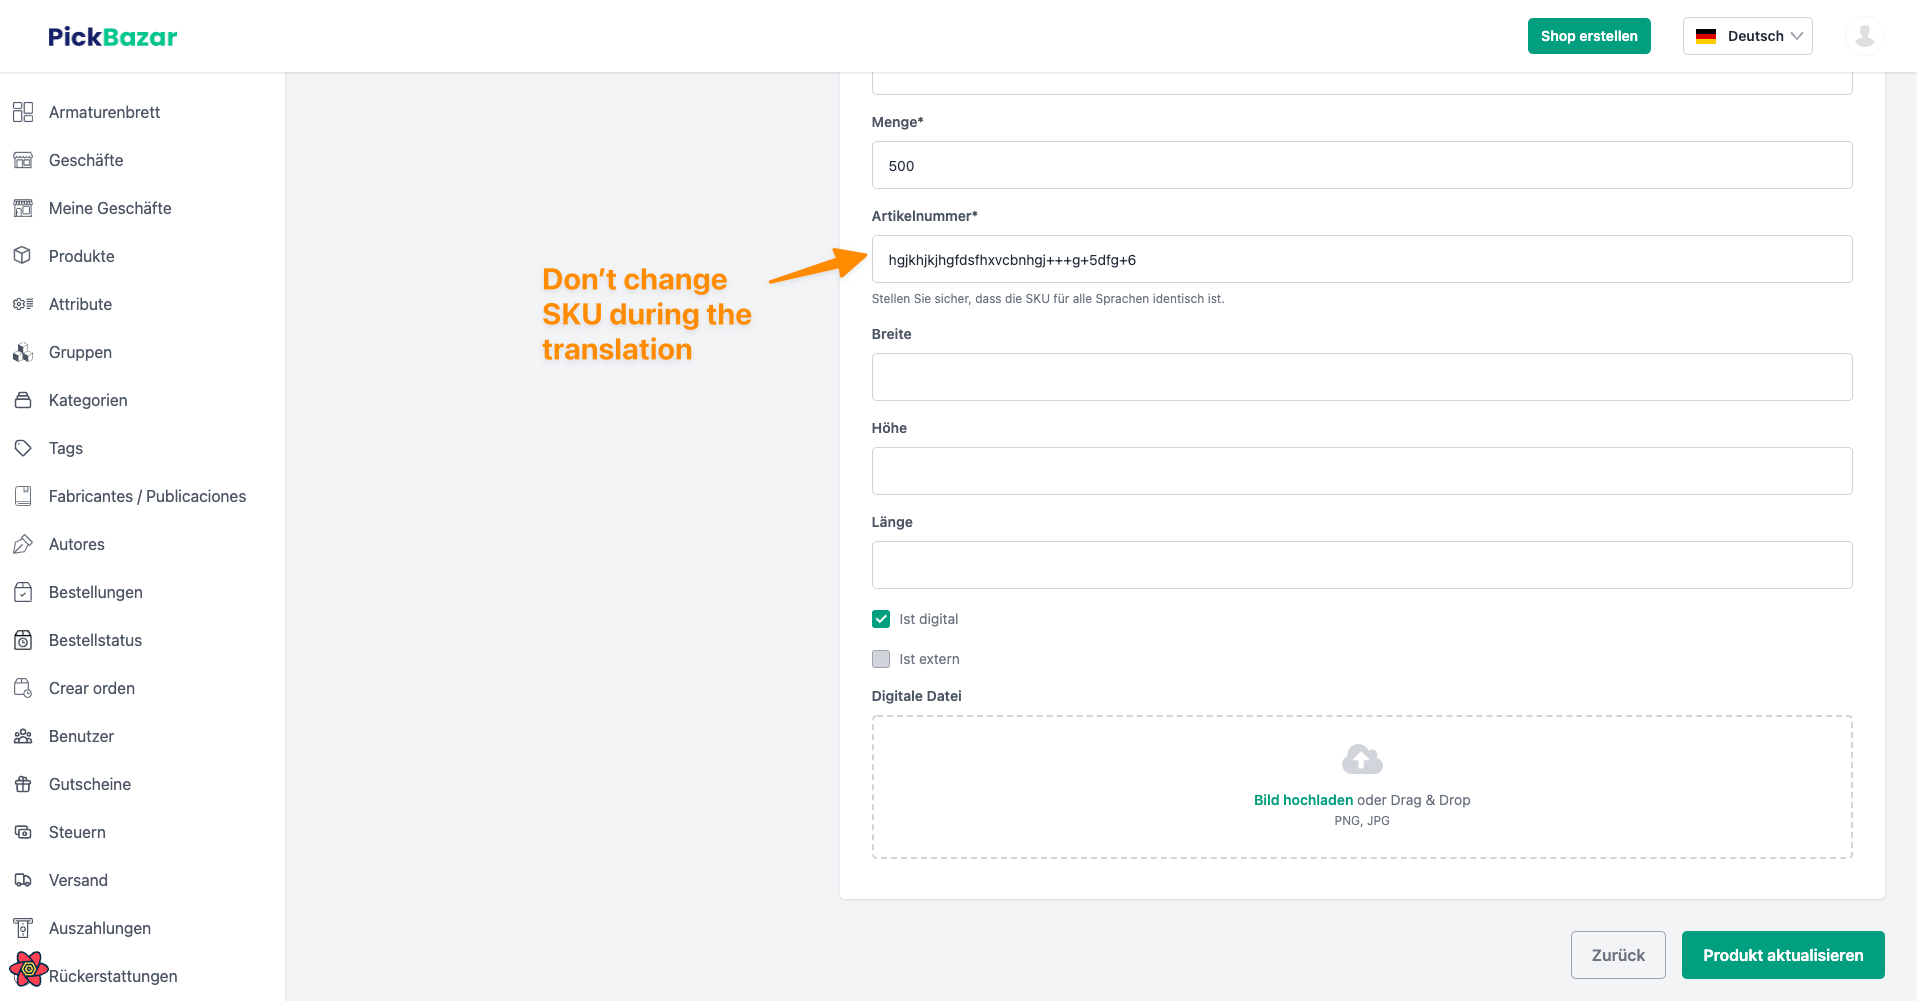
But during the translation, don't change the
SKU.SKU for a product has to be similar for all languages. We calculate the quantity based on that field.
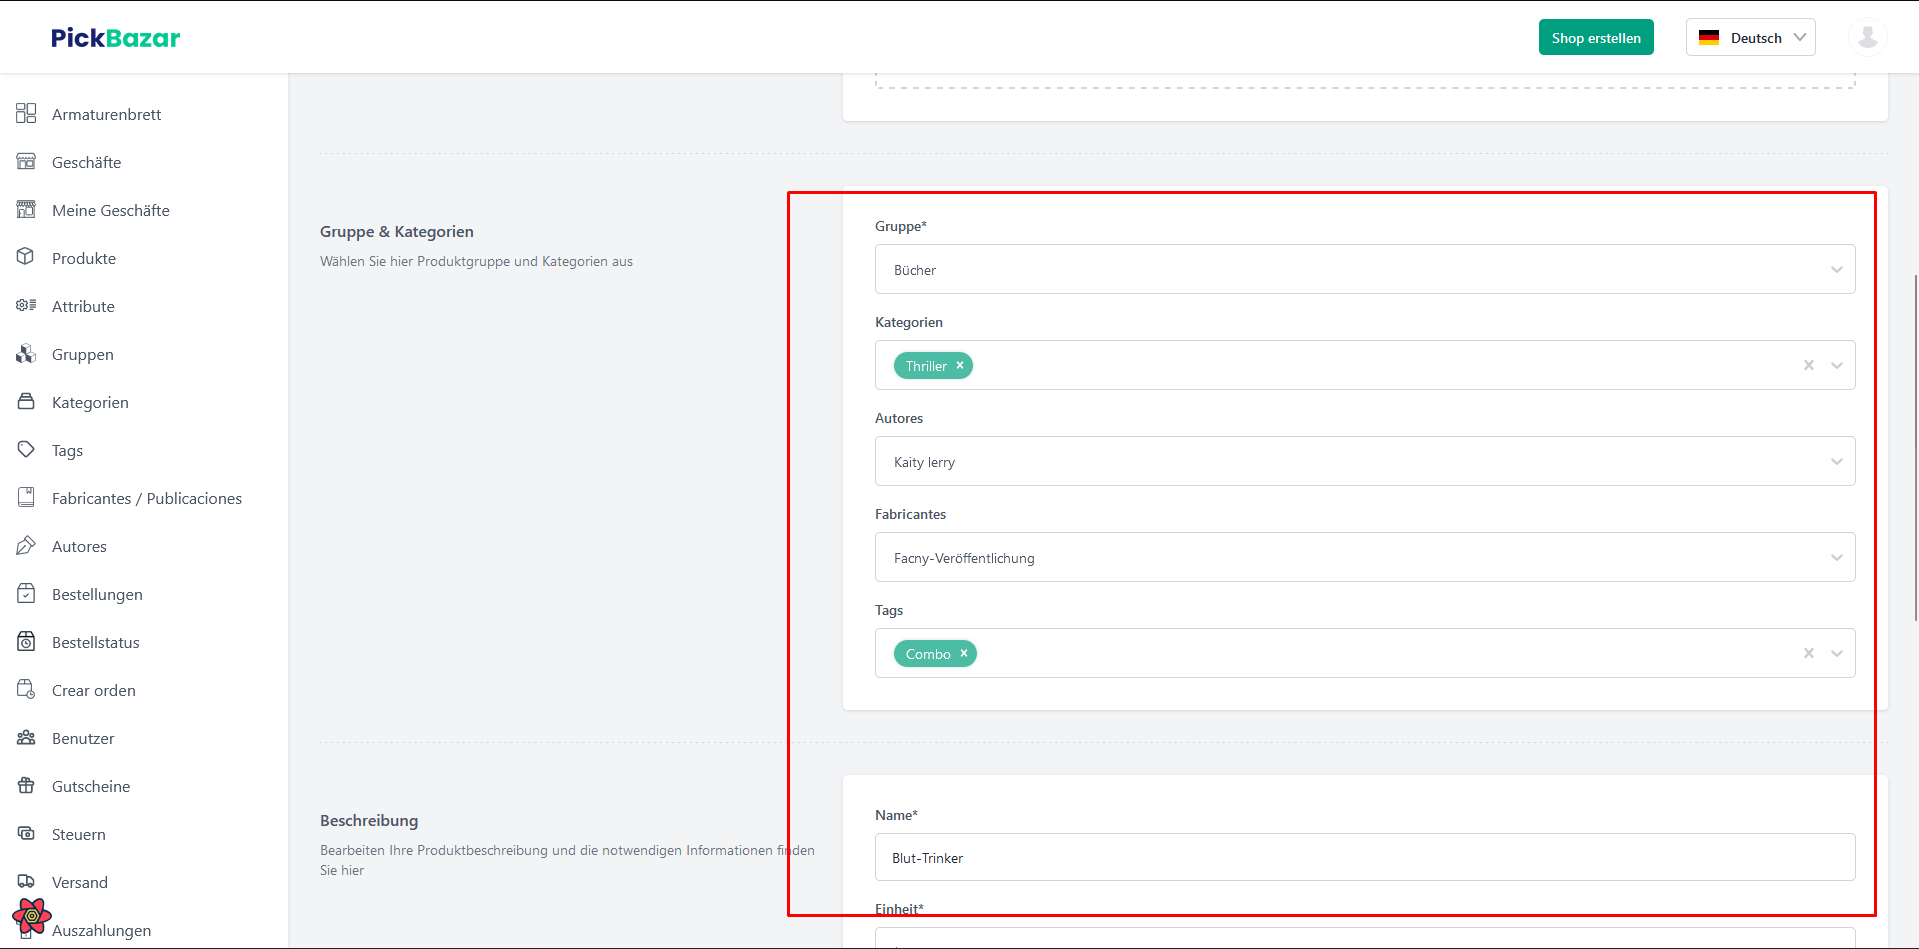
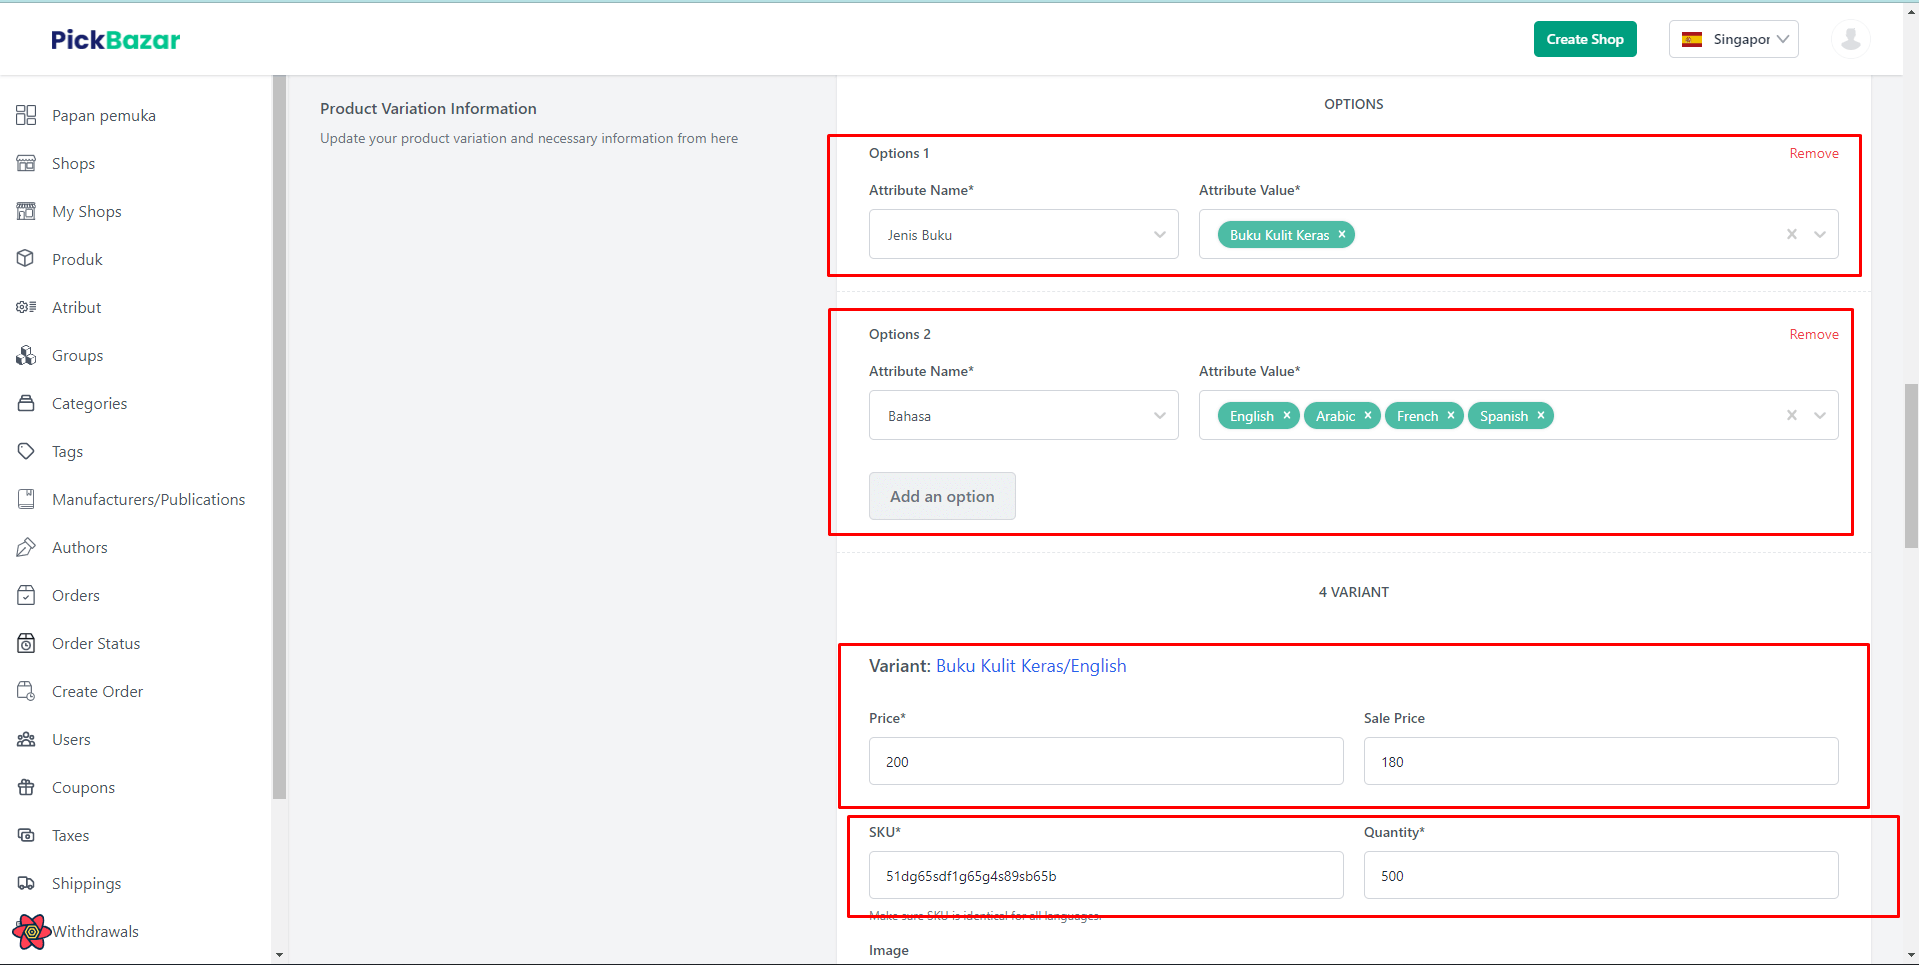
Translate Variable Product:
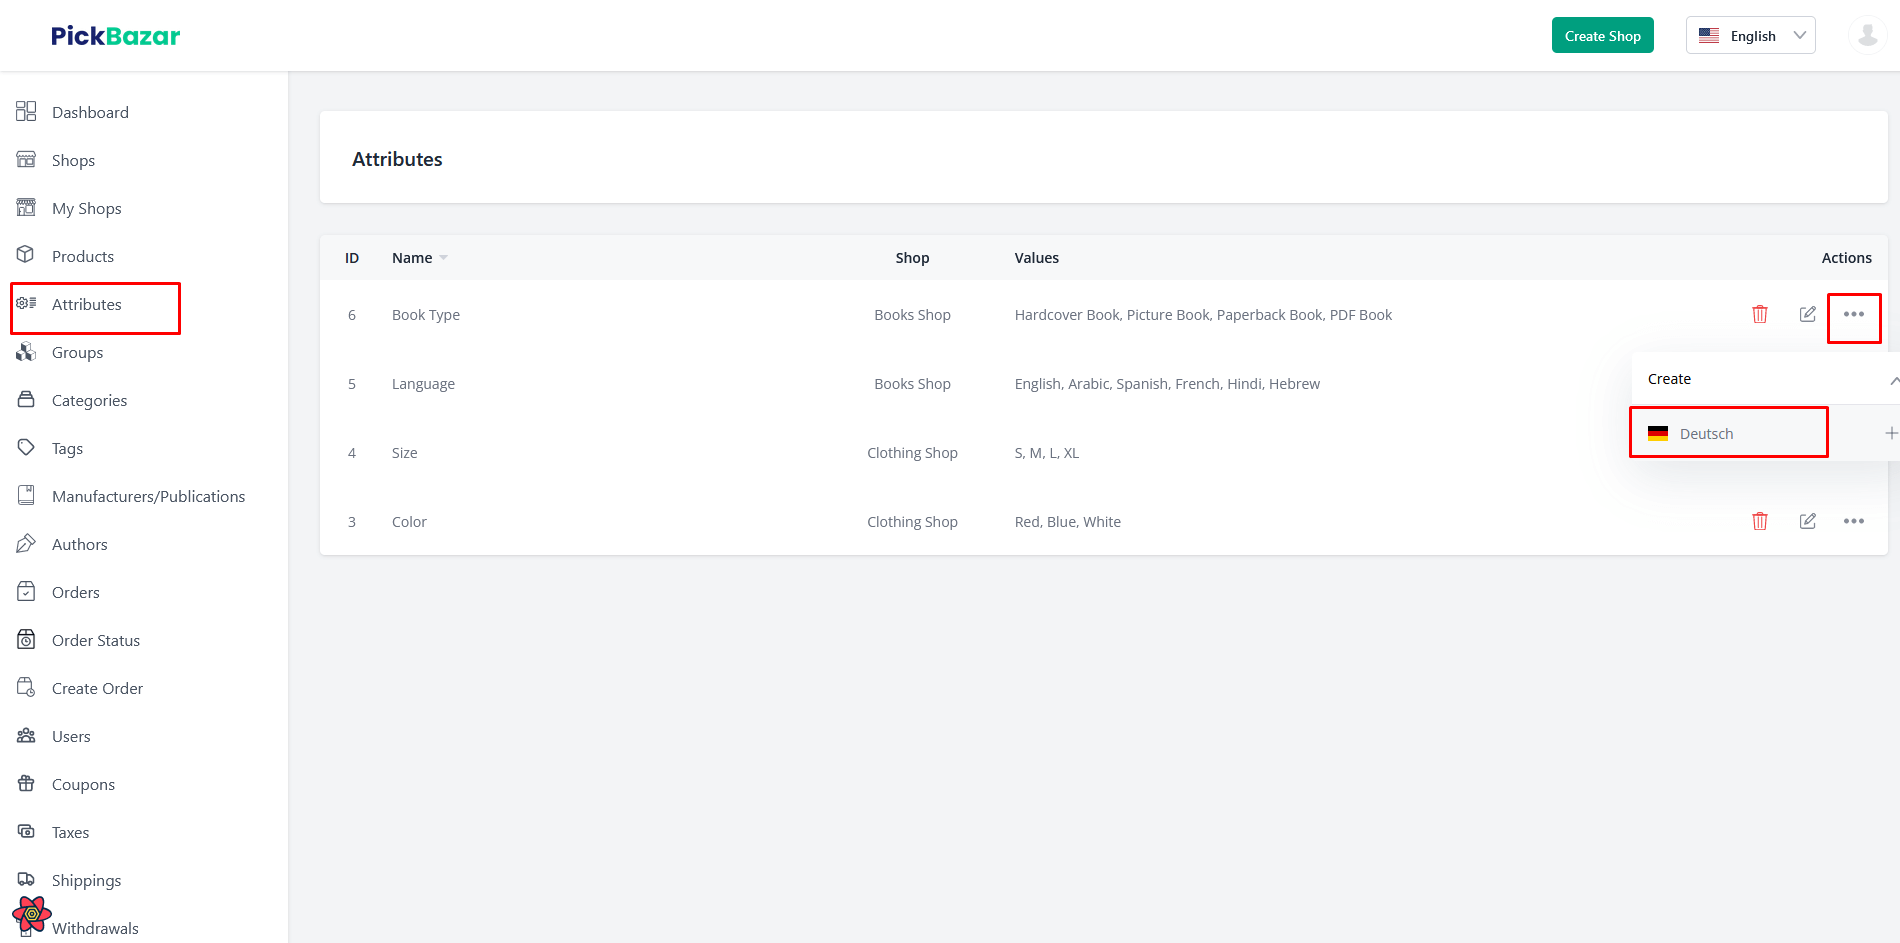
For variable products, you must have to translate attributes first. Without attributes, you can't get an attribute list during the translation.
Click on Three Dots to translate the item.
But for the variable product, you must create the variation for translation again.
Translate Attributes
Translate Groups
Translate Variable Products
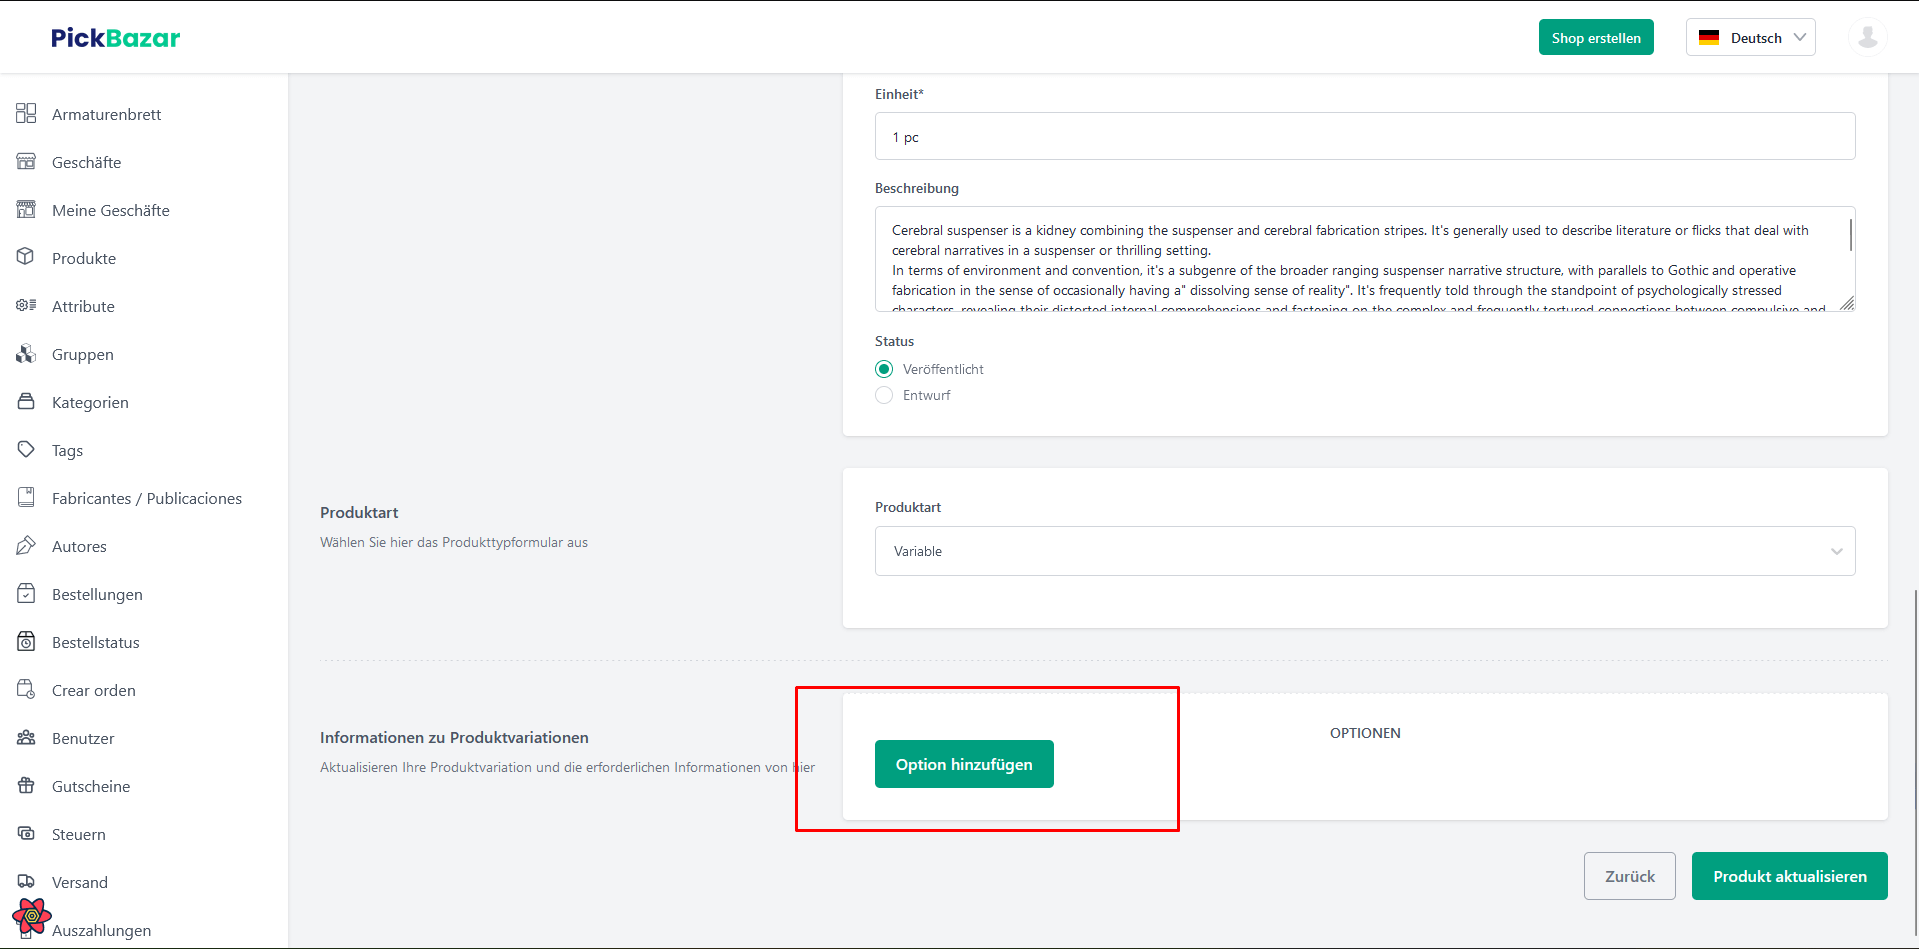
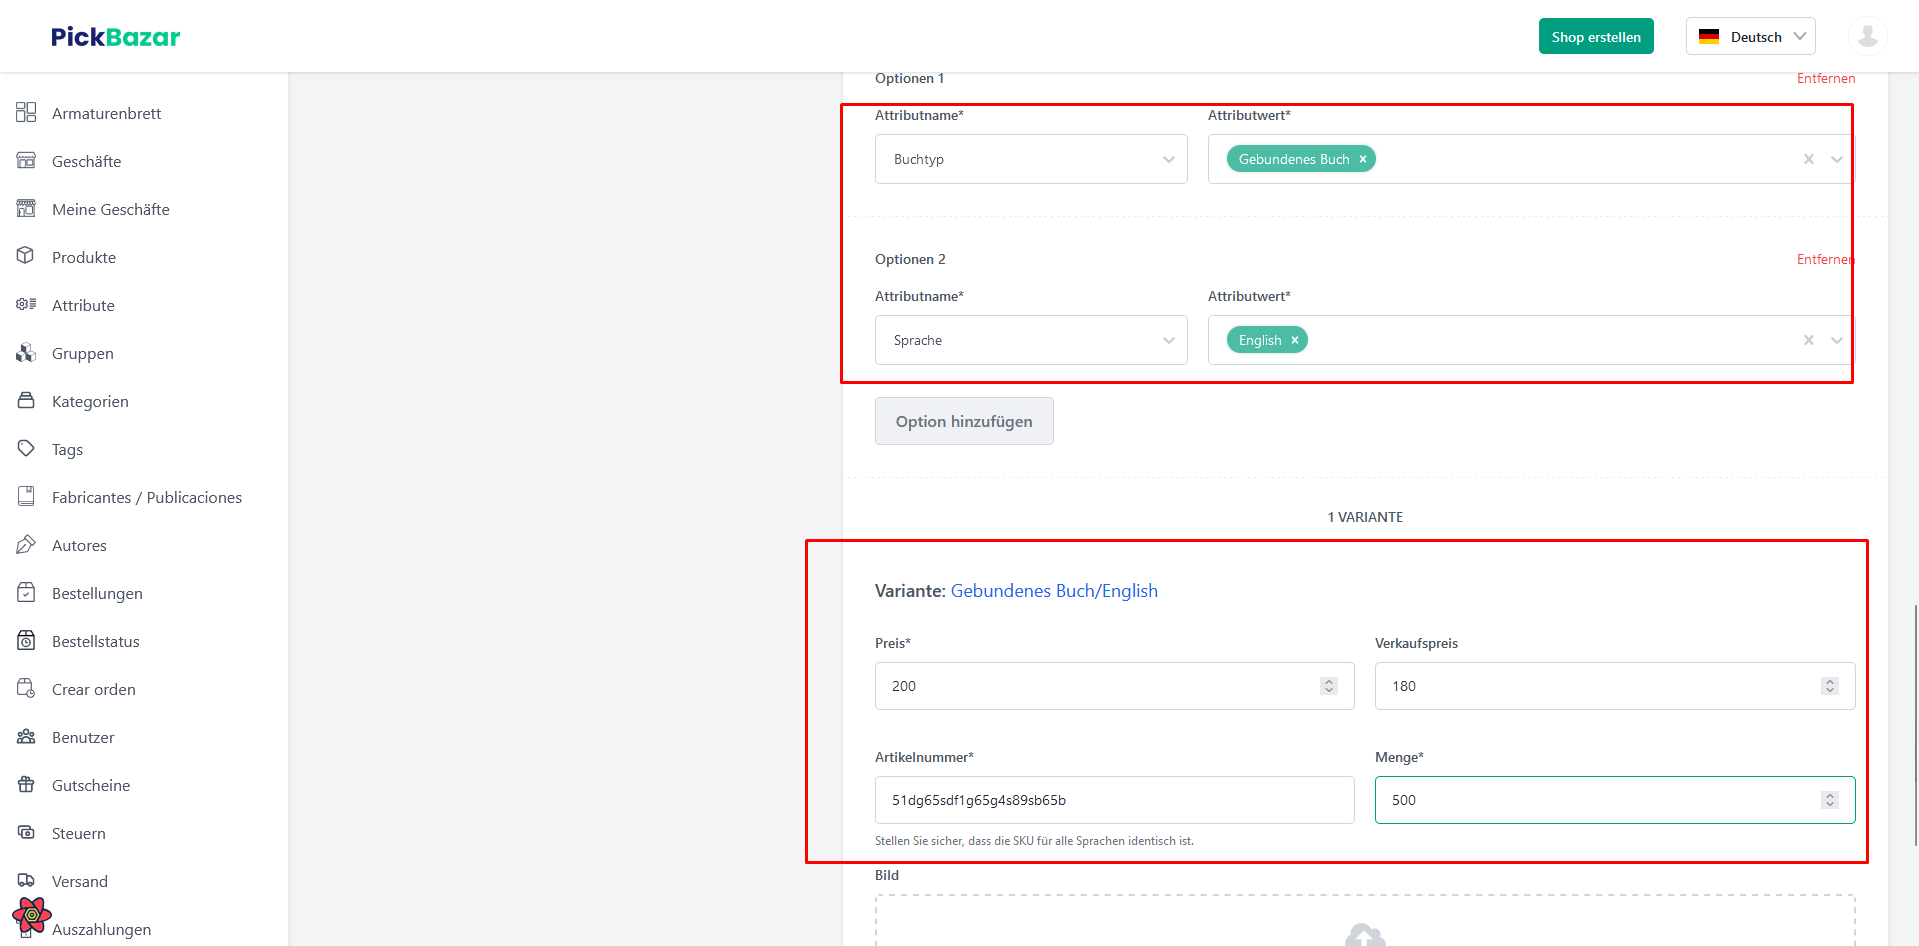
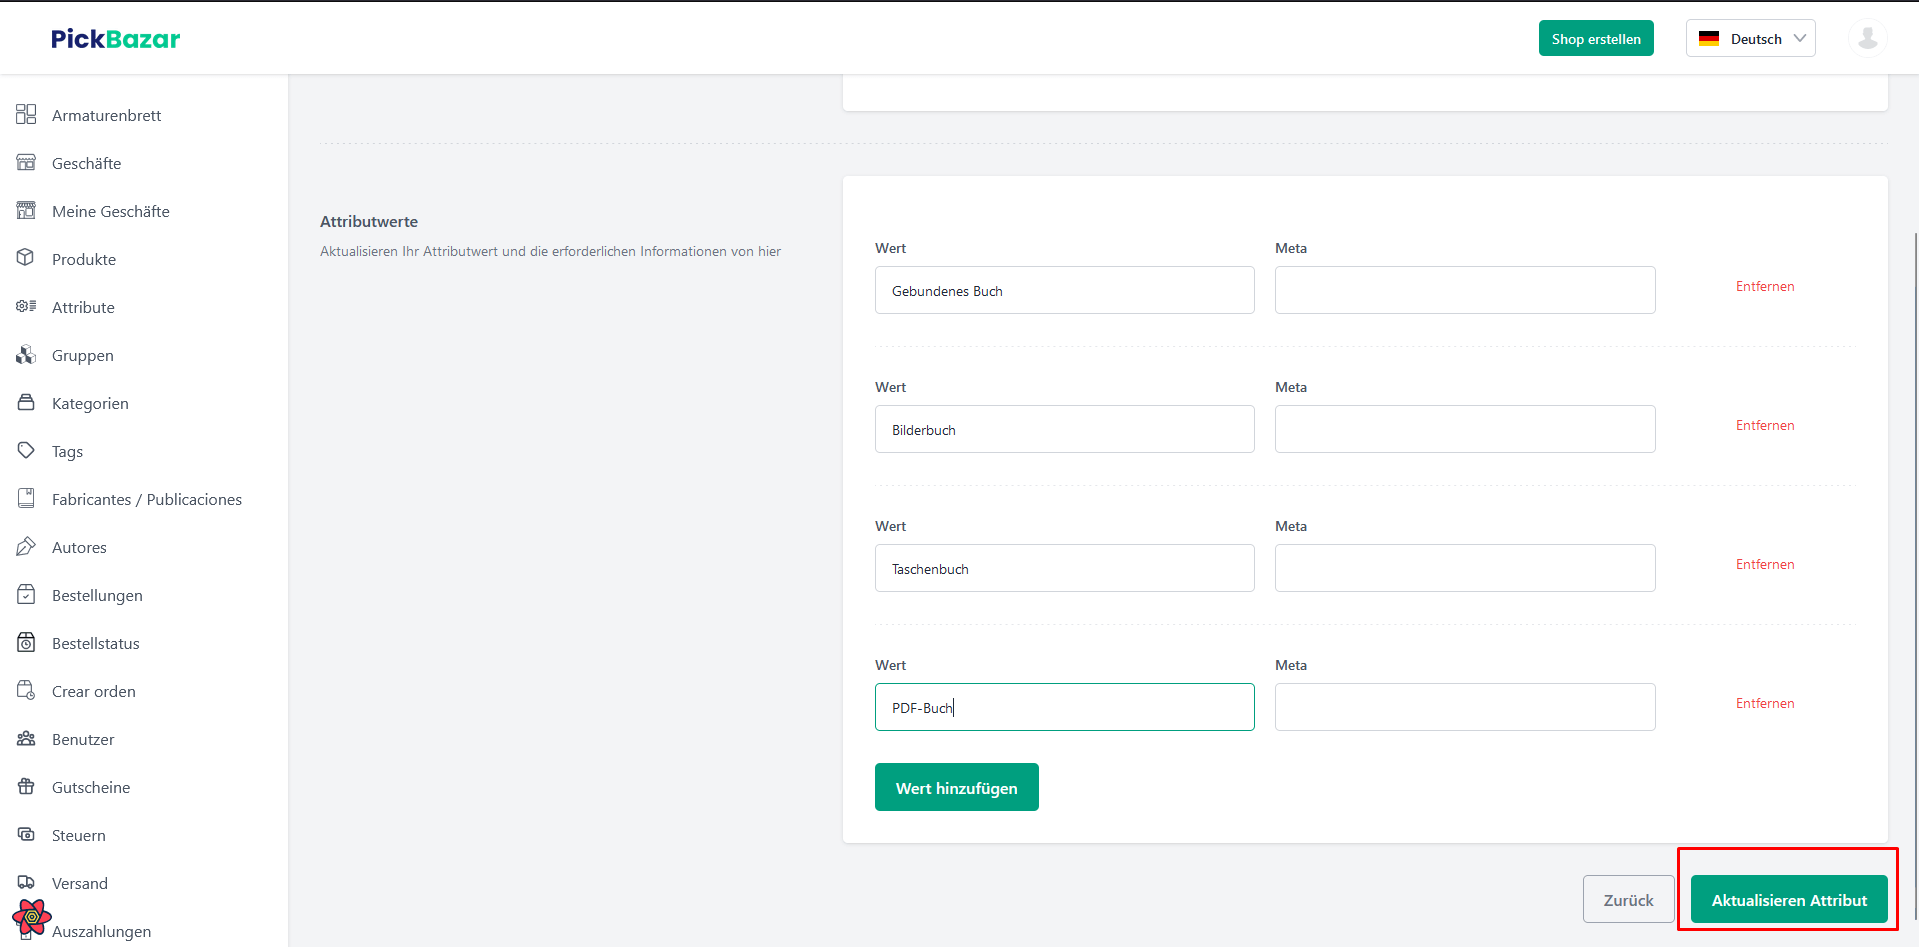
Make sure translated variable product variation value same like as default language example (attribute name, attribute value, price, sale price, quantity and SKU).

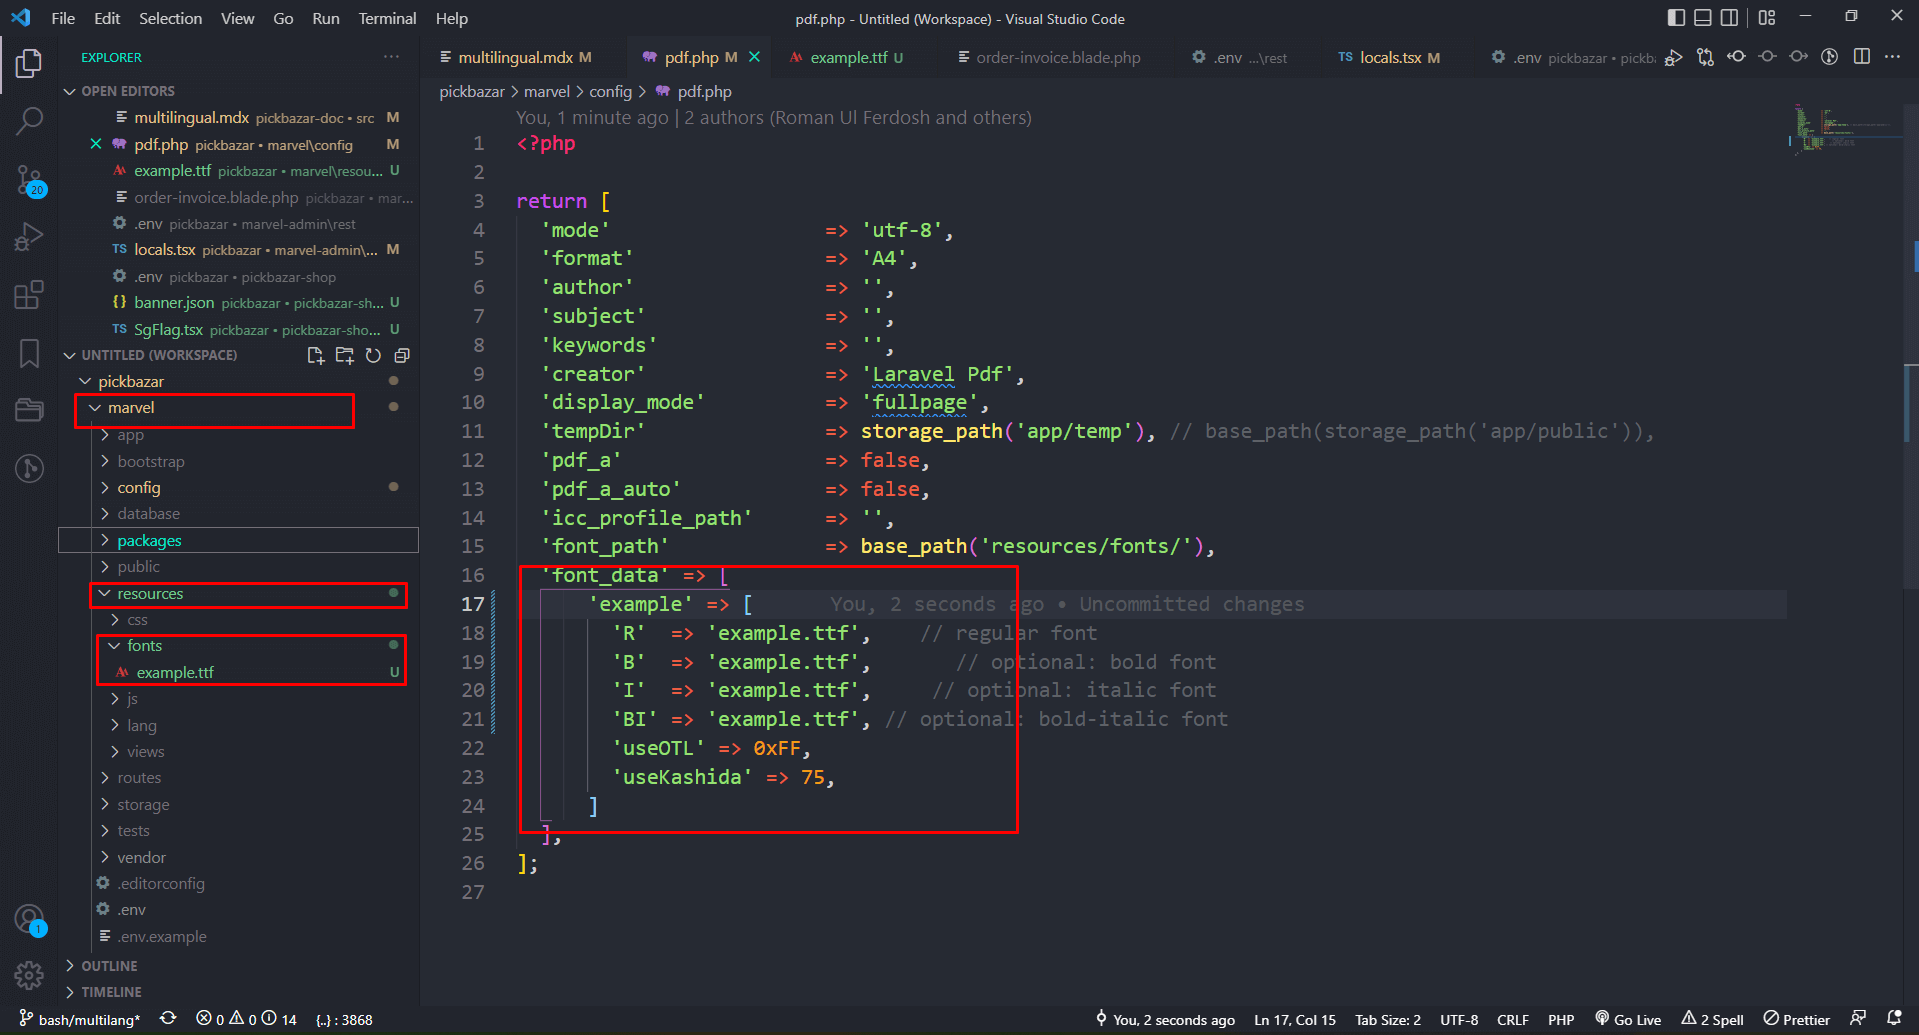
Step 6: How to add custom or solved broken font issue?
File Location
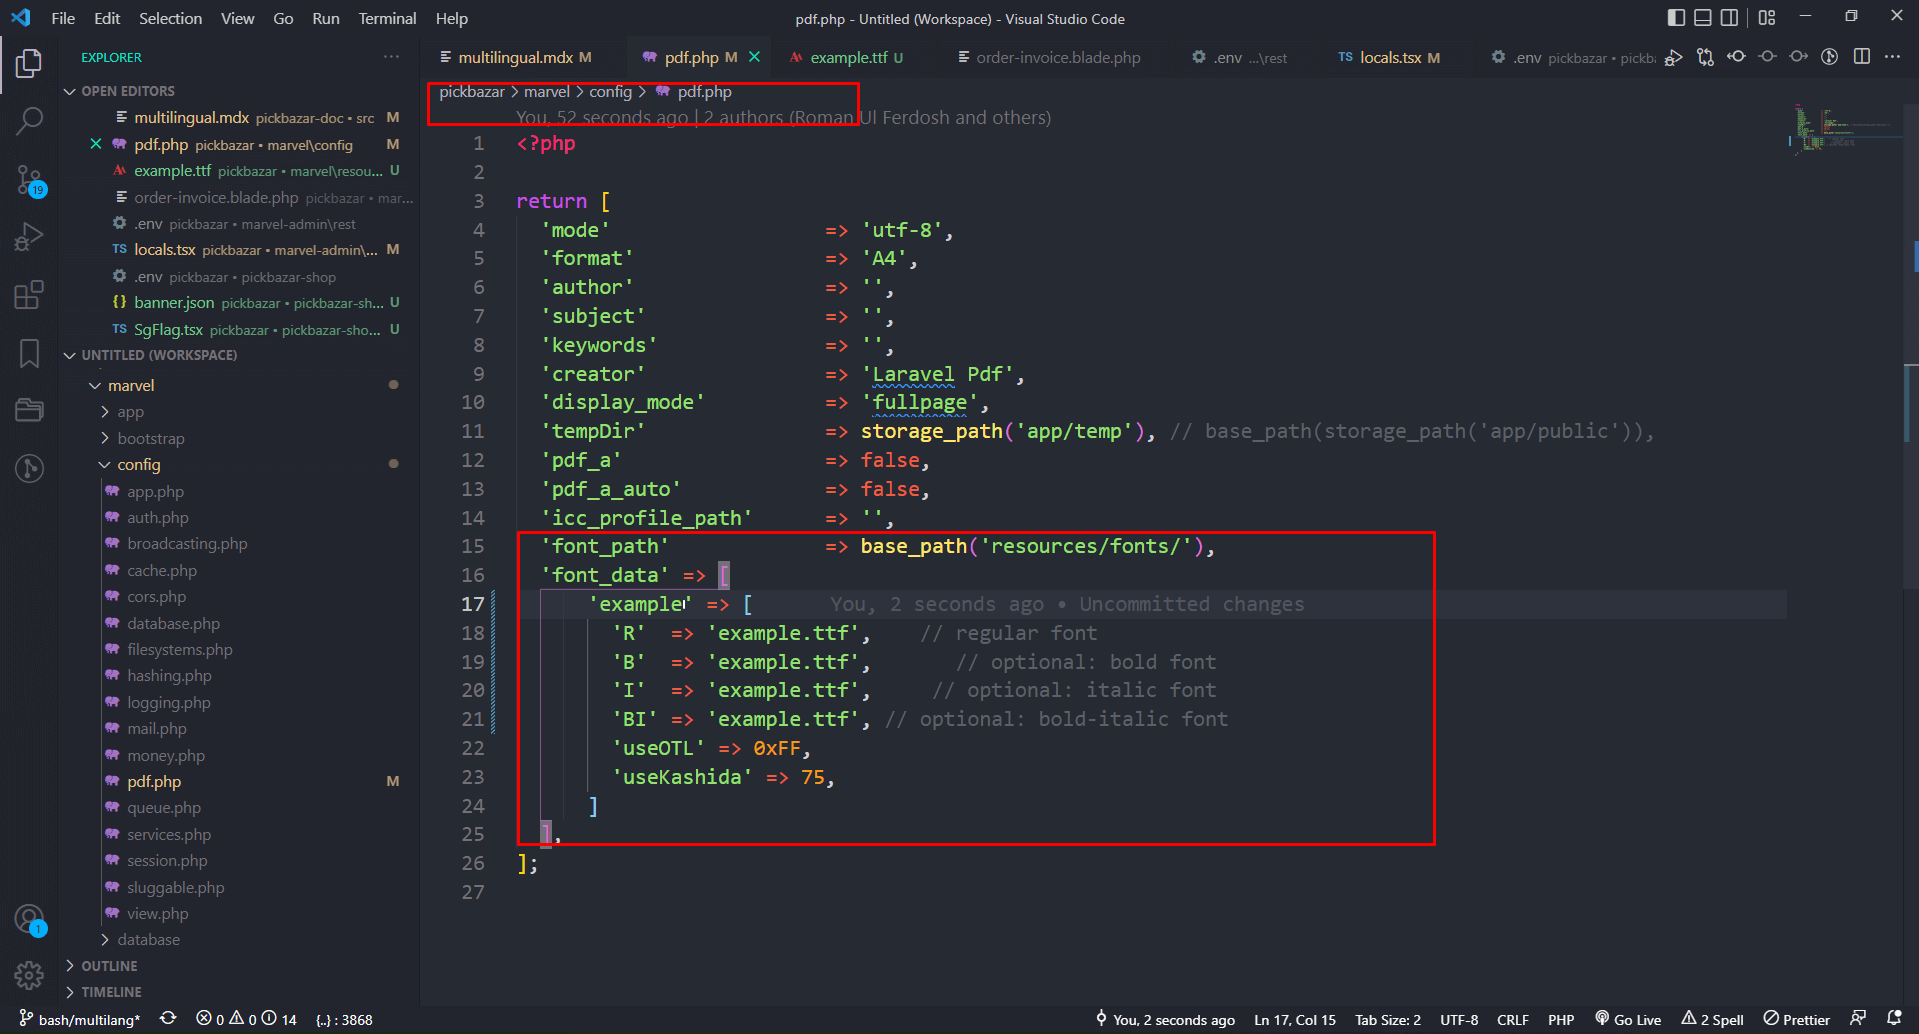
api\config\pdf.php
'font_path' => base_path('resources/fonts/'),'font_data' => ['example' => ['R' => 'example.ttf', // regular font'B' => 'example.ttf', // optional: bold font'I' => 'example.ttf', // optional: italic font'BI' => 'example.ttf', // optional: bold-italic font'useOTL' => 0xFF,'useKashida' => 75,]],
File Location
api\resources\fonts\
File Location
api\packages\marvel\stubs\resources\views\pdf\order-invoice.blade.phpapi\resources\views\pdf\order-invoice.blade.php
@if($language === "ex")<style type="text/css">body {font-family: Arial, sans-serif, example;}</style>@endif
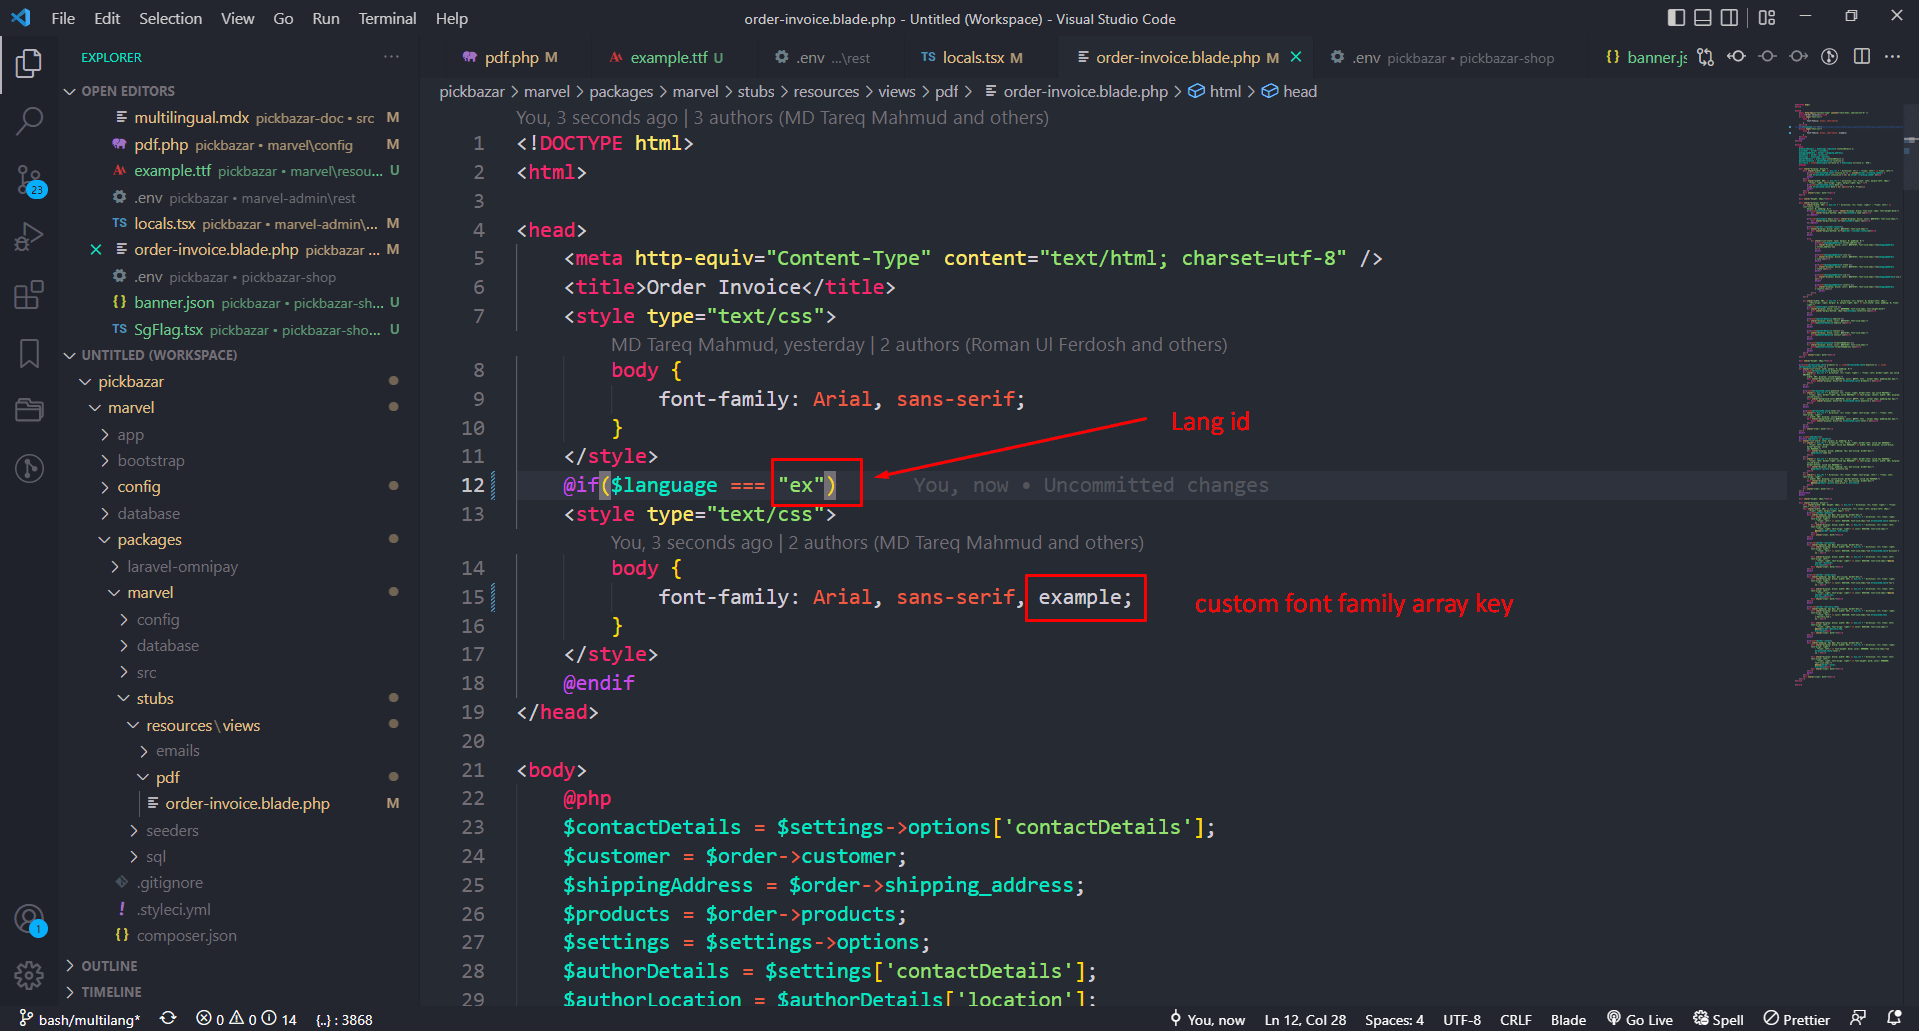
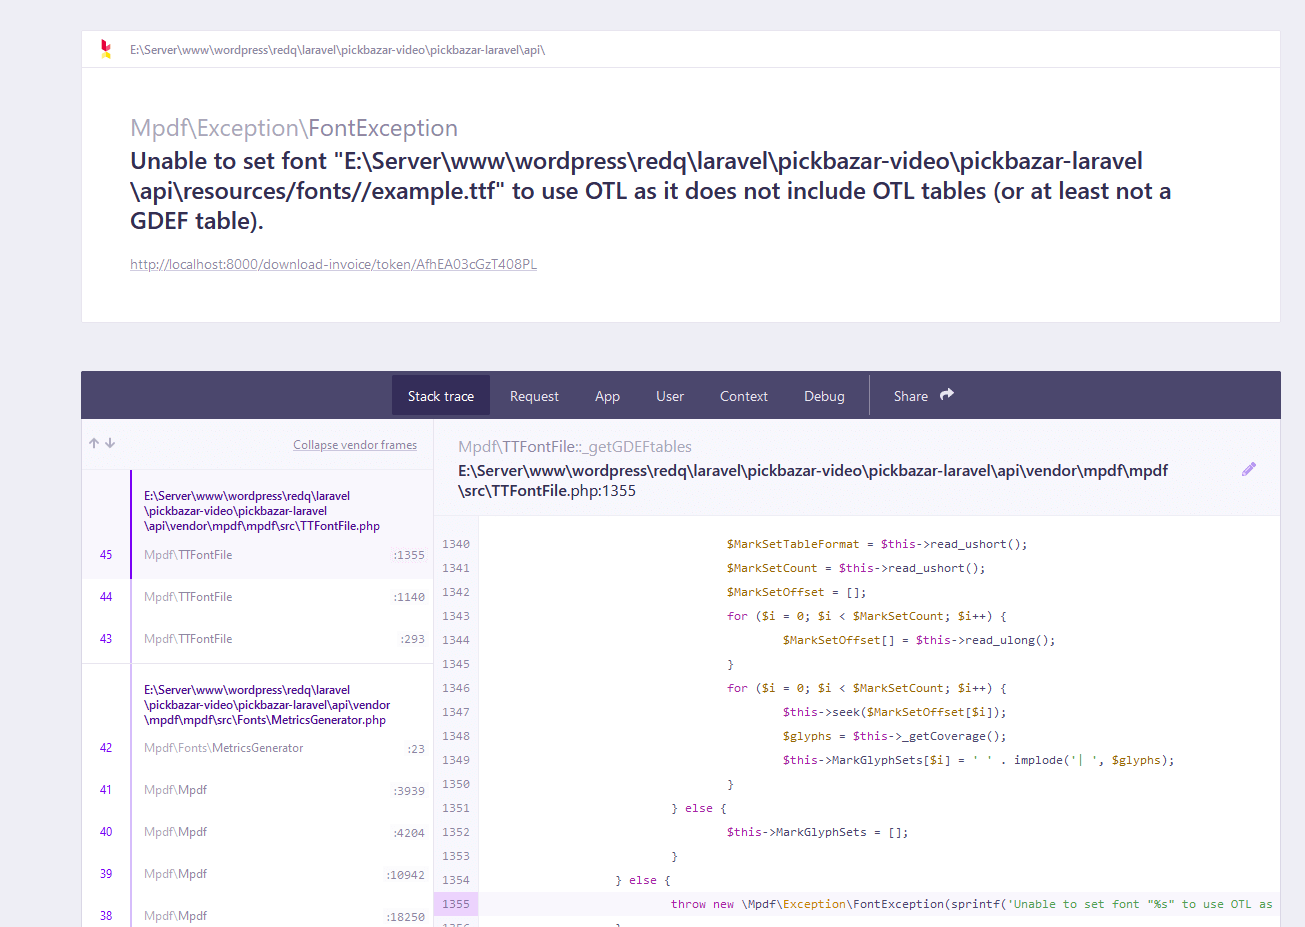
If you are facing above the issue just replace these code.
File Location
api\config\pdf.php
'font_path' => base_path('resources/fonts/'),'font_data' => ['example' => ['R' => 'example.ttf', // regular font'B' => 'example.ttf', // optional: bold font'I' => 'example.ttf', // optional: italic font'BI' => 'example.ttf', // optional: bold-italic font// 'useOTL' => 0xFF,'useKashida' => 75,]],
If you face any issues with Multilingual, or you've any suggestions to improve the Multilingual feature, then please open a ticket at https://redqsupport.ticksy.com/